Home Décor Ideas That Make Every Room Look Expensive

Home decor ideas

Simple, affordable ways to style your home from entryway to bedroom — no designer budget required.


Walk into a home that feels warm, layered, and full of personality — and you instantly know it. Something about it just feels right. The colors make sense together. The shelves look intentional. Even the little corner by the window has something interesting going on.

Decorative Pillows — The Fastest Room Refresh You Will Ever Do

I want to start with decorative pillows because nothing — and I mean nothing — transforms a room faster. You can spend an entire weekend painting a room and not get the same visual impact that three new throw pillows can give you in five minutes.

boucle throw pillow cover

👉 Boucle Throw Pillow Covers — Set of 2 — Shop Here

👉 Rust Velvet Lumbar Pillow Cover — Shop Here

The problem is most people buy pillows the wrong way. They grab two matching ones in the same size and call it a day. Then they wonder why the sofa still looks flat.

Here is what actually works

Mix your sizes first. On a standard sofa, place two large pillows at the back corners. Put two medium sized pillows in front of those. Then add one long lumbar pillow lying flat in the center. That layered look is what you see in every beautifully styled living room photo on Pinterest — and now you know exactly how it is done.

boucle throw pillow cover

Next, mix your textures and patterns. Pick one solid colored pillow, one with a simple pattern, and one with an interesting texture. A cream boucle pillow, a rust colored velvet lumbar, and a linen pillow with a subtle print — that combination works in almost any neutral living room. Pull the colors from something already in the room. Your rug, your curtains, a piece of art on the wall. That is how you get everything to feel connected without being matchy matchy.

One more thing. Buy your pillow covers and inserts separately. It is far cheaper and it means you can swap your whole look out with the seasons without buying brand new pillows every time.

Shop These Pillow Picks:

👉 Linen Pillow Cover Set — Shop Here

👉 Pillow Insert Bundle 18 and 22 inch — Shop Here

Quirky Home Décor — Stop Decorating Like a Catalog

Scroll through Pinterest for ten minutes and you will notice something. The rooms that stop you mid-scroll are never the perfectly neutral, perfectly coordinated ones. The rooms that make you tap save are the ones that feel like a real person lives there. A person with taste, humor, and a few interesting stories.

That is what quirky home décor does. It adds personality.

Now before you panic — quirky does not mean chaotic. It does not mean filling your home with random weird stuff. But it means choosing one or two unexpected pieces per room that make people stop and ask where you got that.

Home Décor Ideas

It may be a sculptural ceramic vase in an unusual shape sitting on your coffee table or a lamp that looks more like a piece of art than a light fixture. It could be a vintage find from a thrift store styled next to something brand new. The contrast is what makes it interesting.

The one-per-room rule is a good starting point if you are new to this. Give every room one quirky anchor piece. Everything else can be calm and neutral. That one piece does all the work.

Home Décor Ideas

 Right now the styles getting the most saves on US Pinterest boards include abstract ceramic objects, dopamine décor in bold unexpected colors, maximalist bookshelves styled with a mix of old and new, and whimsical figurines that bring a little joy into everyday spaces.

Shop These Quirky Décor Finds:

👉 Abstract Sculptural Ceramic Vase — Shop Here

👉 Quirky Decorative Figurines — Shop Here

Entryway Table — Make Coming Home Feel Like an Event

Your entryway is the first thing you see when you walk through your front door. It sets the mood for your entire home. And yet most people completely ignore it.

A well-styled entryway table does not need to be expensive or complicated. It just needs to feel intentional. Here is a simple formula that works every single time.

home decor entry table

Include something tall. A lamp, a tall vase with dried stems, or a mirror leaning against the wall behind the table. Include something round. A circular tray, a round bowl, or a round mirror above the table. Include something personal. A framed photo, a small piece of art, or an object that means something to you. Include something functional. A tray for keys, a small basket, or a candle. And finally, include something alive. A small plant, a succulent, or even a simple vase of fresh flowers from the grocery store.

Those five elements together — tall, round, personal, functional, alive — create a styled entryway table that looks like it took real thought and effort. Even when it took you twenty minutes.

home decor entry table

The looks getting the most attention on Pinterest right now are the warm neutral style with pampas grass and rattan, the modern black and gold look with clean lines and metallic accents, and the cottage core style with vintage pieces and fresh wildflowers.

Shop These Entryway Essentials:

👉 Narrow Console Table — Top Rated — Shop Here

👉 Entryway Table Lamp Neutral Tone — Shop Here

Mushroom Décor — The Whimsical Trend You Need in Your Home

If you have not noticed the mushroom décor trend yet, you have not been spending enough time on Pinterest. This one has been building for a couple of years and it shows absolutely no signs of slowing down — especially in the US home décor community.

And honestly it is not hard to understand why. Mushroom décor brings something into a home that most trends do not. It feels magical. Earthy and whimsical at the same time. It works in cottage core spaces, bohemian rooms, and even modern organic interiors that lean toward natural materials and warm tones.

mushroom room decor

The easiest way to try this trend is to start small. One ceramic mushroom figurine on a bookshelf. A mushroom shaped lamp on a bedroom nightstand. A mushroom print pillow on a reading chair. Just one piece is enough to nod to the trend without going overboard.

If you want to go deeper, a dedicated mushroom shelf is one of the most saved home décor ideas on Pinterest right now. Style a single shelf with a mix of mushroom ceramics in earthy tones, dried moss, small ferns, fairy lights, and a mushroom candle or two. It photographs beautifully and creates a genuinely cozy corner in any room.

mushroom room decor

This trend works especially well in bedrooms, reading nooks, and home offices where you want the space to feel calm, creative, and a little bit magical.

Shop These Mushroom Décor Picks:

👉 Ceramic Mushroom Figurine Set — Shop Here

👉 Mushroom Table Lamp  — Shop Here

Photo Wall Ideas — Turn Your Blank Wall Into Something Beautiful

A gallery wall is one of those projects that feels intimidating before you start and incredibly satisfying once it is done. It is also one of the most searched home décor ideas on Pinterest in the US — and for good reason. A well done photo wall can completely anchor a room and make it feel finished in a way that nothing else really can.

The key is having a plan before you start putting holes in the wall.

If you love a clean, modern look, go with a classic grid. Use frames that are all the same size and the same finish — all black, all white, or all natural wood. Mix photos, art prints, and simple quotes. Measure your spacing carefully and use a level. This approach works beautifully above a sofa, above a bed, or behind an entryway table.

👉 Black Gallery Wall Frame Set 12 Piece — Shop Here

If you prefer something more relaxed and personal, try the eclectic mix approach. Combine different frame sizes and finishes. Add a small round mirror, a woven wall hanging, or a small shelf into the arrangement. Mix family photos with art prints and botanical illustrations. Lay everything out on the floor first so you can see how it looks before committing to the wall.

If you want something that is easy to change over time, picture ledges are your best friend. Install one or two wooden ledges and lean your frames against the wall in casual layers. You can swap photos and prints in and out whenever you feel like a change without touching a single nail.

One of the most searched photo wall ideas in the US is the staircase gallery wall. Frames arranged along the diagonal line of the stairs, varying in size but consistent in color family. It looks incredible and makes use of a space that most people leave completely bare.

Shop These Gallery Wall Essentials:

👉 Natural Wood Mixed Frame Bundle — Shop Here

👉 Printable Art Print Set for Gallery Wall — Shop Here

How to Bring It All Together Room by Room

Now that you’ve got all the individual elements, here’s how to bring them together room by room for a home that feels completely cohesive and Pinterest-perfect.

Living Room: Start with a neutral sofa as your base. Layer in decorative pillows using the solid-pattern-texture formula. Add one quirky home décor statement piece on your coffee table or bookshelf. Build a gallery wall above your sofa using a mix of frames and personal photos. Add a mushroom candle or ceramic accent piece to your side table for a whimsical touch.

Bedroom: Style your bed with layered decorative pillows in a soft, dreamy color palette. Add a mushroom lamp to your nightstand for cozy ambiance. Create a small photo wall above your dresser using a picture ledge for easy swapping. Add one quirky or unexpected décor piece to your dresser or windowsill.

Entryway: Style your entryway table using the five-element formula — tall, round, personal, functional, alive. Add a small gallery wall or single large mirror above the table. Include one seasonal or quirky accent piece that reflects your personality.

A Few Last Thoughts

The homes that look the best on Pinterest are not the ones with the most expensive furniture. They are the ones that feel considered. Every piece has a reason to be there. The textures make sense together. There is personality in the details.

You can build that kind of home on any budget. It just takes a little patience, a willingness to experiment, and the confidence to trust your own taste.

Start somewhere. Even one new throw pillow or one small quirky find from a thrift store can shift the energy of a room. Build from there. Your home will thank you for it.

Found this helpful? Save it to your Pinterest home décor boards so you can come back to it anytime. And share it with a friend who could use a little home inspo! 📌


Disclosure: This post contains affiliate links. If you purchase through these links I may earn a small commission at no extra cost to you. Thank you for supporting this blog.

Trellis Ideas That Will Transform Your Outdoor Space

trllis ideas 2026

Beautiful Trellis Ideas That Will Transform Your Outdoor Space

From privacy fences to cucumber supports — discover the best trellis designs for every garden style and budget.


If there’s one outdoor upgrade that delivers maximum charm with minimum effort, it’s a trellis. These versatile structures have been gracing gardens for centuries — and for good reason. A well-placed trellis can create instant privacy, add architectural interest to a blank wall, support your favorite climbing plants, and completely transform the look and feel of your outdoor space.

Trellis

Ready to get inspired? Let’s explore the most stunning trellis ideas making waves on Pinterest right now.


What Is a Trellis and Why Do You Need One?

A trellis is a framework — typically made from wood, metal, or vinyl — designed to support climbing plants and add visual structure to a garden or home exterior. But the modern trellis is so much more than a plant support. Today’s trellis designs are works of art in their own right, serving as garden focal points, privacy screens, and architectural accents.

Whether you have a sprawling backyard, a compact balcony, or a front porch that needs a little love, there’s a trellis design that will work beautifully for your space.

Pro Tip: Before buying or building a trellis, consider what you want it to do — is it mainly for plants, privacy, or decor? Your answer will guide the material, height, and style you choose.


Trellis Ideas for Privacy: Your Secret Garden Awaits

One of the most popular trellis ideas on Pinterest right now is using trellises specifically for privacy. If you’re tired of feeling like you’re on display in your own backyard, a trellis privacy screen is a beautiful, natural alternative to a solid fence.

The trick is to go tall — at least 6 feet — and combine the trellis with fast-growing climbing plants. Evergreen climbers like star jasmine, English ivy, or climbing hydrangea will give you year-round coverage. For a more colorful approach, try clematis or climbing roses.

You can install trellis panels directly into the ground, attach them to an existing fence for extra height, or mount them on posts to create a freestanding privacy screen. For a truly seamless look, paint or stain your trellis to match your existing fence or exterior colors.

👉 Cedar Lattice Privacy Panels — Shop Here

👉 Outdoor Trellis Plant Supports — Shop Here


Trellis Fence Ideas: The Perfect Marriage of Beauty and Function

A trellis fence combines the structure of a traditional fence with the beauty of a living garden wall. This is one of the most searched trellis fence ideas on Pinterest because it solves two problems at once — boundary definition and garden décor.

trellis ideas

You can build a trellis fence from scratch using cedar or redwood lattice panels (both are naturally rot-resistant), or repurpose an existing fence by adding trellis toppers. The latter is a great weekend project that adds both height and visual interest without a full fence replacement.

Garden Tip: For a romantic trellis fence, train climbing roses along the top and let jasmine fill the lower lattice. You’ll have a breathtaking floral fence by mid-summer.


Trellis Over Garage Door: Instant Curb Appeal Magic

If you want to make a serious first impression, a trellis over the garage door is the upgrade your home’s exterior has been waiting for. This trend has exploded on Pinterest because the transformation is so dramatic — a plain garage door becomes a romantic, cottage-style focal point.

trellis ideas

The most popular approach is an arched or rectangular trellis frame mounted just above the garage door opening, with climbing plants trained up the sides. Wisteria, climbing roses, and star jasmine are all gorgeous choices. Just be sure to keep plants pruned so they don’t interfere with the door mechanism.

For a clean, modern look, opt for a simple geometric trellis design in black or dark bronze metal. For a more traditional or cottage aesthetic, go with painted white or natural wood with flowing floral climbers.

👉 Metal Garden Arch Trellis — Shop Here

👉 Climbing Rose Plant Bundle — Shop Here


Trellis Design: Choosing the Right Style for Your Home

Trellis design has come a long way from the basic square lattice. Today, you can find trellises in a stunning variety of styles to match any architectural aesthetic. Here’s a quick breakdown of the most popular trellis design options:

Classic Lattice — The timeless diamond or square grid pattern. Suits cottage, traditional, and country-style homes beautifully.

Modern Geometric — Clean horizontal or vertical lines in powder-coated metal. Perfect for contemporary and minimalist exteriors.

Fan Trellis — A semi-circular fan design that’s ideal for mounting against a wall and training climbing plants upward.

Arch Trellis — Freestanding arches that create stunning garden entrances or frame pathways with elegance.

Panel Trellis — Large flat panels used for privacy screening or to divide garden zones naturally.

Obelisk Trellis — Tall, narrow, four-sided structures that work as elegant plant supports or standalone garden sculptures.


Best Trellis Plants: What to Grow on Your Trellis

The right trellis plants can turn a basic structure into a breathtaking garden feature. The plants you choose will depend on your climate, sunlight levels, and the look you’re going for.

Flowering Climbers:

Climbing Roses — The queen of trellis plants. Blooms in summer and looks spectacular on arched trellises and fence panels.

Clematis — A prolific bloomer available in purple, pink, white, and red. Thrives in sun and partial shade.

Wisteria — Dramatic cascading blooms that are absolutely stunning on pergolas and trellis archways — just be aware it’s a vigorous grower!

Jasmine — Fragrant, fast-growing, and ideal for privacy screens. Star jasmine is semi-evergreen and wonderfully scented.

Evergreen and Foliage Climbers:

English Ivy — A classic evergreen that provides dense coverage quickly. Perfect for a lush privacy trellis.

Climbing Hydrangea — Elegant white blooms in summer and attractive bark in winter — a true four-season beauty.

👉 Clematis Starter Plants — Shop Here

👉 Climbing Rose Varieties — Shop Here

👉 Jasmine Seeds Bundle — Shop Here


Trellis for Cucumbers: The Gardener’s Secret Weapon

If you grow vegetables, you absolutely need a trellis for your cucumbers. Growing cucumbers vertically on a trellis produces healthier plants, better air circulation (which means fewer fungal diseases), and makes harvesting so much easier. Plus, vertically-grown cucumbers are straighter and more evenly colored.

The best trellis for cucumbers is something simple, sturdy, and at least 5–6 feet tall. A basic A-frame trellis, cattle panel arch, or wire mesh trellis all work brilliantly. Secure the trellis firmly — a mature cucumber plant loaded with fruit is heavier than you think!

Other popular vegetables that thrive on a trellis include pole beans, peas, squash, and small pumpkins. Growing vertically also maximizes space, making it ideal for raised bed gardens and small backyards.

Garden Tip: Train cucumber vines gently onto the trellis when they’re young, and use soft plant ties or strips of old t-shirt fabric to secure them. Never use wire or string that could cut into the stems.

👉 Cucumber & Bean A-Frame Trellis — Shop Here

👉 Garden Mesh Netting Roll — Shop Here

👉 Plant Tie Tape — Shop Here


Trellis on the Front of Your House: Curb Appeal on a Budget

A trellis on the front of the house is one of the most cost-effective ways to dramatically improve your home’s curb appeal. A simple wooden or metal trellis mounted against an exterior wall, paired with a climbing rose or wisteria, creates a picture-perfect cottage look that will have your neighbors stopping to admire it.

The key is choosing a trellis that complements your home’s architecture. For a brick home, a classic white diamond lattice looks stunning. For a rendered or painted home, try a sleek black metal trellis for a contemporary-meets-nature look. For a timber-clad home, a natural cedar trellis blends beautifully with the existing material palette.

Mount the trellis 2–3 inches away from the wall to allow air circulation behind the plants — this protects both your wall and your plants from moisture damage.


Trellis Garden Ideas: Creating a Garden Room

One of the most magical things you can do with trellises is use multiple panels to create a garden room — an outdoor space that feels enclosed, intimate, and truly special. By placing trellis screens on two or three sides of a seating area and covering them with climbing plants, you create a natural bower that feels like a secret garden.

This works beautifully with a small bistro table and chairs, a garden bench, or even a hammock strung between two trellis posts. Add fairy lights, hanging lanterns, and potted plants to complete the look.

Tip: String solar-powered fairy lights through your trellis and climbing plants for an enchanting evening atmosphere that requires zero wiring or electricity costs.


Materials Matter: Choosing the Best Trellis Material

The material you choose will affect both the appearance and lifespan of your trellis. Here’s a quick guide:

Cedar Wood — Naturally rot-resistant and beautiful. The top choice for traditional garden trellises. Will last 10–15 years with minimal maintenance.

Powder-Coated Steel — Sleek, strong, and weather-resistant. Ideal for modern trellis designs and virtually maintenance-free.

Vinyl/PVC — Never rots, fades, or needs painting. Best for low-maintenance privacy screen trellises.

Bamboo — Affordable and eco-friendly. Great for vegetable garden trellises, especially for cucumbers and beans, though less durable long-term.

Wrought Iron — Heavy, ornate, and incredibly durable. Perfect for formal gardens and decorative trellis arches.


Final Thoughts on Trellis Ideas

Whether you’re looking for trellis ideas for privacy, a gorgeous trellis over your garage door, a practical trellis for cucumbers in your vegetable garden, or a stunning trellis on the front of your house — there is truly a trellis solution for every space, style, and budget.

The beauty of a trellis is how it effortlessly bridges the gap between structure and nature. Start small with a simple fan trellis and a clematis, or go all-in with a full trellis garden room complete with fairy lights and fragrant jasmine. Either way, your outdoor space will thank you.

Happy gardening — and don’t forget to save this post to your Pinterest boards! 📌


Disclosure: This post contains affiliate links. If you purchase through these links, I may earn a small commission at no extra cost to you. Thank you for supporting this blog!

Cheap Wedding Ideas

wedding arc

15 Cheap Wedding Ideas That Seem Fancy
(You’ll Be Shocked by Number 3!)

Discover 15 cheap wedding ideas that look incredibly expensive! From $150 cakes to DIY backdrops — save thousands without sacrificing style.


Planning a wedding is one of the most magical experiences of your life — but let’s be honest, it can also drain your bank account faster than you can say “I do.” The good news? You don’t need a six-figure budget to have a stunning, memorable wedding. With the right tricks, even the most budget-friendly wedding can look like it cost a fortune. Here are 12 genius ideas that prove luxury is all about the details, not the price tag.

Use Candles Everywhere Instead of Floral Centerpieces

Fresh flowers are beautiful but wildly expensive. Swap them out with clusters of pillar candles, tapered candles, and tea lights in varying heights.

candle table

A mix of white and ivory candles arranged on mirrors or wooden slices creates a romantic, high-end look that photographers absolutely love. You can buy candles in bulk for a fraction of what a florist charges, and the warm glow makes everything look magical — especially at evening receptions.

Pro Tip: Add a few sprigs of dried eucalyptus or baby’s breath around the candles for that expensive bohemian feel.

Rent a Luxurious Venue on an Off-Peak Day

Saturday venues can cost 2–3x more than a Friday evening or Sunday afternoon wedding. Many gorgeous venues — vineyard estates, boutique hotels, historic mansions — offer dramatic discounts on weekdays.

Cheap Wedding Ideas Cheap Wedding Ideas

Your guests will still be wowed by the stunning backdrop, and you’ll save thousands that can go toward food, photography, or your honeymoon. Off-season months like January, February, or November also offer steep discounts at premium locations.

Pro Tip: Always ask venues about their “off-peak” pricing — many don’t advertise it but will offer it if you ask directly.

Use a Grocery Store Bakery for Your Wedding Cake

Here’s the secret that luxury wedding planners don’t want you to know: high-end grocery store bakeries (like Whole Foods, Costco, or even local supermarkets) make absolutely stunning tiered cakes for a fraction of the price. A custom wedding cake from a specialty bakery can cost $800–$2,000. The same quality from a grocery bakery? As low as $150–$300.

 Grocery Store Cake

The trick is to order a simple white fondant or buttercream cake, then hire a florist to add fresh flower accents on top. Nobody will ever guess — and the taste is often just as incredible. This single swap alone can save you over $1,000!

Pro Tip: Order a small display cake and serve a large sheet cake from the same bakery hidden in the kitchen. Classic trick used by even celebrity weddings!

DIY Your Wedding Invitations With Canva

Professional invitation suites can cost $5–$15 per set. For 150 guests, that’s a staggering $750–$2,000 just for paper. Canva Pro (or even the free version) offers hundreds of elegant, designer-quality wedding invitation templates. Design once, print at a local print shop or on your home printer, and save big.

DIY Canva Invitations

Add a wax seal stamp (under $15 on Amazon) and suddenly your DIY invites look like they came straight from a stationery boutique.

Pro Tip: A simple black and gold design with a wax seal photographs beautifully and looks incredibly upscale in flat lays.

Create a Stunning Backdrop With Fairy Lights and Fabric

A photo backdrop that looks like it came from a high-end event designer can be made for under $100. Buy a large piece of flowing chiffon or organza fabric (check fabric stores for remnants), hang it behind the head table or ceremony altar, and drape string lights behind it.

The result is a dreamy, ethereal backdrop that photographs stunningly. Add a few hanging geometric shapes or floral wreaths and you have an Instagram-worthy setup that guests will think you spent thousands on.

Pro Tip: White or blush fabric with warm white fairy lights gives the most luxurious, timeless feel.

Hire a Culinary School for Catering

Professional catering companies charge premium prices, but culinary schools and local chef training programs often offer exceptional catering services at significantly reduced rates. Students supervised by professional chefs will prepare and serve your meal with care and enthusiasm.

wedding reception dinner

The food quality is often outstanding — these are passionate future professionals eager to impress. This can slash your catering costs by 40–60% while maintaining a genuinely high-quality dining experience for your guests.

Pro Tip: Contact your nearest culinary institute at least 6 months in advance — they book up quickly for events.

Buy Your Wedding Dress Off-Season or Sample Sale

Bridal boutiques hold sample sales every season where you can get stunning designer gowns for 50–80% off the original price. These gowns are usually in perfect condition, just previously tried on. Shopping off-season — or even browsing platforms like Still White, PreOwnedWeddingDresses.com, or even Facebook Marketplace — can land you a $2,000 dress for $300. A simple steam and professional clean (around $50–$100) and it’ll look brand new on your special day.

wedding suit

Pro Tip: Bring a trusted friend with great taste and visit at least 3 sample sales to find the best deal.

Grow or Forage Your Own Greenery

Lush greenery installations — eucalyptus garlands, ivy, ferns — are massively on-trend and incredibly inexpensive compared to flowers. Many of these plants can be purchased inexpensively from garden centers, or even foraged responsibly from your own backyard or a kind neighbor’s garden.

wedding dinner table

Eucalyptus bundles from farmers markets or wholesale flower markets are especially affordable. Drape greenery along tables, around ceremony arches, and in mason jars for a gorgeous organic aesthetic that looks wildly expensive.

Pro Tip: Order eucalyptus wholesale online — a full box costs around $30–$50 and can decorate an entire venue.

Use a Photography Student for Engagement Photos

While you might want to invest in a professional for your actual wedding day, engagement photos can be beautifully done by a talented photography student. Browse local university fine arts departments or platforms like Instagram and Model Mayhem to find emerging photographers who charge $100–$200 for a session.

Many are incredibly talented and eager to build their portfolio. Use these stunning photos for your save-the-dates, wedding website, and social media — no one needs to know the photographer was a student.

Pro Tip: Always review their portfolio carefully and schedule a quick meet-and-greet before booking.

Ask Friends and Family for Their Talents as Gifts

Some of the most meaningful and beautiful wedding elements come from the people who love you most. Do you have a friend who bakes? Ask them to make desserts as their wedding gift. A cousin who does calligraphy? Let them address the envelopes. An uncle with a beautiful garden? Ask if you can cut flowers the morning of the wedding. A friend with a vintage car? Perfect for your getaway vehicle. Not only does this cut costs dramatically, it adds deeply personal touches that no amount of money can buy.

Pro Tip: Be specific and appreciative when asking — frame it as a special role, not just a favor, and always acknowledge their gift publicly during the reception.

Rent a Wedding Arch Instead of Buying

Purchasing a decorated wedding arch can cost hundreds of dollars, but renting one from a florist or event rental company saves you up to 70%.

wedding arc

You can find arches already decorated with silk flowers, pampas grass, or lush greenery — no setup stress required. The best part? One arch does double duty for both your ceremony and your photo backdrop, giving you maximum value for a single rental fee.

Create a Paper Flower Wall as Your Photo Backdrop

A paper flower wall is one of the most jaw-dropping DIY wedding backdrops you can create for under $50. Using cardstock or tissue paper, craft oversized blooms in your wedding color palette and arrange them across a foam board or wire frame.

From a few feet away, they look strikingly similar to real flowers — and guests will be lining up to take photos in front of it all night long. This is exactly the kind of Pinterest-worthy shot that goes viral.

Buy Flowers Directly From a Wholesale Flower Market

Skip the florist markup entirely by visiting your local wholesale flower market the morning before your wedding. Flowers here cost 60–80% less than retail price, and the selection is often just as beautiful.

Gather your bridesmaids the night before and turn bouquet-making into a fun group activity — you save money, bond with your closest friends, and end up with completely personal, handcrafted arrangements that no florist could replicate.

Set Up a Dessert Table Instead of One Big Wedding Cake

Instead of spending $800–$2,000 on a single wedding cake, create a stunning dessert table that becomes one of the most photographed spots at your reception. Fill it with mini cupcakes, macarons, cake pops, brownies, cheesecake bites, and chocolate-dipped strawberries — all sourced affordably from grocery stores and local bakeries.

A well-styled dessert table looks incredibly luxurious in photos, gives guests more variety to enjoy, and often costs a fraction of a traditional tiered cake.

Your wedding day is about the love you share and the memories you create — not the number of zeros in your budget. With these 12 ideas, you can create a genuinely stunning celebration that reflects your personality and leaves your guests speechless, all without going into debt. The best weddings aren’t the most expensive ones — they’re the most thoughtful ones.

Save this pin for later and share it with a bride-to-be who deserves to know these secrets!

Did this help you?

Save this pin + follow for more budget wedding tips every week!

Outdoor Living Design 2026 Ideas

Modern Outdoor Living Design 2026 Ideas

60 Modern Outdoor Living Design 2026 Ideas For Stylish And Functional Spaces

Explore innovative Outdoor Living Design 2026 ideas to transform your backyard into a beautiful outdoor retreat.

Are you dreaming of turning your backyard into a beautiful outdoor retreat? Looking for outdoor living design ideas that are both modern and practical? Do you want a space that feels like an extension of your home rather than just a yard?

In 2026, modern outdoor living design is all about creating spaces that blend indoor comfort with outdoor beauty. Designers are focusing on clean lines, natural materials, and smart layouts that make every square foot count. Whether you have a large backyard or a compact balcony, these ideas will help you create an outdoor space that is truly stunning.

Let’s explore 60 modern outdoor living design ideas that will transform your space in 2026.


Open-Air Living Room Concept

The open-air living room is one of the biggest trends in 2026. This design brings all the elements of an indoor living room — sofa, coffee table, rugs, lighting — outside. Use weather-resistant furniture with clean, modern lines. Choose neutral tones like beige, gray, and white to create a sophisticated look.

Modern Outdoor Living Design 2026

For the perfect open-air living room, this Outdoor sectional sofa set & Outdoor rug is a great starting point.

Modern Outdoor Living Design 2026

Concrete and Wood Combination

Pairing concrete surfaces with warm wood elements is a timeless modern approach. Use concrete for flooring or countertops and add wooden pergolas or decking to soften the look. This combination creates a beautiful contrast that feels both industrial and natural.

Concrete and Wood Combination Concrete and Wood Combination

Biophilic Design with Living Walls

Living walls — vertical gardens filled with plants — are extremely popular in modern outdoor design 2026. They add color, texture, and a sense of nature to any outdoor space. Install a living wall on a fence or exterior wall to create a stunning green backdrop.

Modern Outdoor Living Design 2026 Ideas

Sunken Seating Areas

Sunken seating areas create a cozy, intimate atmosphere in outdoor spaces. Dig slightly into the ground or build raised platforms around a lower seating area to define the space. Add cushions, throw pillows, and outdoor rugs to make it feel luxurious.

Modern Outdoor Living Design 2026 Ideas

Minimalist Pergola Design

In 2026, pergolas have a sleek, minimalist look. Instead of heavy wooden beams, designers are using slim aluminum or steel frames with clean horizontal slats. This modern take on the pergola provides shade without blocking the view.

 Modern Outdoor Living Design 2026 Ideas

Outdoor Kitchen with Island

An outdoor kitchen is no longer a luxury — it is a necessity for modern outdoor living. A well-designed outdoor kitchen with an island creates the perfect space for cooking and entertaining. Include a built-in grill, countertop space, and bar seating for guests.

Infinity Edge Pool Integration

Infinity edge pools are still a top trend in 2026. When integrated into a modern outdoor living space, they create a seamless connection between the pool and the surrounding landscape. Pair with minimalist loungers and contemporary planters for a resort-like feel.

 Modern Outdoor Living Design 2026 Ideas

Fire Pit as a Focal Point

A fire pit instantly becomes the heart of any outdoor space. In modern design, fire pits are built-in, low-profile, and often rectangular rather than circular. Surround it with built-in bench seating or contemporary outdoor sofas for a complete look.

modern outdoor living area

Outdoor Dining with Pergola Roof

Create a dedicated outdoor dining zone by placing a large dining table under a pergola. String lights above and potted plants around the perimeter add warmth and ambiance. This setup is perfect for family dinners and evening entertaining.

Outdoor Dining with Pergola Roof

Smart Outdoor Lighting Systems

Smart lighting is transforming outdoor spaces in 2026. Use programmable LED lights to set different moods — bright for entertaining, soft and warm for relaxing evenings. Solar-powered path lights and uplighting for trees add both function and beauty.

Smart Outdoor Lighting Systems

Seamless Indoor-Outdoor Flow

One of the defining features of modern outdoor living design in 2026 is the seamless transition between indoor and outdoor spaces. Large sliding or folding glass doors open up to a patio that mirrors the interior flooring and furniture style.

Seamless Indoor-Outdoor Flow

Modular Outdoor Furniture

Modular furniture allows you to rearrange your outdoor space to suit different occasions. Mix and match sectional pieces to create a configuration that works for intimate gatherings or large parties. Choose furniture in weather-resistant materials like teak, aluminum, or all-weather wicker.

Modular Outdoor Furniture

Zen Garden Corner

A dedicated Zen garden corner brings tranquility to your outdoor space. Use gravel, smooth stones, bamboo, and a small water feature to create a peaceful retreat. This works beautifully in both large and small outdoor spaces.

Zen Garden Corner

Outdoor Movie Theater

An outdoor movie theater is one of the most exciting trends in modern outdoor living 2026. Mount a projector screen on an exterior wall or use a freestanding screen. Add comfortable outdoor seating, blankets, and outdoor speakers for the ultimate entertainment experience.

Outdoor Movie Theater

Shade Sail Installation

Shade sails are a modern and stylish way to create shade in your outdoor space. Available in a range of colors and shapes, they add a geometric element to the design. Use multiple overlapping sails for a dynamic visual effect.

Shade Sail Installation

Raised Garden Beds with Sleek Design

Raised garden beds are both functional and beautiful. In 2026, they have a modern, structured look with clean lines and materials like weathered steel or painted wood. Grow vegetables, herbs, or flowers to add life and color to your outdoor space.

Garden Beds with Sleek Design

Hammock Lounge Zone

Create a relaxed hammock lounge zone by hanging multiple hammocks between trees or installing a modern hammock stand. Add fairy lights overhead and a small side table for drinks. This creates a casual, laid-back corner in your outdoor space.

Hammock Lounge Zone

Water Feature Wall

A water feature wall adds movement, sound, and elegance to an outdoor space. Choose a sleek, contemporary design with a smooth stone or concrete face and a simple trough at the bottom. The sound of flowing water creates a calming atmosphere.

Water Feature Wall

 Outdoor Yoga and Meditation Deck

A dedicated yoga and meditation deck is a growing trend in modern outdoor living 2026. Create a smooth, level surface with non-slip decking material. Surround it with plants, candles, and soft lighting to inspire relaxation and mindfulness.

Outdoor Yoga and Meditation Deck

Greenhouse-Inspired Dining Space

A greenhouse-style structure made of glass and metal frames is one of the most elegant trends in outdoor design. Use it as a dining room that allows you to enjoy the outdoors while being protected from the elements. Fill it with plants for a lush, garden-inspired atmosphere.

Greenhouse-Inspired Dining Space

Tiled Outdoor Floor Patterns

Statement floor tiles are making a big impact in outdoor design 2026. Choose large-format tiles with geometric patterns or subtle textures. Porcelain tiles are a popular choice because they are durable, easy to clean, and available in a wide range of designs.

Tiled Outdoor Floor Patterns

Outdoor Curtains for Privacy

Outdoor curtains add privacy, shade, and a sense of luxury to a patio or pergola. Choose heavy, weather-resistant fabrics in neutral or earthy tones. Pull them closed for an intimate, enclosed feel or leave them open to let in the breeze.

Outdoor Curtains for Privacy

Naturalistic Landscaping

Modern outdoor design in 2026 embraces naturalistic landscaping — planting in a way that mimics nature. Use native plants, grasses, and wildflowers to create a low-maintenance, eco-friendly garden that looks beautiful year-round.

Naturalistic Landscaping

Floating Deck Design

A floating deck creates the illusion of a platform suspended above the ground. This modern design technique uses minimal supports and clean lines to create a sleek, sophisticated outdoor platform. It works especially well on sloped or uneven ground.

Floating Deck Design

Multifunctional Outdoor Storage Benches

Outdoor storage benches serve double duty as seating and storage. Choose designs with clean lines and built-in cushions. Use them to store cushions, garden tools, or outdoor toys, keeping your space neat and organized.

Multifunctional Outdoor Storage Benches

Bold Color Accents in Outdoor Decor

While neutral tones dominate modern outdoor design, bold color accents add personality and energy. Use deep teal, terracotta, or mustard yellow in cushions, planters, and accessories to create visual interest without overwhelming the space.

Bold Color Accents in Outdoor Decor

Curved Pathways and Landscaping

Curved pathways and planting borders soften the look of a modern outdoor space. Use natural stone, gravel, or brick to create winding paths that lead visitors through the garden. Curved landscaping adds a sense of movement and flow.

garden pathway

Outdoor Reading Nook

A cozy outdoor reading nook is the perfect addition to any modern outdoor space. Create it with a built-in bench, comfortable cushions, a small bookshelf, and good lighting. Surround it with plants and a privacy screen for a truly secluded retreat.

Outdoor Reading Nook

Integrated Planters in Outdoor Furniture

Built-in planters integrated into outdoor furniture are a clever design solution that adds greenery without taking up extra space. Look for outdoor sofas, benches, and dividers with built-in planting areas to create a seamless blend of furniture and nature.

Outdoor Reading Nook


Key Design Principles for Modern Outdoor Living 2026

When designing your outdoor space, keep these principles in mind. First, always prioritize comfort alongside aesthetics — a beautiful space that is not comfortable will not be used. Second, choose materials that can withstand your local climate while still looking great. Third, think about lighting from the very beginning of your design process, as it transforms the space after dark. Fourth, create defined zones for different activities — dining, lounging, cooking, and play — to make your outdoor space feel organized and intentional.

Final Thoughts

Modern outdoor living design in 2026 is about creating spaces that feel personal, functional, and beautiful. From open-air living rooms to smart lighting systems and naturalistic landscaping, there are endless possibilities for transforming your outdoor space. Start with the ideas that excite you most and build from there. Your perfect outdoor retreat is within reach.


Which of these modern outdoor living design ideas inspired you the most? Share your thoughts and start planning your dream outdoor space today!

Best Makeup Vanity Tables on a Budget 2026

Discover the best budget makeup vanity tables of 2026 with storage, mirrors and lights for every space and style.

Best Makeup Vanity Tables on a Budget 2026 (Top Picks for Every Space)

Discover the best budget makeup vanity tables of 2026 with storage, mirrors and lights for every space and style.

Do you dream of having a beautiful makeup vanity table where you can sit, get ready, and feel like a million dollars — without actually spending a million dollars? You are not alone. Millions of women around the world are searching for the perfect budget makeup vanity table that looks stunning, functions perfectly, and does not destroy their savings account.

The good news is this: in 2026, there are more affordable, stylish, and practical makeup vanity table options than ever before. Whether you have a spacious bedroom or a tiny corner to work with, this guide covers the absolute best picks for every budget, every space, and every style.

Let us dive in and find your perfect vanity table.


What to Look for in a Budget Makeup Vanity Table

Before spending a single rupee or dollar, it is important to know exactly what makes a good makeup vanity table worth buying. Not every cheap vanity table is a good deal — and not every expensive one is worth the price.

vanity table

Here are the four most important things to check:

Size and Space: Measure your available space before buying anything. A vanity table that looks perfect online can feel overwhelming in a small bedroom. Always check the exact dimensions — width, depth, and height — and compare them against your available space with at least 2 feet of walking room on each side.

Storage Options: The best budget vanity tables offer smart storage without adding bulk. Look for drawers, side shelves, built-in compartments, or mirror storage pockets. A vanity table with zero storage forces you to buy separate organizers — which adds to your total cost.

Mirror Quality: Some budget vanity tables come with mirrors and some do not. If yours includes one, check whether it is a basic flat mirror or one with lighting. Lighted mirrors are significantly more useful for makeup application because they eliminate shadows.

Build Quality: Budget does not have to mean flimsy. Look for vanity tables made from solid wood, MDF with proper veneer, or powder-coated metal frames. Avoid vanities with particleboard legs or plastic joints — they wobble within weeks of assembly.


Best Budget Makeup Vanity Tables in 2026

Here are the top picks across different budgets and styles:


1. VASAGLE Makeup Vanity Table with Mirror and Stool

The VASAGLE Makeup Vanity Table is one of the most consistently top-rated budget vanity tables available on Amazon right now. It comes as a complete set — vanity table, mirror, and matching stool — which makes it exceptional value compared to buying each piece separately.

make up vanity

The table features two side drawers and an open middle section for frequently used products. The flip-up mirror reveals hidden storage inside for smaller items like lipsticks and eyeshadow palettes. The overall aesthetic is clean and modern, working beautifully in both minimalist and traditional bedroom styles.

make up vani

Best for: Beginners who want a complete setup in one purchase

Price range: Very affordable — under $150

What users love most: Easy assembly, generous storage, and the matching stool that completes the look


2. Tribesigns Modern Vanity Table with Large Mirror

If you love a bold, statement-making vanity setup, the Tribesigns Modern Vanity Table delivers exactly that without a premium price tag. The oversized frameless mirror is the star of this piece — it is significantly larger than mirrors on comparable budget vanities, giving you a full and clear view while doing your makeup.

Best Makeup Vanity Tables on a Budget 2026

The table surface is spacious enough to hold all your daily essentials without feeling cluttered. Three drawers on the right side provide organized storage for brushes, palettes, and skincare products. The slim legs give it an elegant, airy look that makes small bedrooms feel more open rather than crowded.

Best for: People who prioritize mirror size and surface workspace

Price range: Mid budget — under $200

What users love most: The large mirror, sturdy construction, and modern aesthetic


3. Homfa Makeup Vanity Desk with 10 Drawers

Storage lovers — this one is for you. The Homfa Makeup Vanity Desk offers an extraordinary amount of drawer space for its price point. Ten individual drawers of varying sizes mean you can organize every single category of your makeup collection separately — foundations in one drawer, eye products in another, lip products in a third, and so on.

best vanity table for make up

The clean white finish works with virtually any bedroom color scheme. The table surface is generously sized and the overall build quality is surprisingly solid for the price. Note that this model does not include a mirror — budget separately for a lighted mirror to complete the setup.

Best for: Large makeup collections that need serious organization

Price range: Budget friendly — under $130

What users love most: The drawer quantity, smooth drawer glides, and clean white finish


4. Latitude Run Farmhouse Makeup Vanity Table

For anyone who loves the warm, rustic farmhouse aesthetic, the Latitude Run Farmhouse Makeup Vanity Table is a gorgeous option that looks significantly more expensive than its actual price. The combination of a natural wood finish tabletop with white painted legs creates that popular modern farmhouse look that performs extremely well on Pinterest.

A gorgeous farmhouse style makeup vanity table

It includes a round mirror, two small side drawers, and open shelving underneath for baskets or bins. The style pairs beautifully with rattan organizers and wicker storage baskets on the lower shelf.

Best for: Farmhouse, boho, and rustic bedroom styles

Price range: Affordable — under $180

What users love most: The aesthetic, the sturdy build, and how beautiful it looks styled with plants and decor


5. WLIVE Small Makeup Vanity Table for Small Spaces

Not everyone has a dedicated bedroom corner for a full vanity setup. For truly small spaces — studio apartments, dorm rooms, or shared bedrooms — the WLIVE Small Makeup Vanity Table is the smartest buy on this list.

Its compact footprint takes up minimal floor space while still providing a proper mirror, two drawers, and a surface large enough for your daily makeup essentials. It fits perfectly in corners, against narrow walls, or even in a large closet converted into a mini beauty space. Despite its small size, the build quality is impressively solid and the assembly is straightforward.

Best for: Small spaces, dorm rooms, apartments, and minimalist makeup collections

Price range: Very budget friendly — under $100

What users love most: The compact size, the easy assembly, and how much functionality it packs into a small footprint


6. Beautify Hollywood Vanity Mirror with Lights and Desk

Sometimes the mirror matters more than the table. The Beautify Hollywood Vanity Mirror with Lights is a lighted mirror and desk combination that gives you professional-level lighting for makeup application at a fraction of salon prices. The warm LED bulbs around the mirror frame eliminate shadows completely — the same lighting setup professional makeup artists use.

make up lighting table

The desk surface is slim but functional and the overall setup looks incredibly glamorous. If you have seen those beautiful Hollywood-style vanity setups on Pinterest and assumed they were expensive — this is how people recreate that look on a budget.

Best for: Makeup enthusiasts who prioritize lighting quality above everything else

Price range: Mid range — under $120

What users love most: The Hollywood lighting, the glamorous aesthetic, and the dramatic improvement in makeup application accuracy


How to Style Your Budget Vanity Table

Buying the vanity table is just the beginning. Styling it properly is what transforms a piece of furniture into a personal beauty sanctuary.

Use a tray for daily essentials. Place a small decorative tray on your vanity surface and keep only your most-used daily products on it — foundation, mascara, lipstick, and moisturizer. Everything else goes in drawers. This keeps your surface looking clean and intentional rather than cluttered.

Add a small plant. A tiny succulent or a trailing pothos in a small ceramic pot adds life and color to your vanity setup. It also photographs beautifully if you enjoy sharing your space on social media.

Organize with clear containers. The mDesign Plastic Makeup Organizer Set available on Amazon provides stackable clear compartments for brushes, palettes, and smaller products. Clear organization means you can see everything at a glance without digging through drawers.

Layer your lighting. If your vanity table does not have built-in lights, add a small LED ring light or a lighted vanity mirror separately. Good lighting is non-negotiable for accurate makeup application — overhead room lighting creates shadows that make blending almost impossible.

Add a comfortable stool or chair. If your vanity table did not come with seating, invest in a proper vanity stool. Sitting at the wrong height while doing your makeup causes neck and back strain over time. Your eyes should be level with the middle of your mirror when seated comfortably.


DIY Hacks to Upgrade Your Budget Vanity Table

Buying a budget vanity does not mean you have to live with a budget look. These simple upgrades make an enormous visual difference:

vanity table

Paint the hardware. Swap out basic silver drawer handles for gold or matte black alternatives. A pack of ten replacement drawer knobs on Amazon costs under $15 and completely changes the aesthetic of any vanity table.

Add adhesive wallpaper to the back panel. Peel and stick wallpaper in a marble, floral, or geometric pattern applied to the back of your vanity mirror or the back panel of your table transforms it from basic to boutique in under twenty minutes.

vanity table make up

Install LED strip lights. Adhesive LED strip lights applied around the inside of your mirror frame create a custom Hollywood vanity look for under $20. They connect via USB and can be adjusted for warmth and brightness.

make up vanity

Use decorative perfume trays. A mirrored or marble-look tray holding your perfume bottles, a small candle, and your daily moisturizer creates a luxury lifestyle aesthetic that looks effortlessly curated.


Budget Breakdown — What You Can Achieve at Every Price Point

Under $100: The WLIVE Small Vanity Table gives you a complete functional setup. Add a $15 clear organizer set and you have everything you need for a simple daily routine.

Under $200: The VASAGLE Complete Vanity Set with mirror and stool gives you a full professional-looking setup. Add a $20 LED strip light and a $15 drawer handle upgrade for a completely transformed look.

Under $300: The Beautify Hollywood Vanity Mirror Desk with a separate $30 organizer set and $25 worth of styling accessories creates a setup that looks like it cost three times the price.


Final Thoughts

Finding the perfect budget makeup vanity table in 2026 is genuinely easier than it has ever been. The options available on Amazon right now offer real quality, beautiful aesthetics, and smart storage at prices that work for almost every budget.

best-makeup-vanity-tables-on-a-budget-2026

Start by deciding your three priorities — storage, mirror quality, or aesthetic — and choose the vanity table from this list that best matches those priorities. Then style it thoughtfully with a tray, some organization, good lighting, and a personal touch or two.

Your dream vanity setup is not as far away as you think. And it definitely does not have to be expensive. 💄✨

Small Balcony Garden Ideas on a Budget

balcony corner

10 Small Balcony Garden Ideas on a Budget (Easy & Aesthetic 2026 Guide)

No space? No money? No problem! These 10 small balcony garden ideas on a budget prove that anyone can create a beautiful outdoor garden.

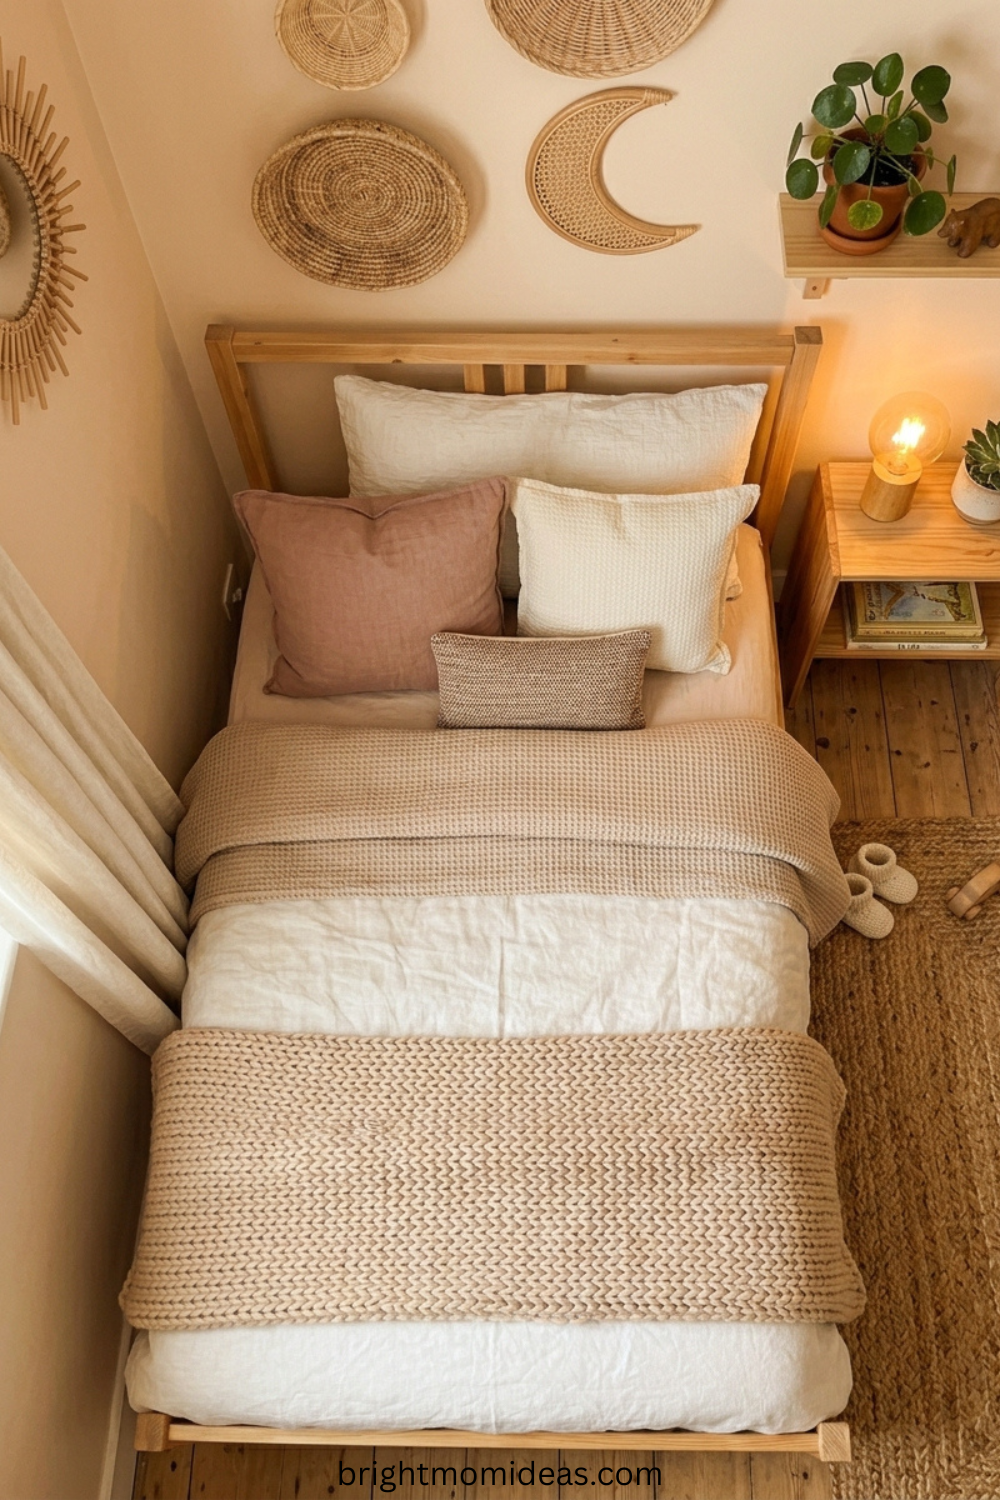
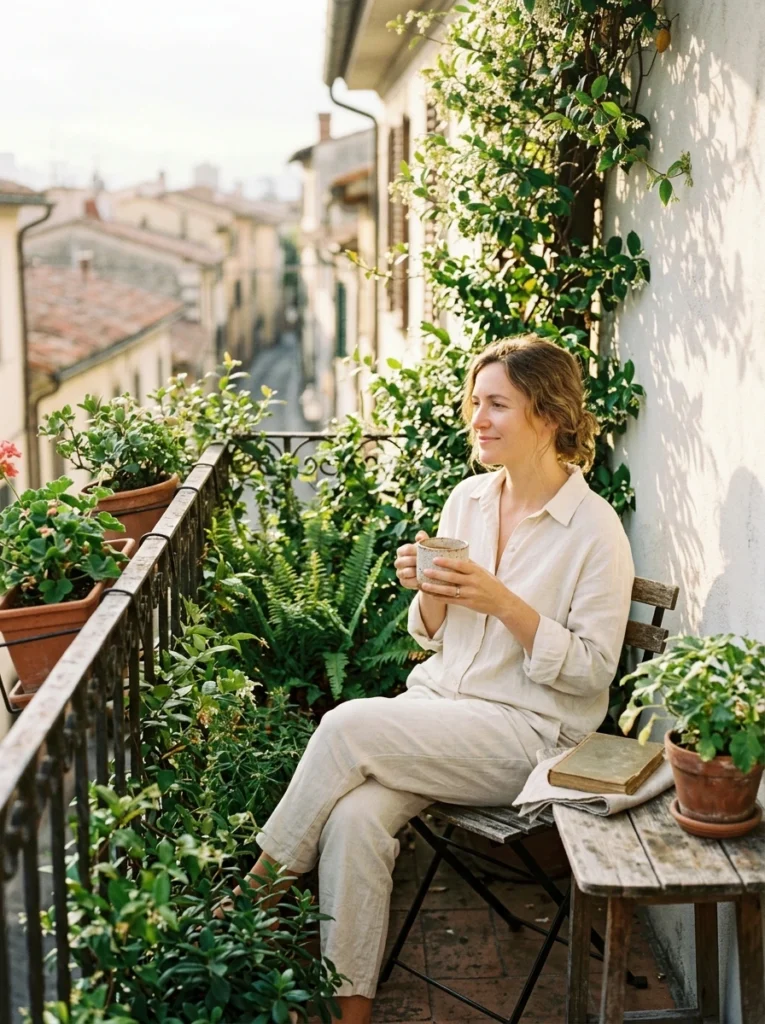
Do you look at your tiny balcony and wish it could be something more? Maybe you imagine a lush green corner where you sip your morning tea surrounded by plants, soft light filtering through leaves, fairy lights glowing in the evening — but then you look at the cramped space and think, “There’s no way.”

There is a way. And it costs far less than you think.

Millions of apartment dwellers around the world have transformed the smallest outdoor spaces into stunning personal gardens using nothing more than creativity, a few affordable supplies, and the right plan. Whether your balcony fits two people comfortably or barely fits one chair, these small balcony garden ideas on a budget will show you exactly what is possible in 2026.

This guide covers 10 easy, aesthetic ideas — complete with budget estimates, plant suggestions, and product recommendations — so you can start this weekend and see results immediately.


Why a Balcony Garden is Worth Every Penny

Before diving into ideas, consider what a balcony garden actually gives you beyond looks. Fresh herbs from your own DIY herb garden corner mean you stop buying overpriced grocery store packets. Plants naturally cool the air around them through transpiration, making your balcony noticeably more comfortable in summer heat. Green spaces reduce cortisol — the stress hormone — which means your balcony garden is genuinely good for your mental health, not just your Instagram feed.

And from a purely practical angle, a well-designed small balcony makeover cheap costs less than one dinner out for two people. The value is extraordinary.


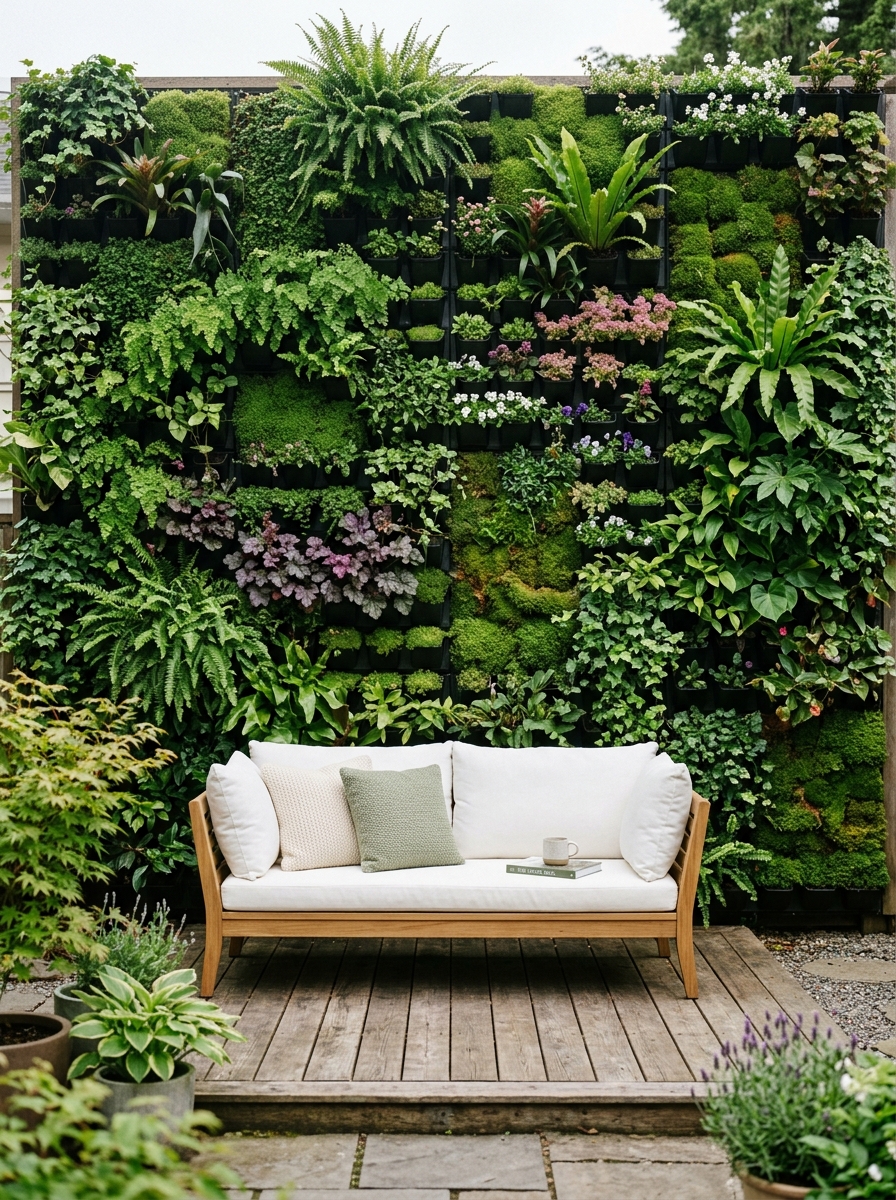
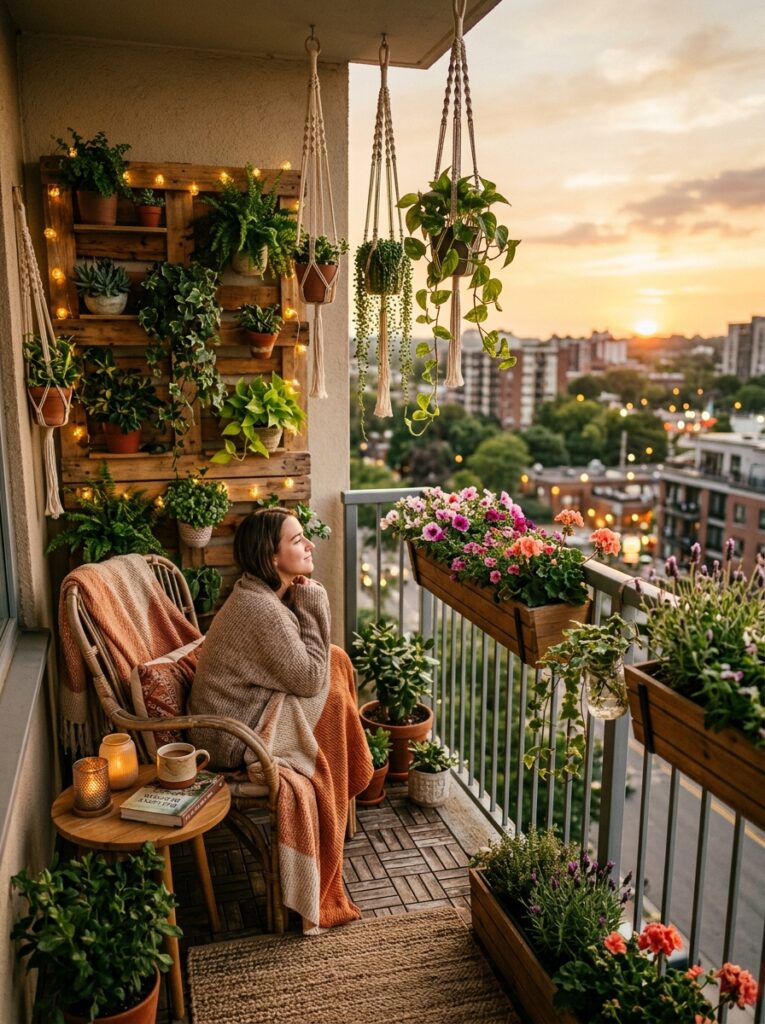
1: Vertical Pallet Garden Wall

The vertical pallet garden is the single most searched balcony garden idea for beginners on Pinterest, and it earns that popularity by being genuinely transformative. Instead of using your limited floor space for plants, you go upward — turning a bare wall into a living, breathing green feature.

Vertical Pallet Garden Wall

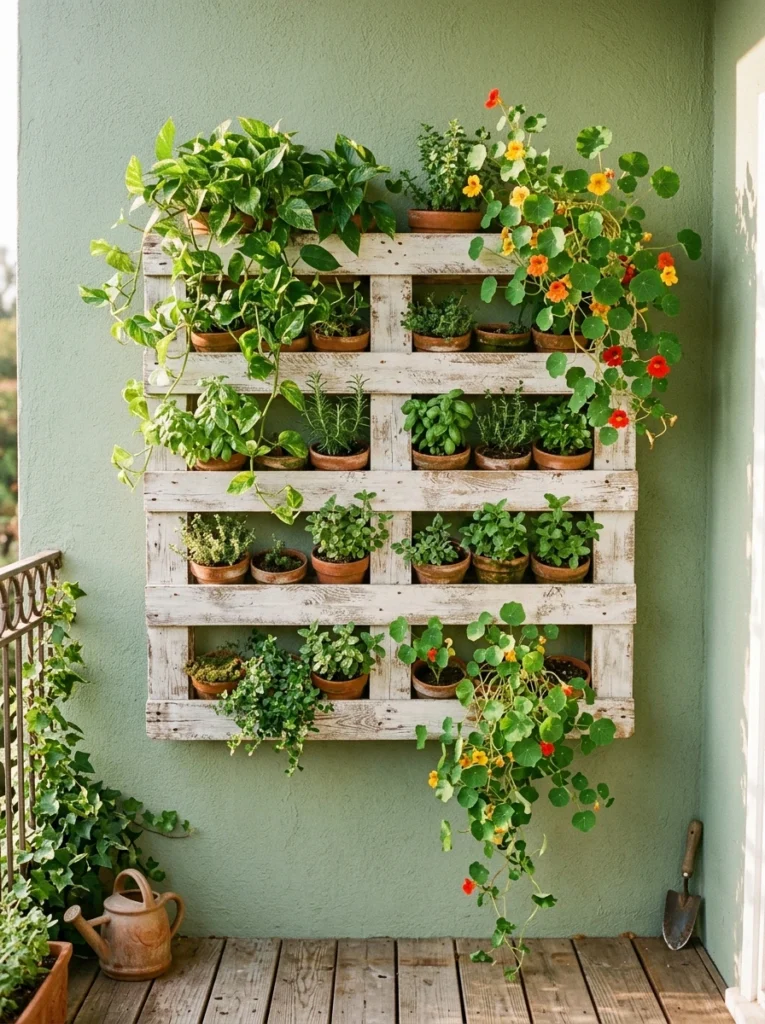
Source a heat-treated wooden pallet (look for the “HT” stamp — this means it was heat-treated rather than chemically treated, making it safe for food plants). Sand any rough edges smooth, apply a coat of exterior wood stain in a color that suits your balcony aesthetic, and staple landscape fabric to the back to hold soil inside each slat opening.

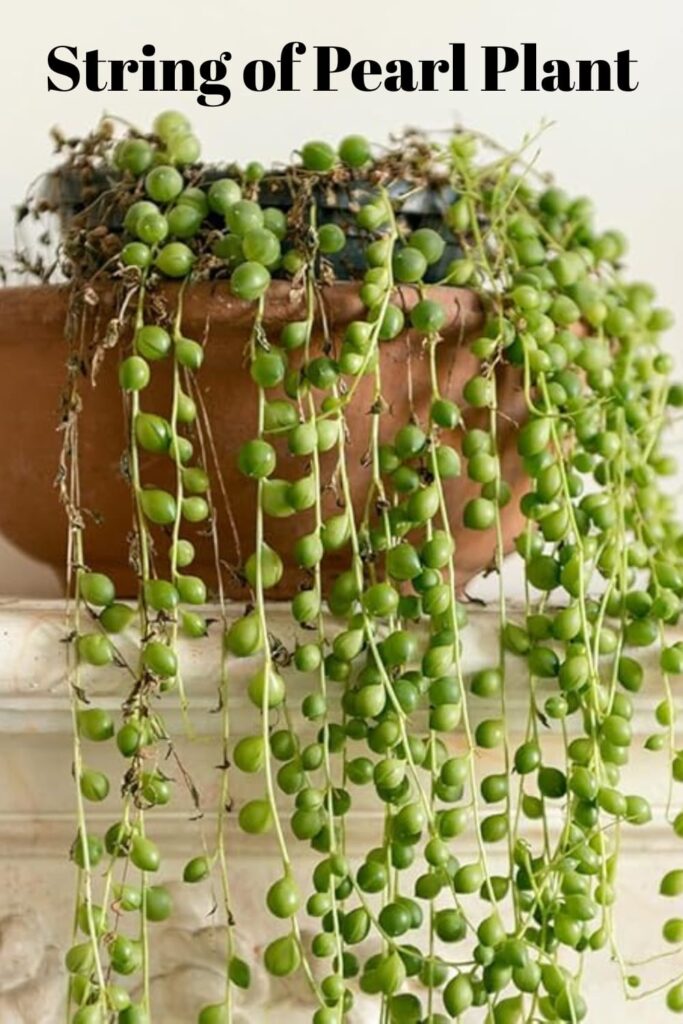
Fill each opening with a mix of potting soil and perlite, then plant trailing plants like String of pearls, Pothos, Nasturtiums, or compact herbs like thyme and oregano. Lean the pallet against your balcony wall or mount it using heavy-duty wall brackets.

For a no-pallet alternative, the Mkono Wall Hanging Planter and the GROWNEER Wall Mounted Planter Pockets are both excellent Amazon finds under $25 that achieve the same vertical garden effect without any woodworking.

Budget estimate: Free to $30 Best plants: Pothos, herbs, strawberries, nasturtiums, ferns


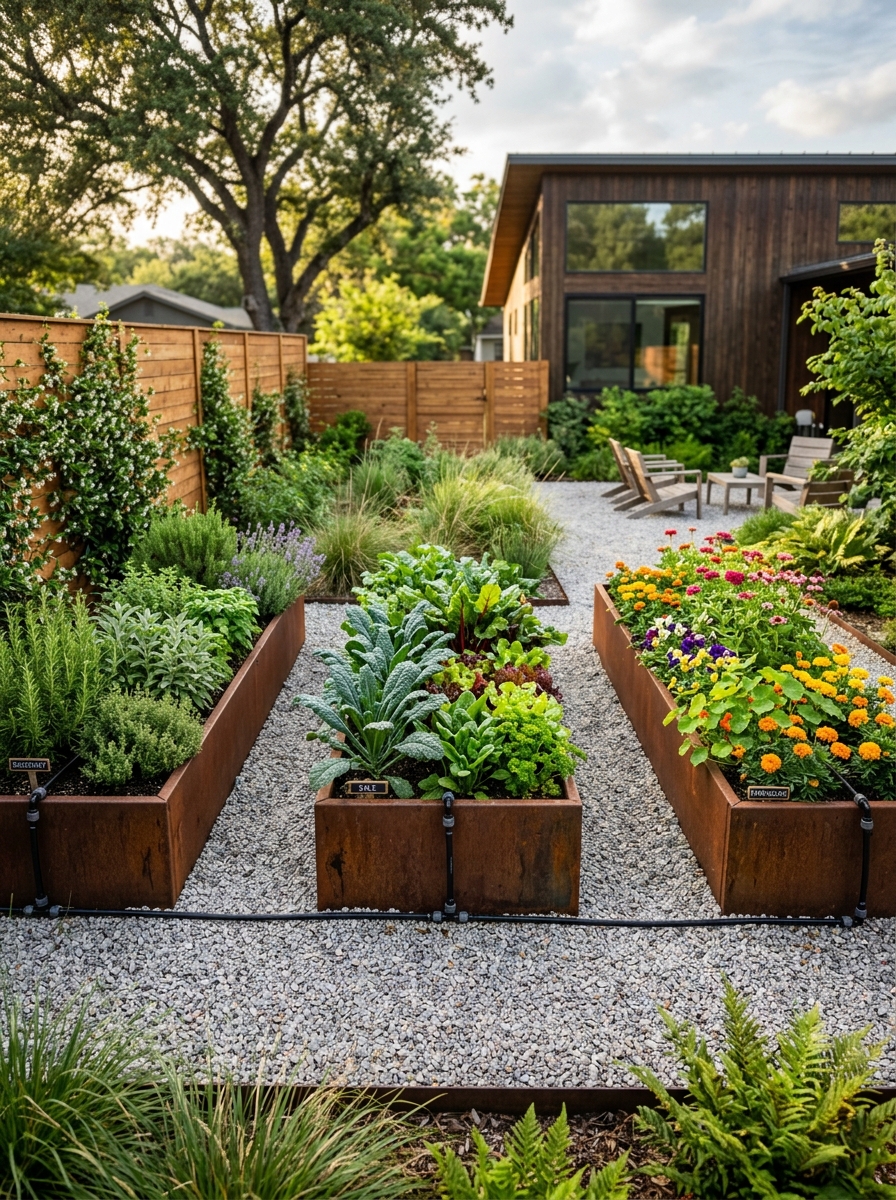
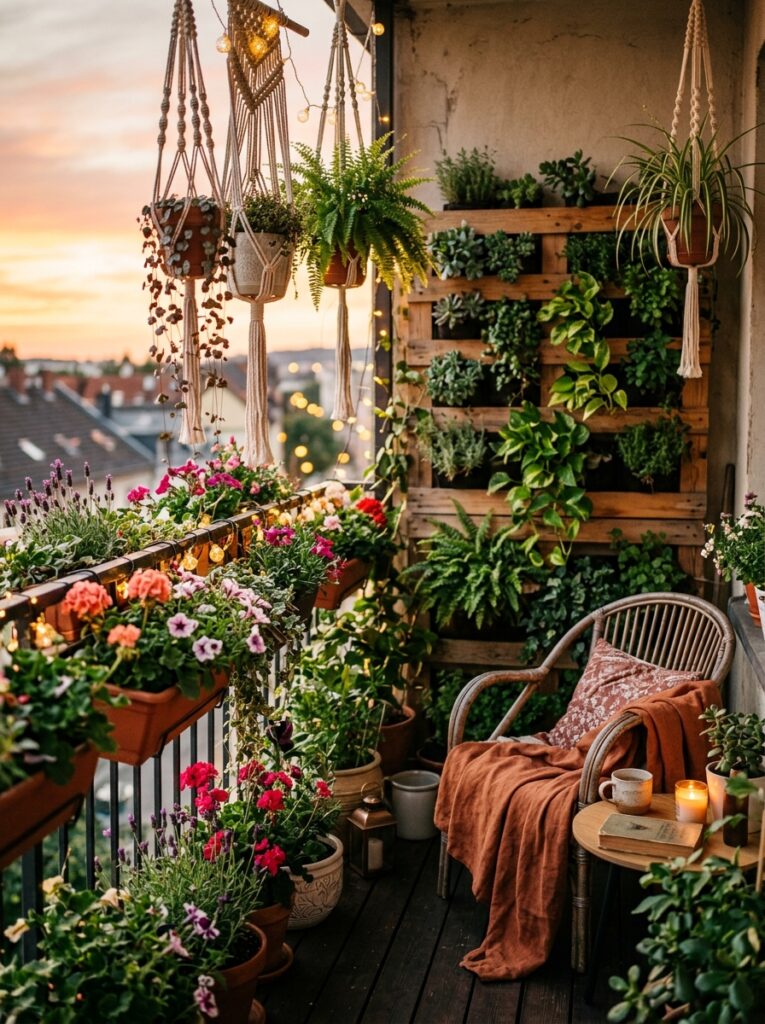
 2: Railing Planter Boxes

Your balcony railing is valuable real estate that most people completely ignore. Railing planter boxes attach directly to the top or inside face of your railing and instantly double your planting space without using a single inch of floor area.

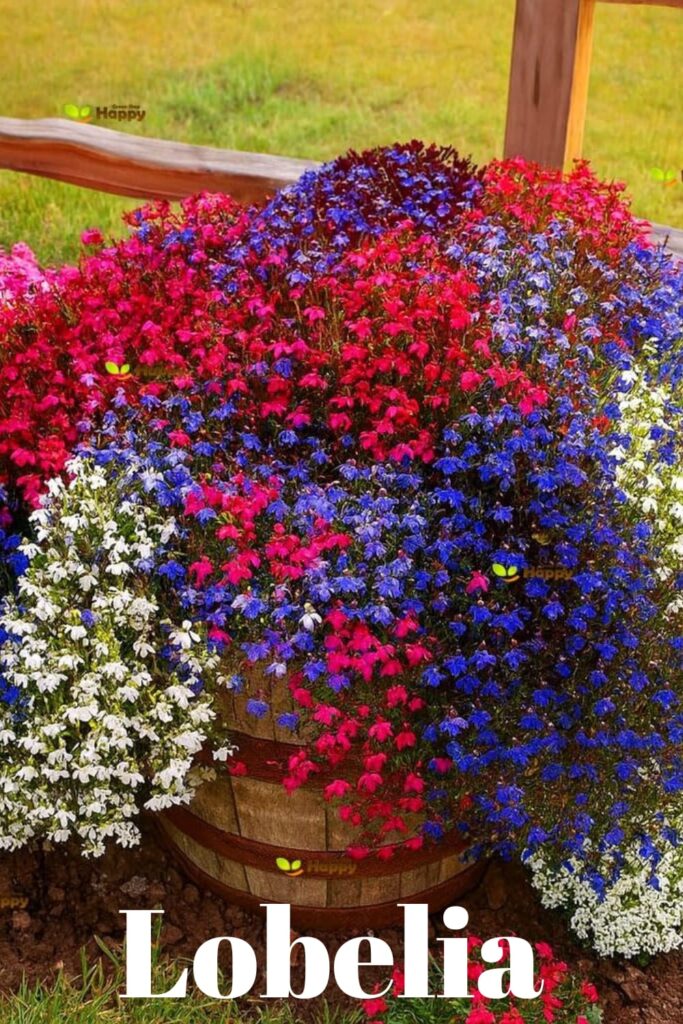
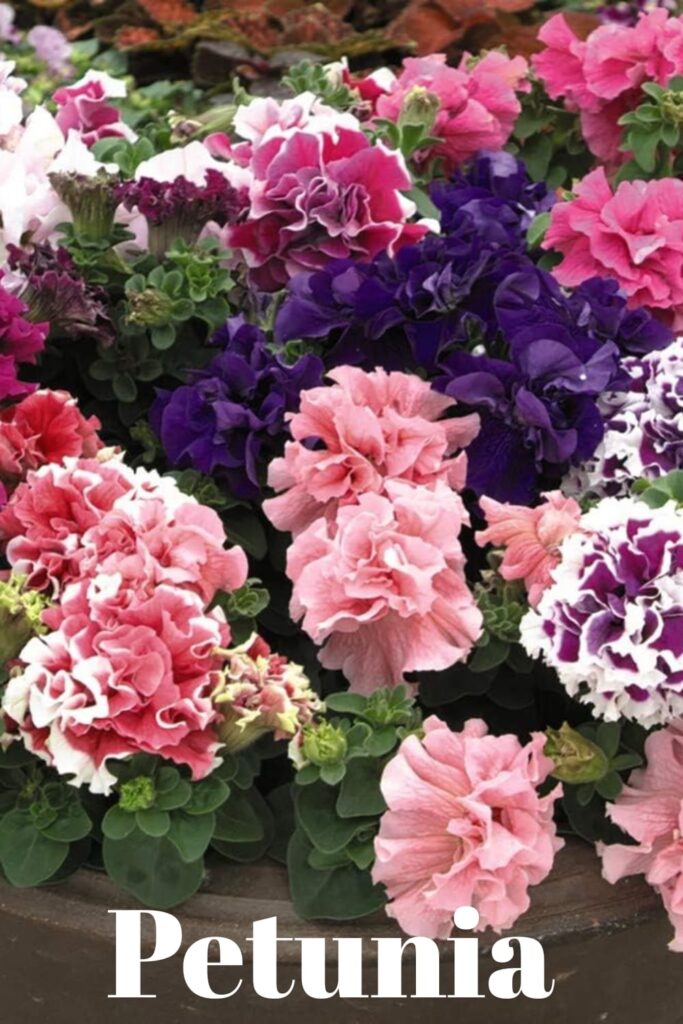
This is one of the best cheap balcony garden ideas for apartments because the planters themselves are inexpensive and the plants you fill them with can be started from seed for almost nothing. Plant trailing varieties that spill downward — bacopa, lobelia, sweet potato vine, or trailing petunias — for a waterfall-of-flowers effect that looks expensive and elaborate but costs very little.

Balcony Railing Planter Boxes

The LEOVONE Railing Planter Window Box on Amazon fits most standard railings and comes with a secure mounting system that handles wind without requiring any drilling. The Mkono Balcony Railing Planter is another top-rated option available in multiple colors to match your balcony furniture.

For edible gardens, fill railing boxes with lettuce, spinach, radishes, and herbs — all shallow-rooted crops that thrive in the limited depth of a railing planter.

Budget estimate: $15 to $35 for planters, seeds under $5

Best plants:

Petunias
Lobelia
Lettuce
Herbs
Strawberries


3: Hanging Basket Garden

Hanging baskets bring layers and dimension to a small balcony, drawing the eye upward and making the space feel larger than it is. A cluster of three hanging baskets at varying heights — filled with different trailing and flowering plants — creates a lush, garden-like atmosphere even in the tightest spaces.

Macrame hanging planters are particularly popular right now for their bohemian, handcrafted aesthetic. The TIMEYARD Macrame Plant Hangers on Amazon come in sets of four with wooden beads and are consistently top-rated for both quality and appearance. Pair them with terracotta pots for a warm, earthy look or ceramic white pots for a cleaner, more modern aesthetic.

For the easiest possible hanging garden, pre-planted hanging basket liners filled with slow-release fertilizer pellets need almost no maintenance beyond weekly watering. Replace the liner each season for a fresh look without repotting.

 Hanging Basket Garden

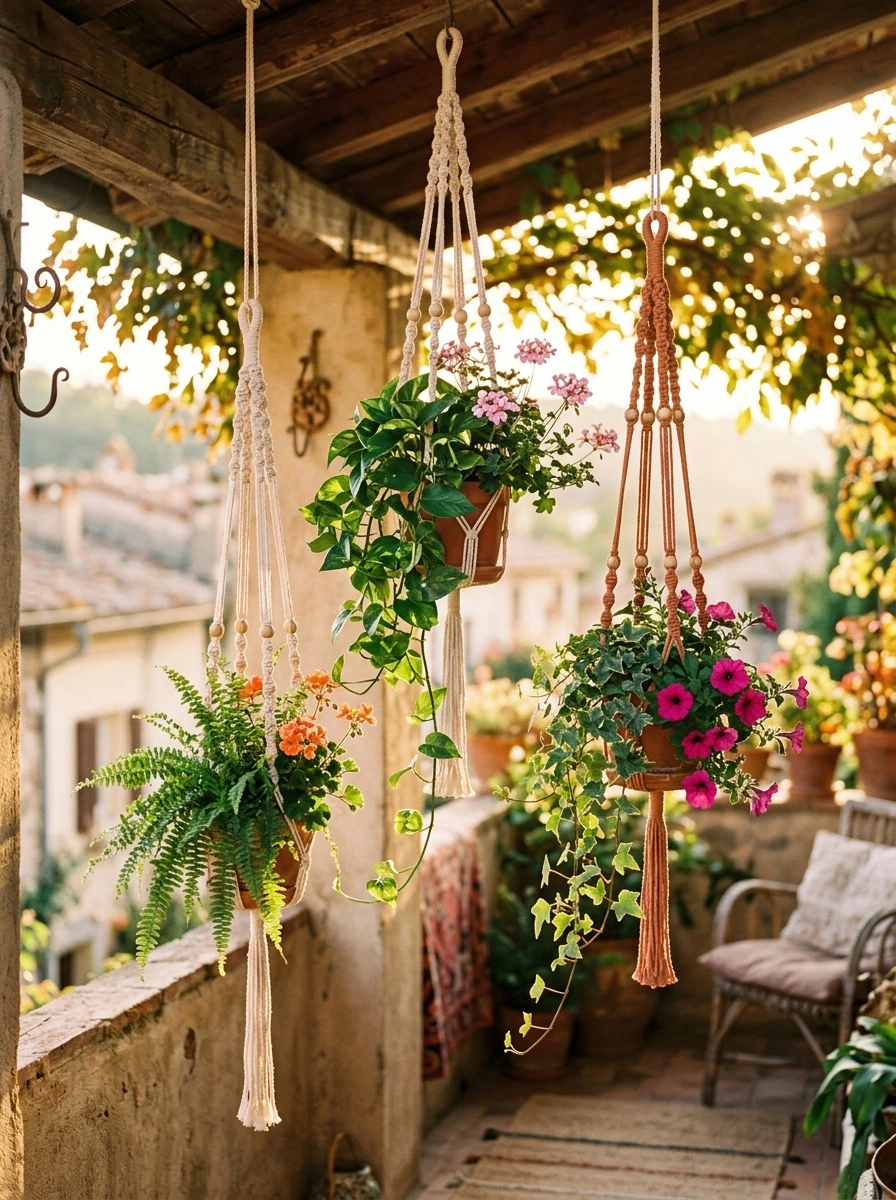
This idea works especially well for apartment balcony garden ideas where drilling into walls is restricted — most hanging baskets can be suspended from existing ceiling hooks or balcony beam clamps that require no permanent installation.

Budget estimate: $20 to $40

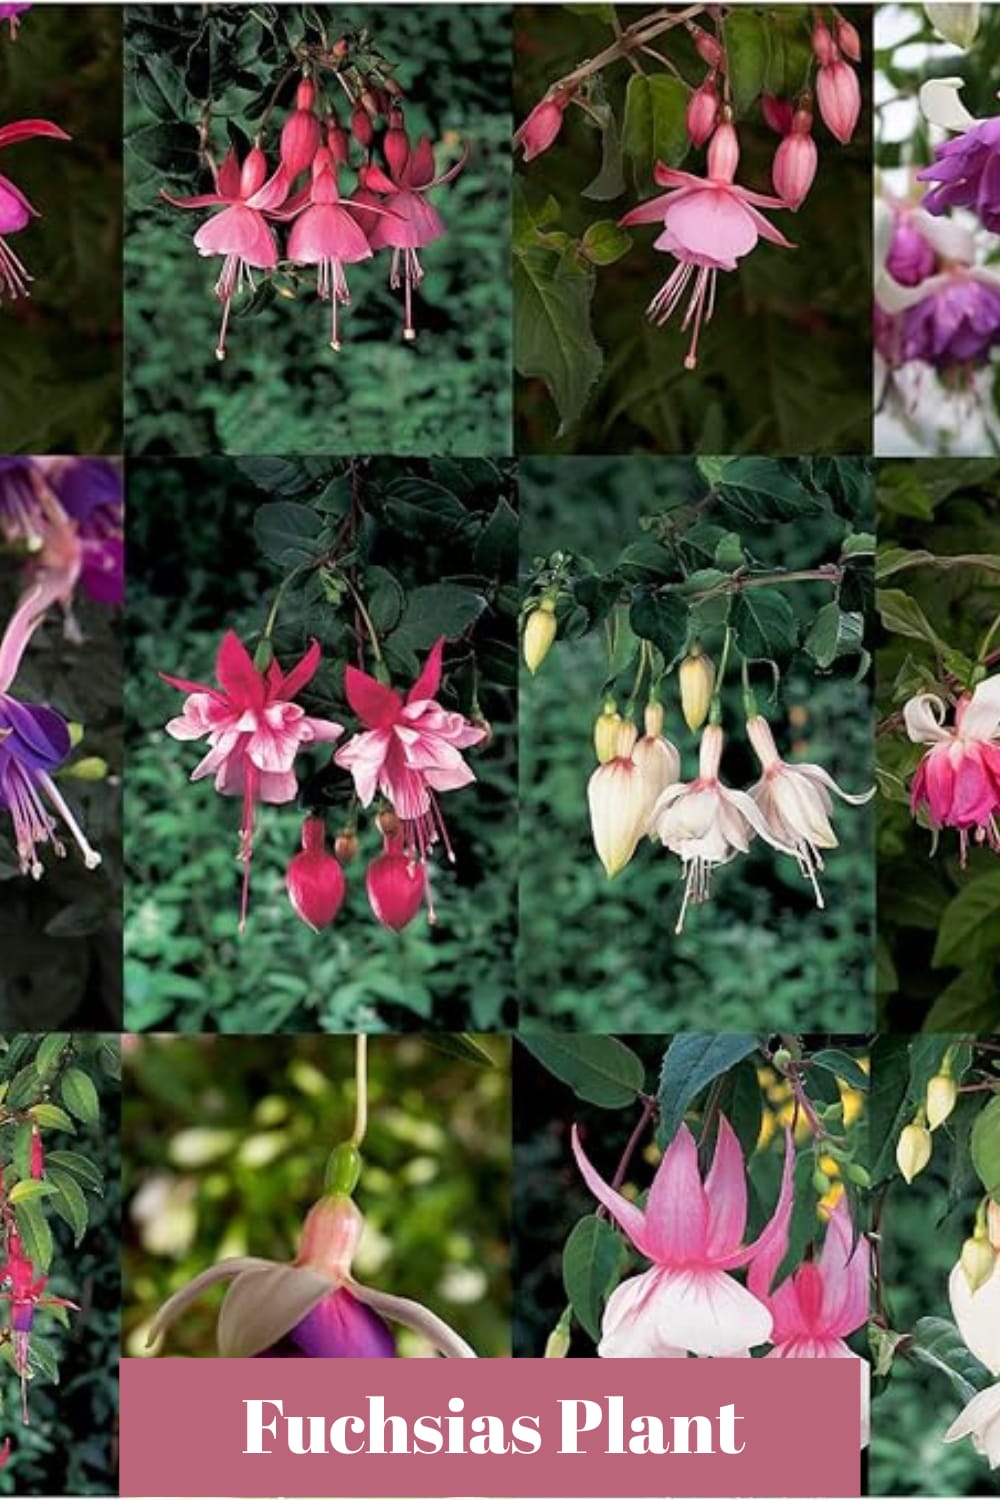
Best plants: Fuchsia, impatiens, trailing petunias, ferns, pothos

fushsias


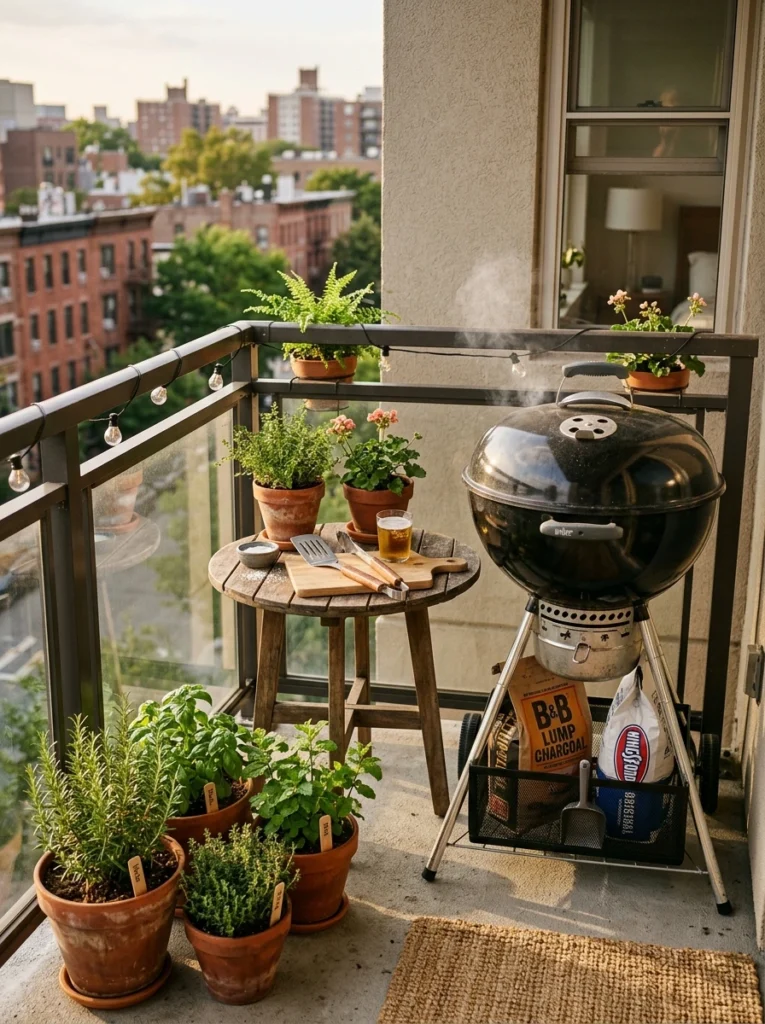
4: DIY Herb Garden Corner

A DIY herb garden corner is the most practical thing you can add to any balcony. Fresh herbs elevate every meal, they smell incredible in the evening breeze, they attract pollinators, and they are among the easiest plants to grow in containers.

The classic approach uses a small wooden crate shelf — either purchased or built from scrap wood — holding four to six small pots at different levels. Plant basil, mint, rosemary, thyme, parsley, and cilantro. Label each pot with hand-painted stones or small wooden plant markers for an aesthetic that photographs beautifully.

 DIY Herb Garden Corner

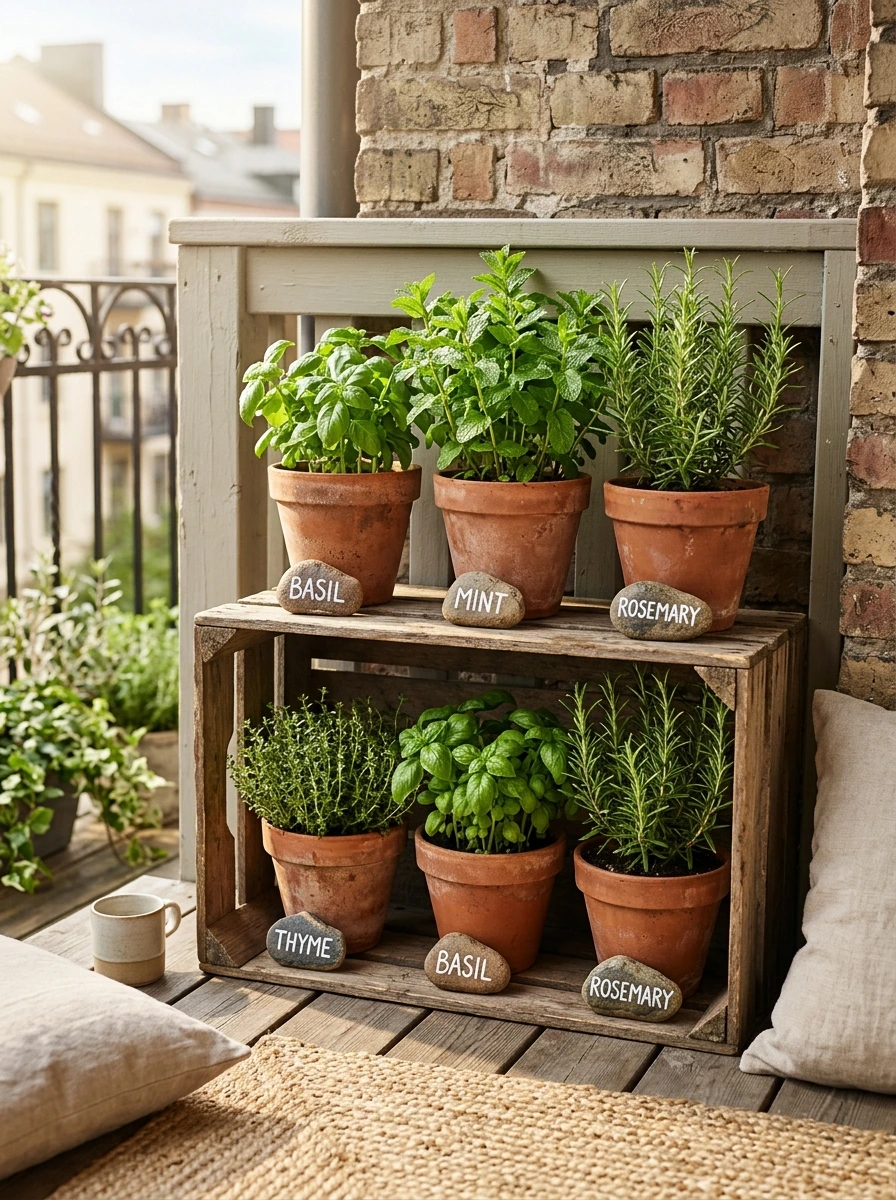
The VIVOSUN 5-Pack Herb Garden Planter Pots on Amazon are specifically designed for herb growing with drainage holes and saucers included. For a self-contained all-in-one solution, the Back to the Roots Window Garden Herb Kit includes everything — pots, soil, and seeds — making it perfect for complete beginners trying balcony garden ideas for beginners.

vivosun

Keep mint in its own separate pot — it spreads aggressively and will crowd out neighboring herbs if planted together. Place your herb corner in your balcony’s sunniest spot, as most culinary herbs need at least four to six hours of direct sun daily.

Budget estimate: $15 to $40

Best herbs: Basil, mint, rosemary, thyme, parsley, chives


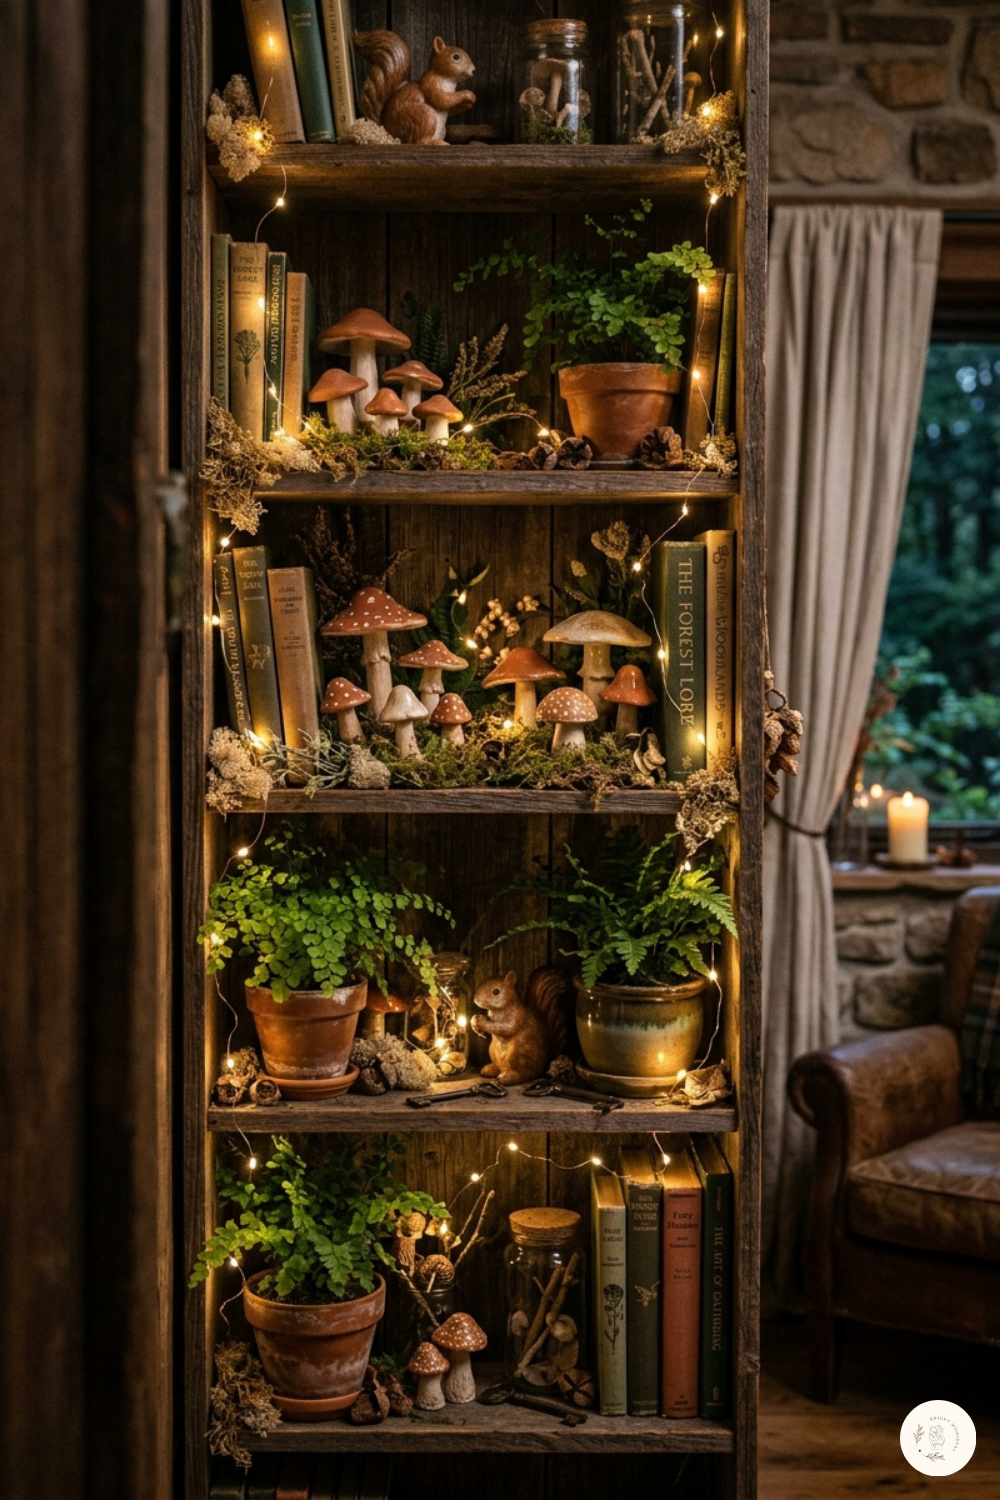
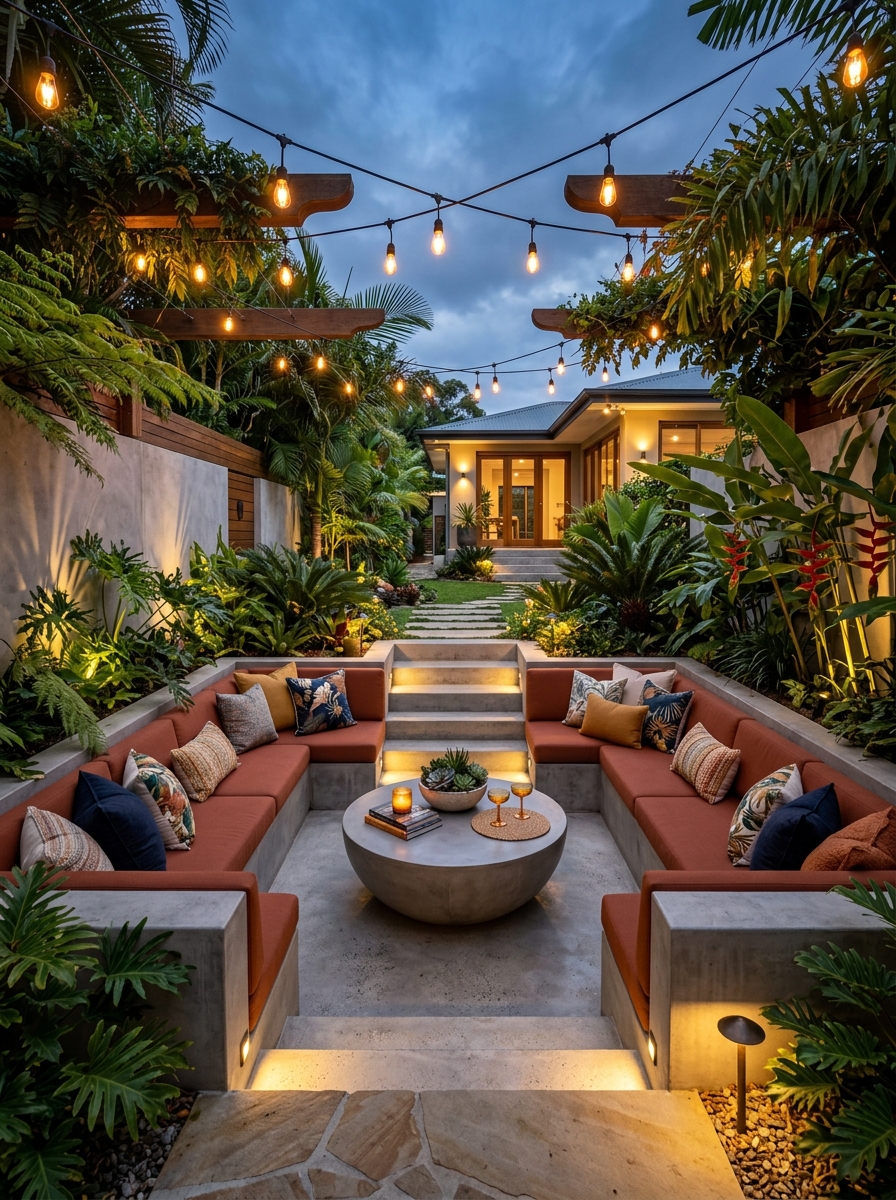
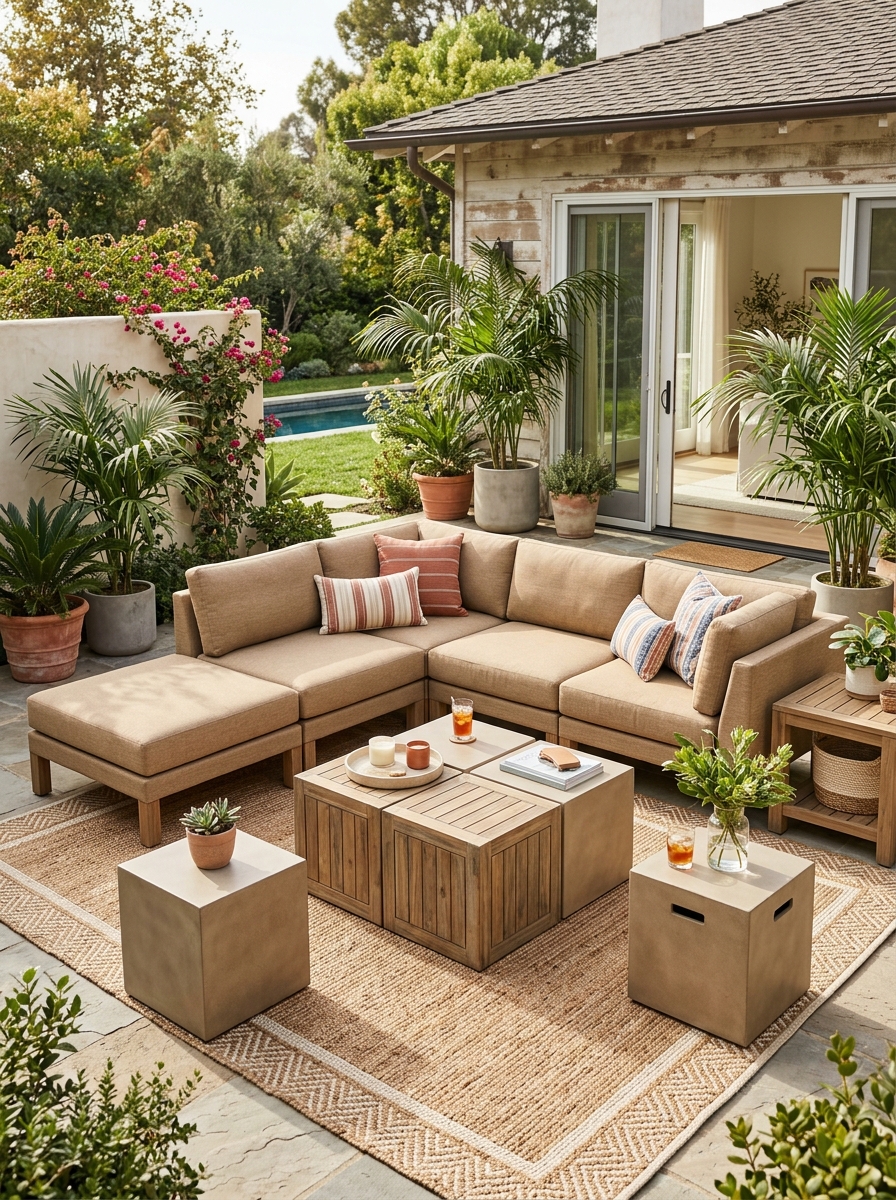
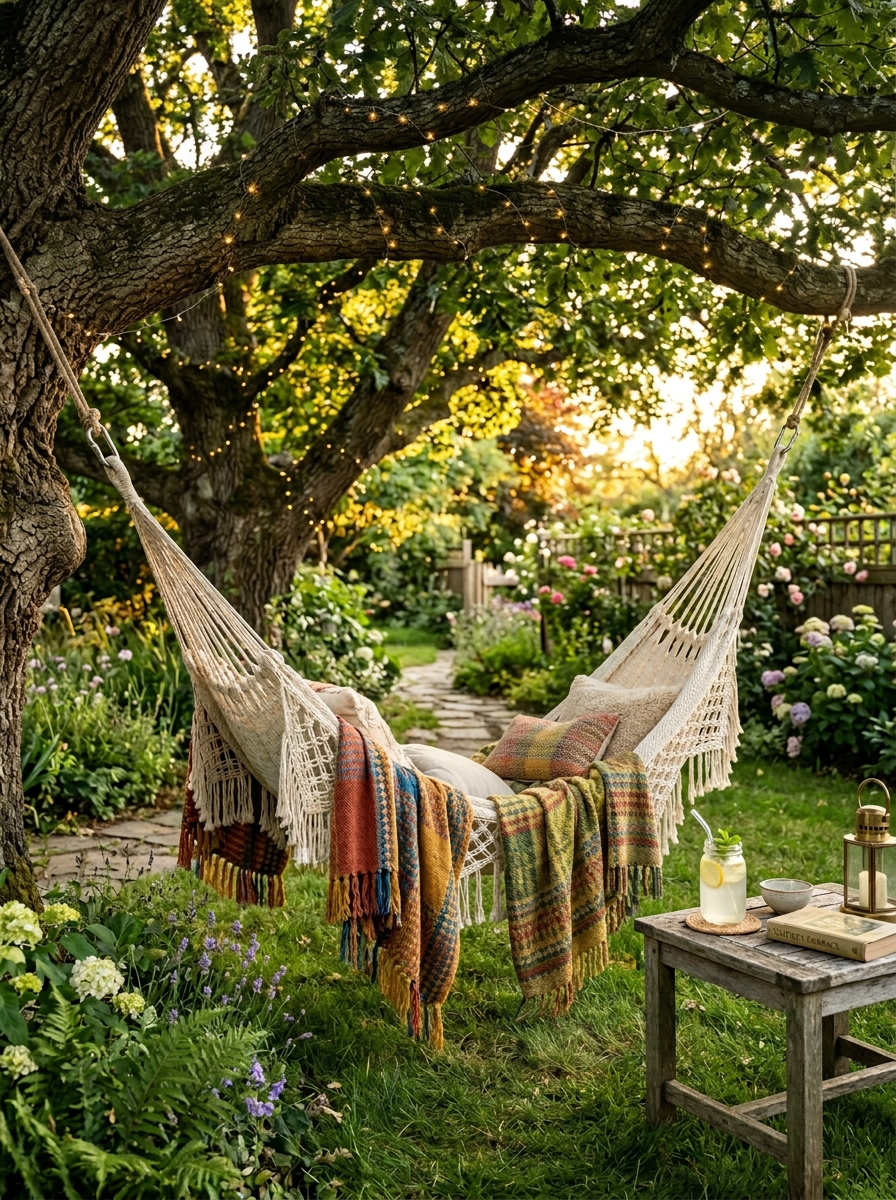
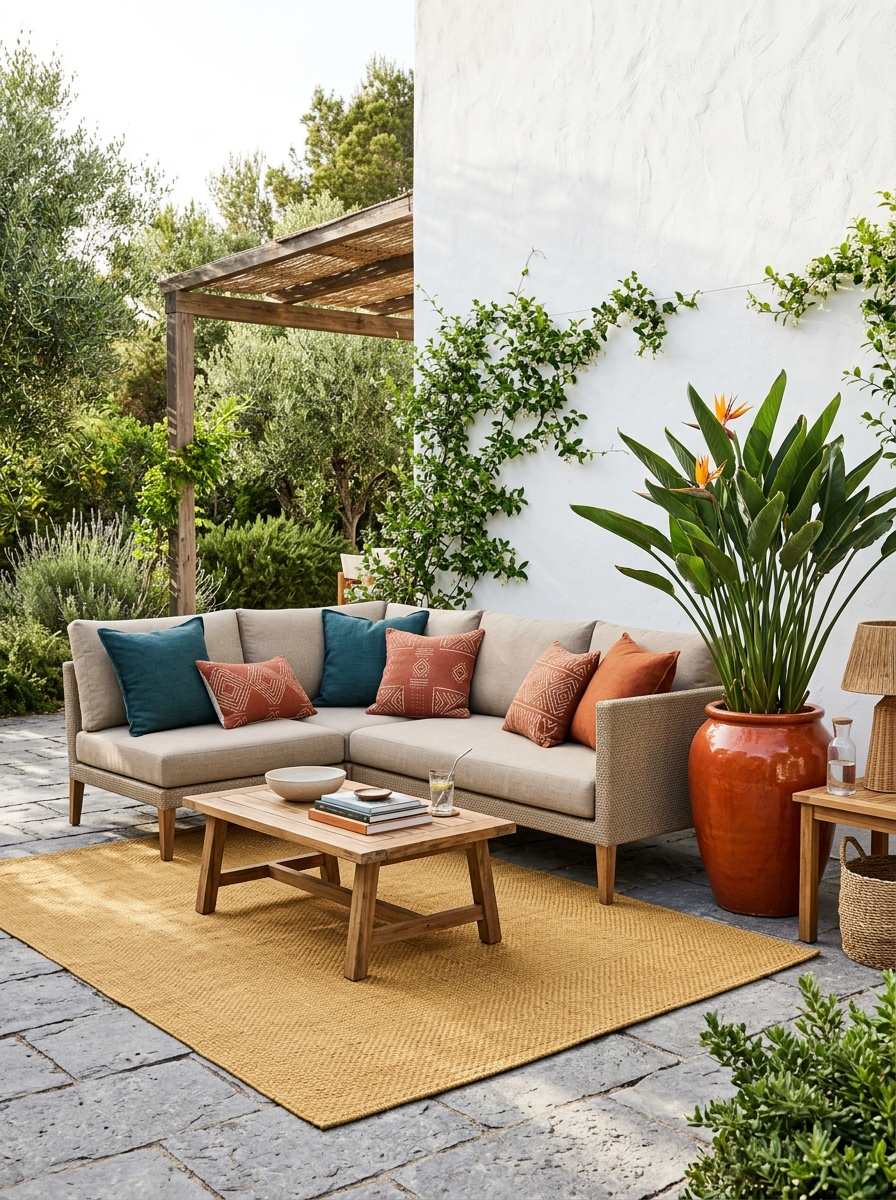
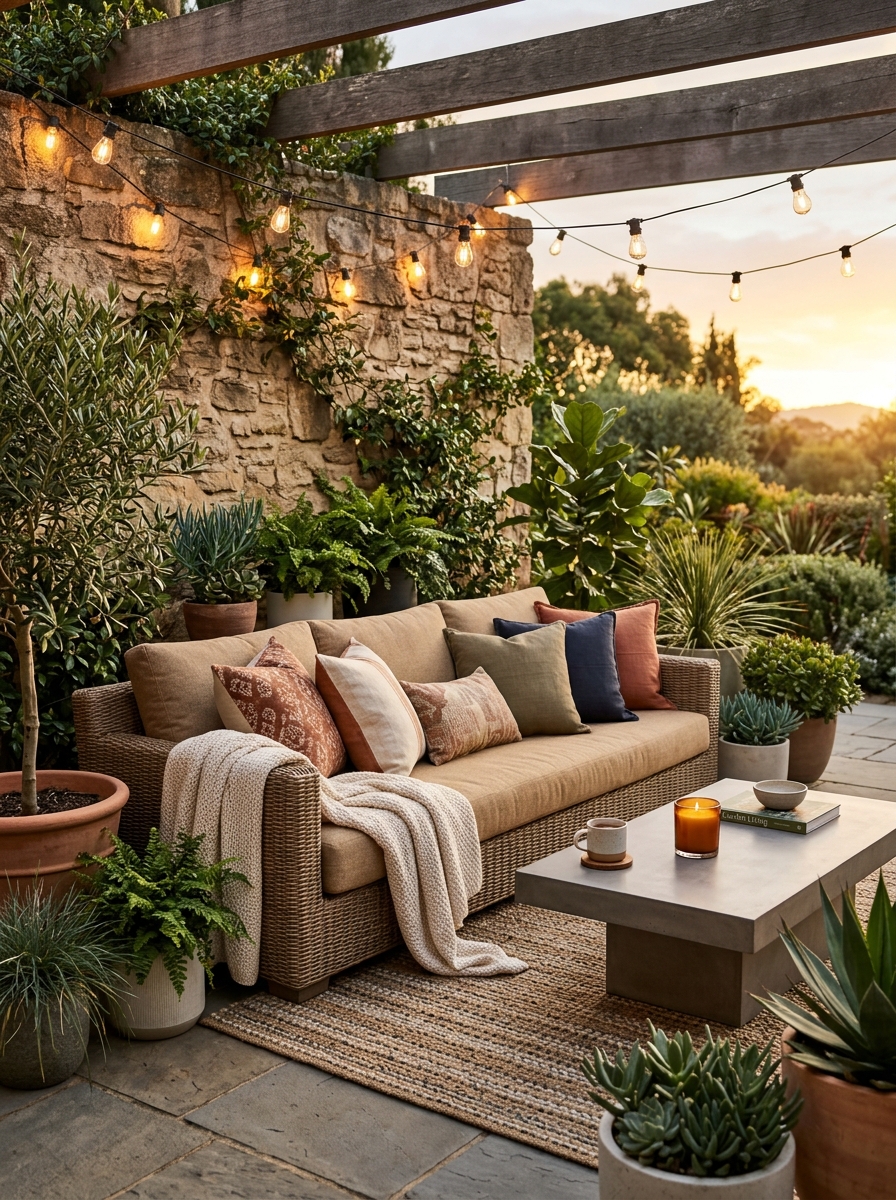
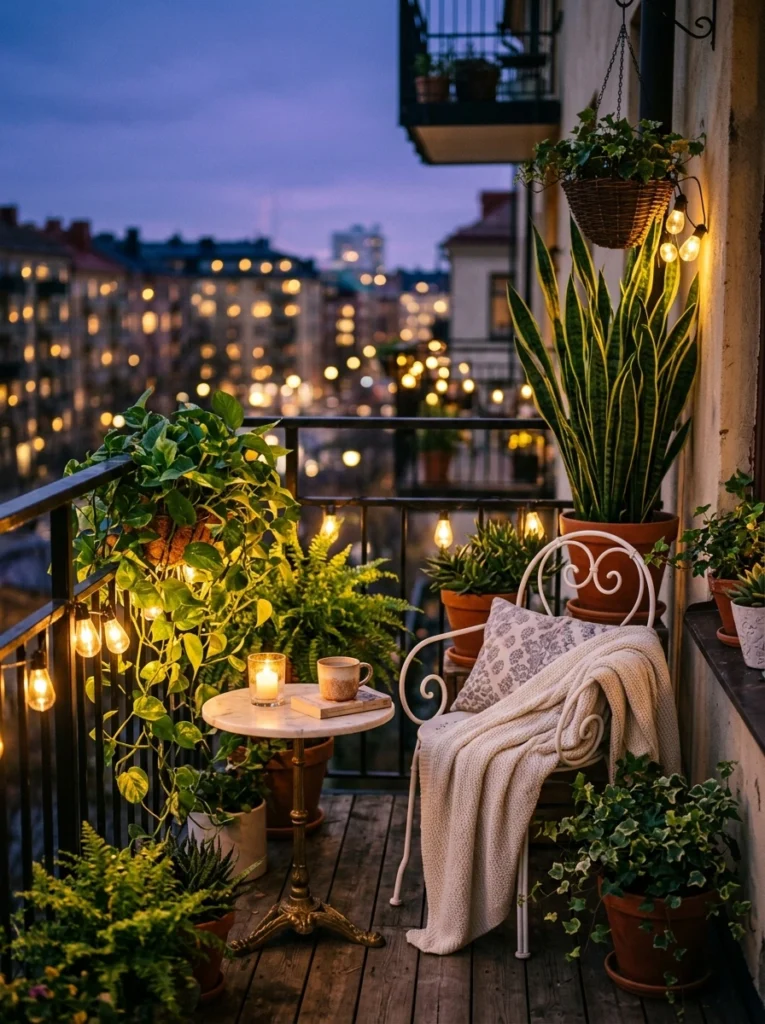
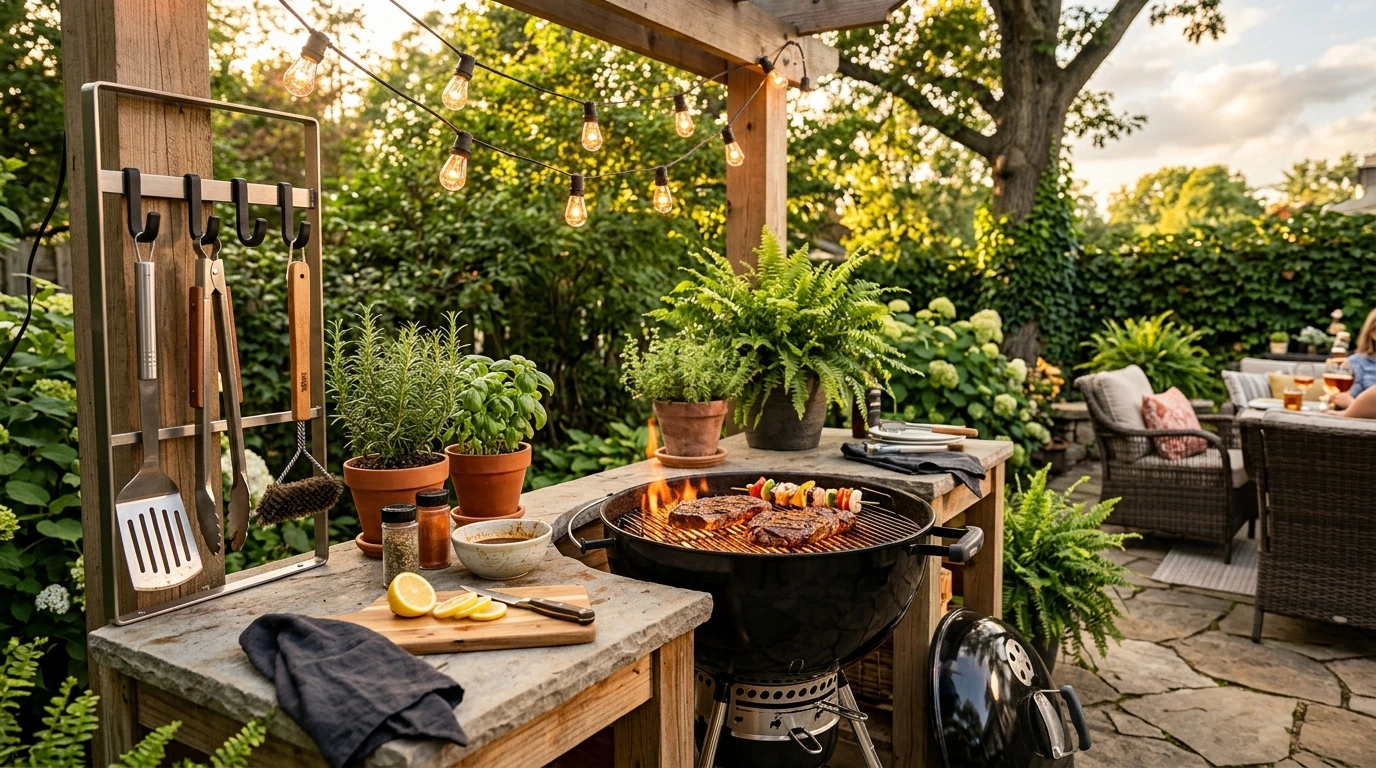
5: Fairy Light and Plant Aesthetic Corner

This idea is pure Pinterest magic — and it costs almost nothing to execute. Create a dedicated corner of your balcony where plants and soft lighting coexist, producing an atmosphere that feels like a private outdoor café.

balcony corner

The formula is simple: cluster three to five plants of varying heights together in one corner. Place the tallest at the back (a fiddle leaf fig, bamboo, or tall snake plant in a floor pot), medium plants in the middle (potted ferns, peace lilies, or philodendrons), and trailing plants or succulents at the front. Then weave solar-powered fairy lights through and around the plants so they glow softly after dark.

balcony corner

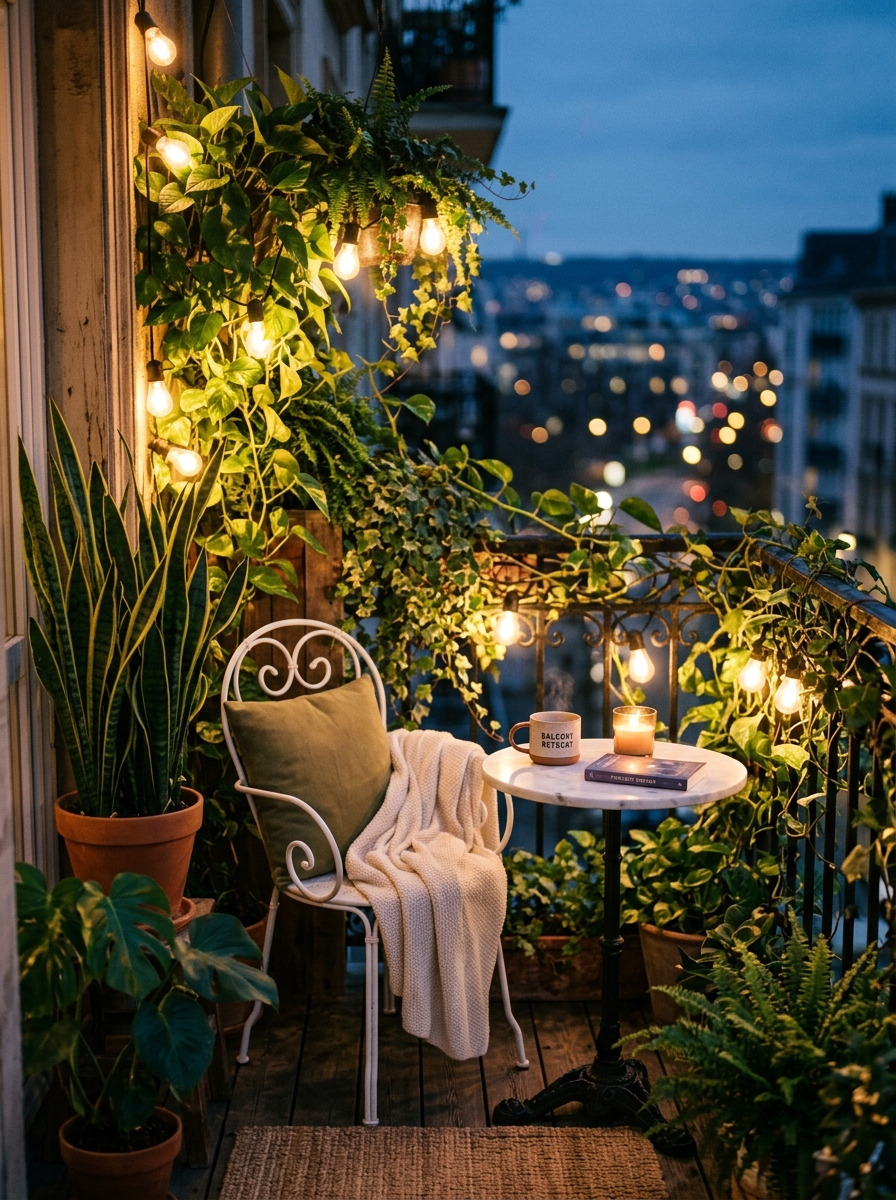
The Brightown Solar String Lights on Amazon are waterproof, require no electricity, and provide eight hours of soft warm light after a day of sun charging. The Govee Outdoor String Lights with Edison bulbs create a warmer, more golden glow for a cozier evening atmosphere.

Add a small bistro chair and side table in the corner and you have a complete outdoor retreat that took one afternoon to create and costs under $60 total.

Budget estimate: $25 to $60

Best plants: Snake plant, fern, pothos, peace lily, bamboo


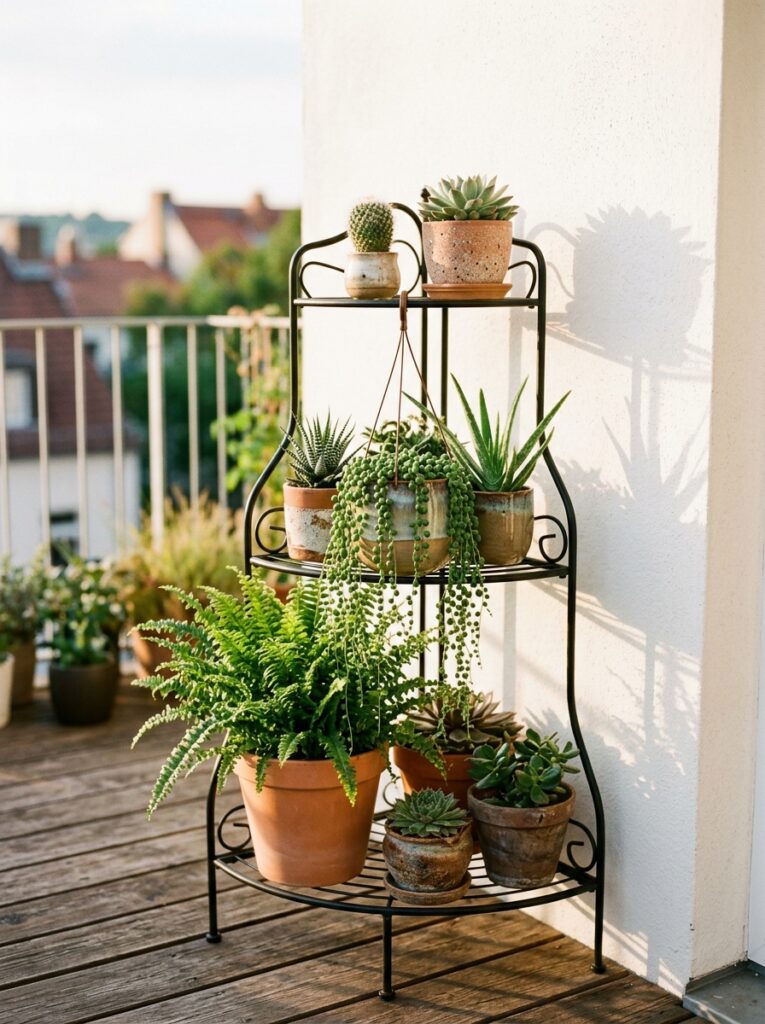
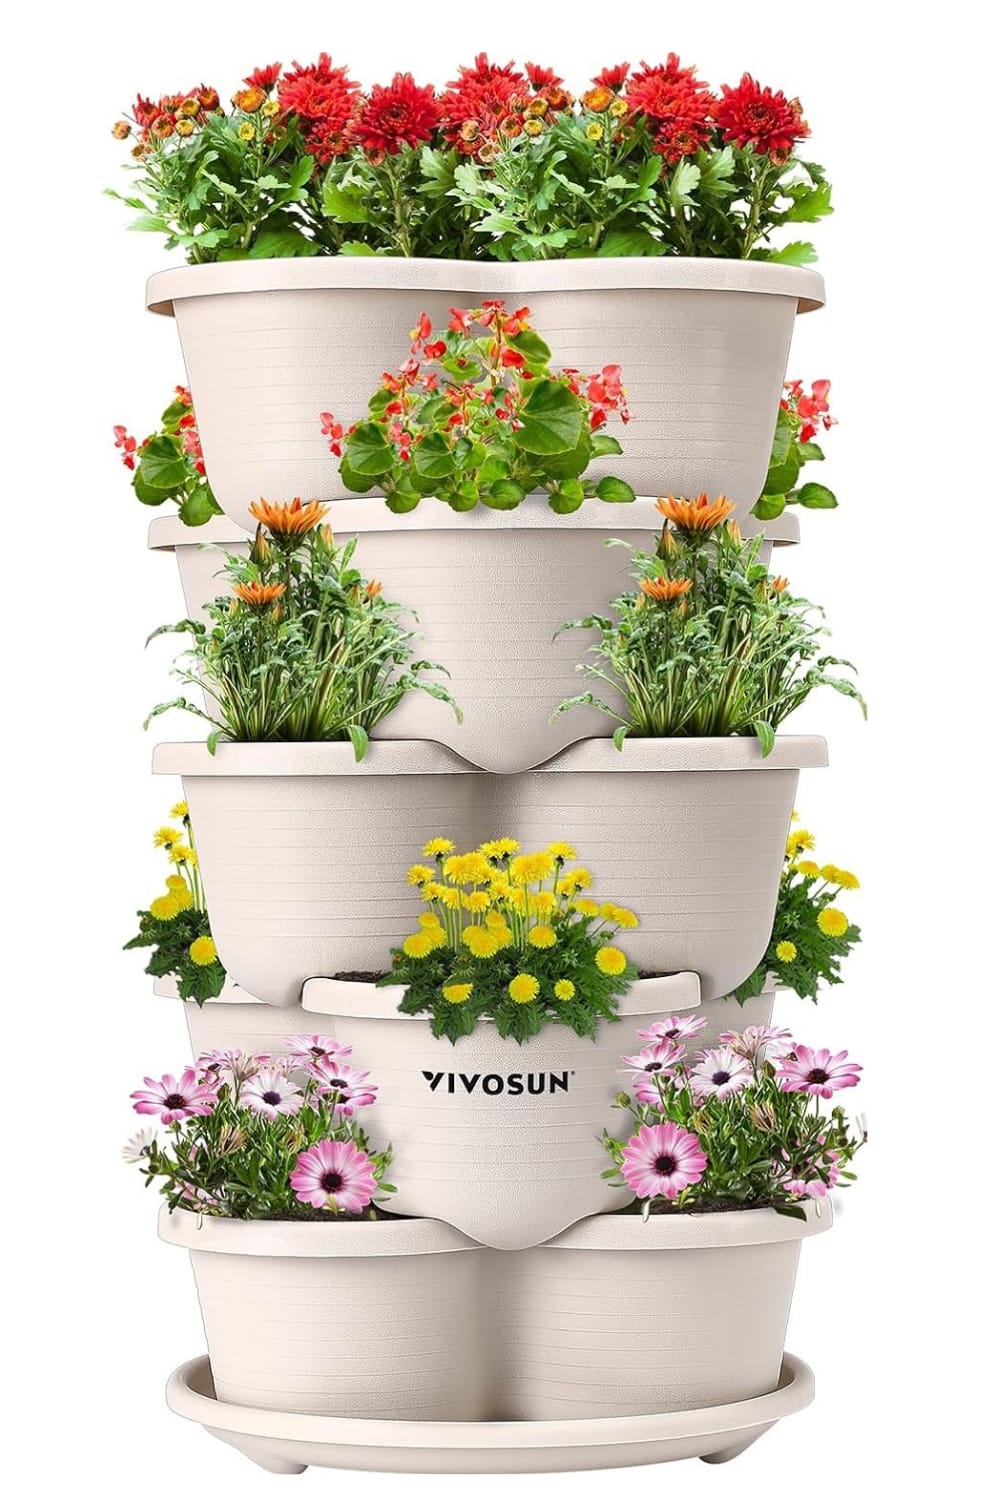
6: Tiered Plant Stand

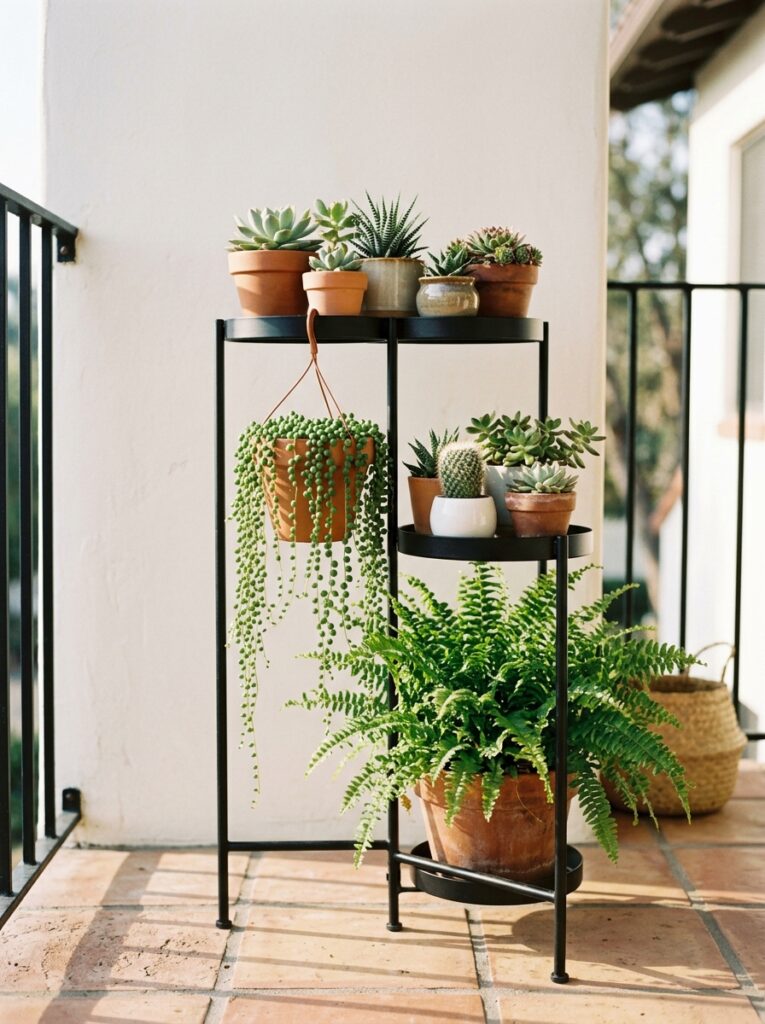
When floor space is the limiting factor, a tiered plant stand is the most space-efficient solution available. A three or four-tier stand holds eight to twelve plants in the footprint of a single large pot.

Arrange plants by height and light needs — sun-loving plants on the top tier where light is strongest, shade-tolerant plants on lower tiers. Mix textures and colors deliberately: a spiky cactus beside a soft trailing string of pearls beside a broad-leafed hosta creates visual interest that a uniform planting never achieves.

The FANHAO 4-Tier Plant Stand on Amazon is one of the best-selling options in this category, with a powder-coated steel frame that handles outdoor conditions without rusting. The Bamboo Plant Stand 3-Tier is a warmer, more natural-looking alternative that suits bohemian and natural aesthetics particularly well.

This is one of the most effective small balcony garden ideas on a budget for people who want a lot of plants without a lot of space — and without a lot of effort arranging them.

Budget estimate: $20 to $45 for the stand, plants extra

Best plants: Succulents, cacti, herbs, trailing plants, small ferns


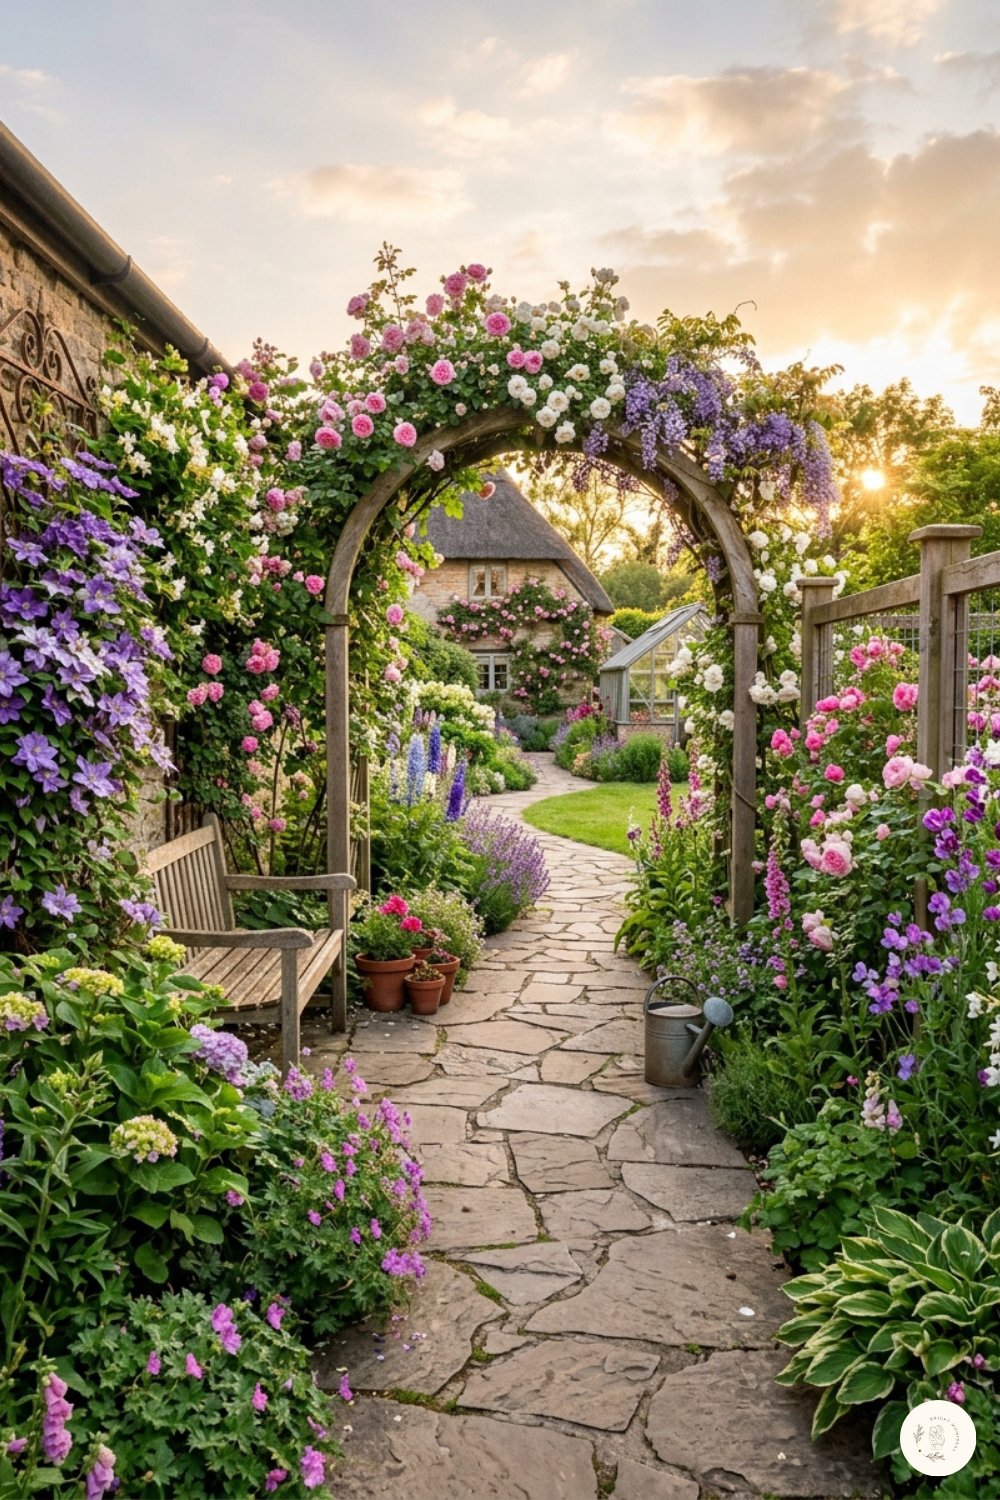
7: Balcony Privacy Screen with Climbing Plants

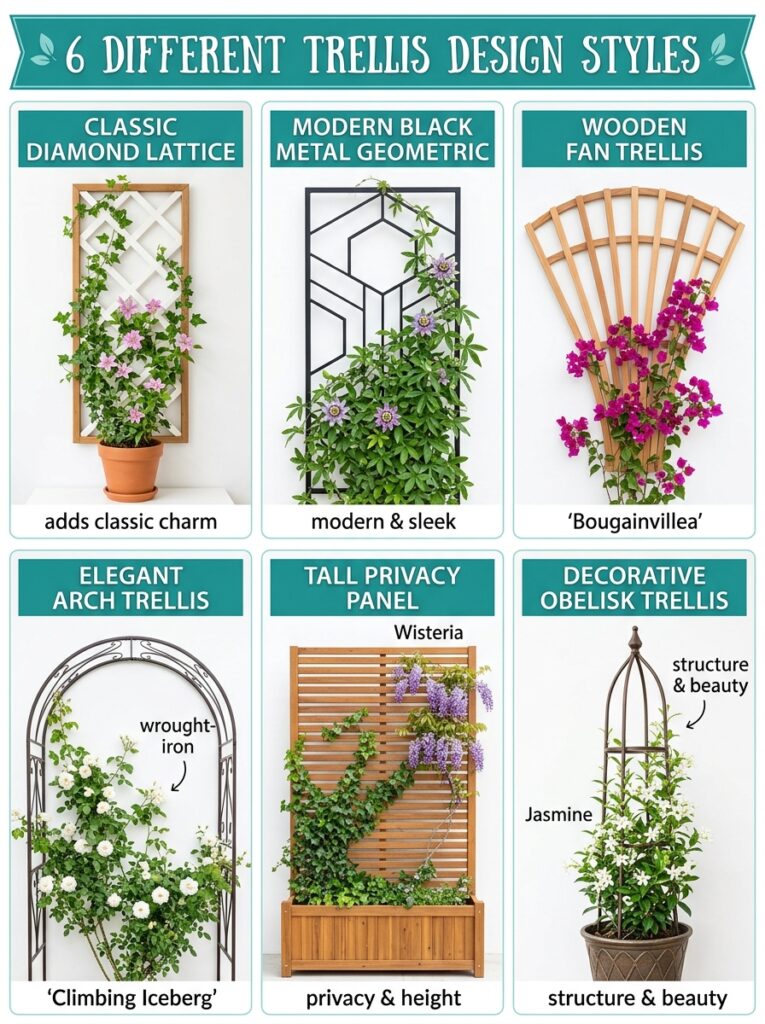
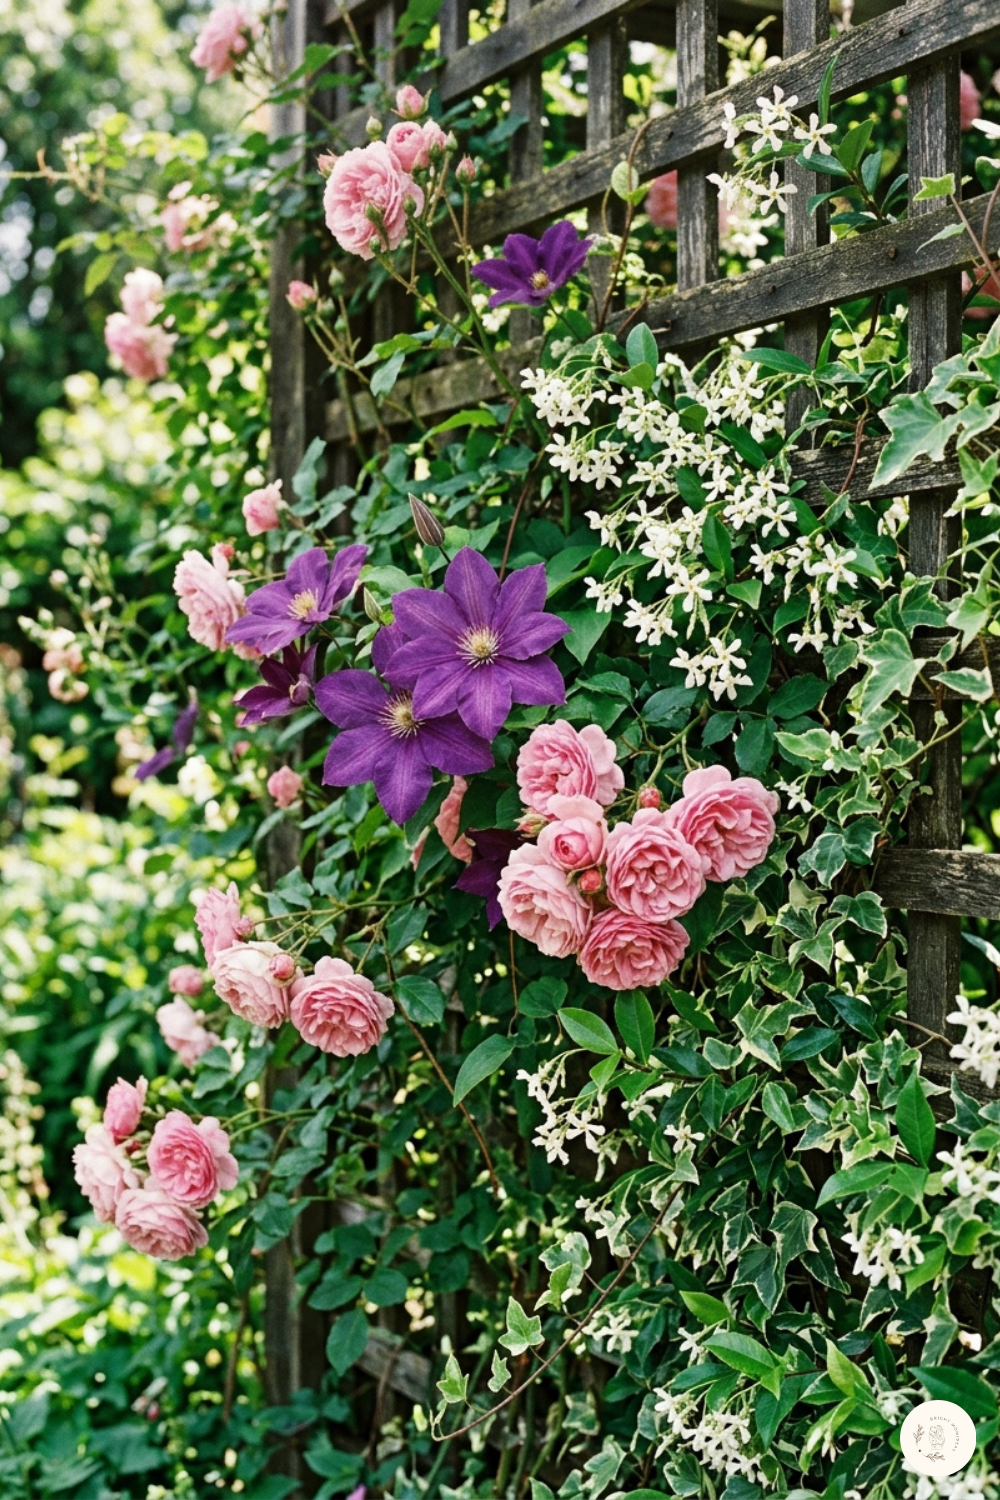
This idea solves two problems simultaneously — it gives you privacy from neighbors and creates a living green wall. A bamboo privacy screen or wooden trellis mounted along the outer edge of your balcony provides a structure for climbing plants to grow up and over, eventually creating a dense natural screen.

Balcony Privacy Screen with Climbing Plant Balcony Privacy Screen with Climbing Plant

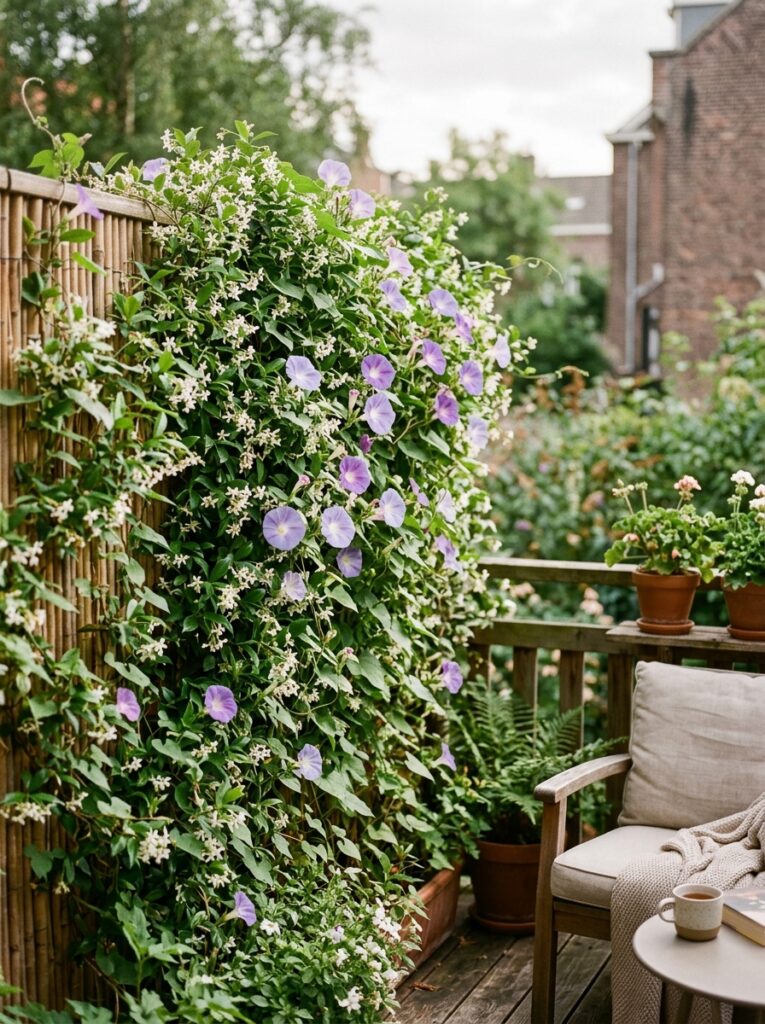
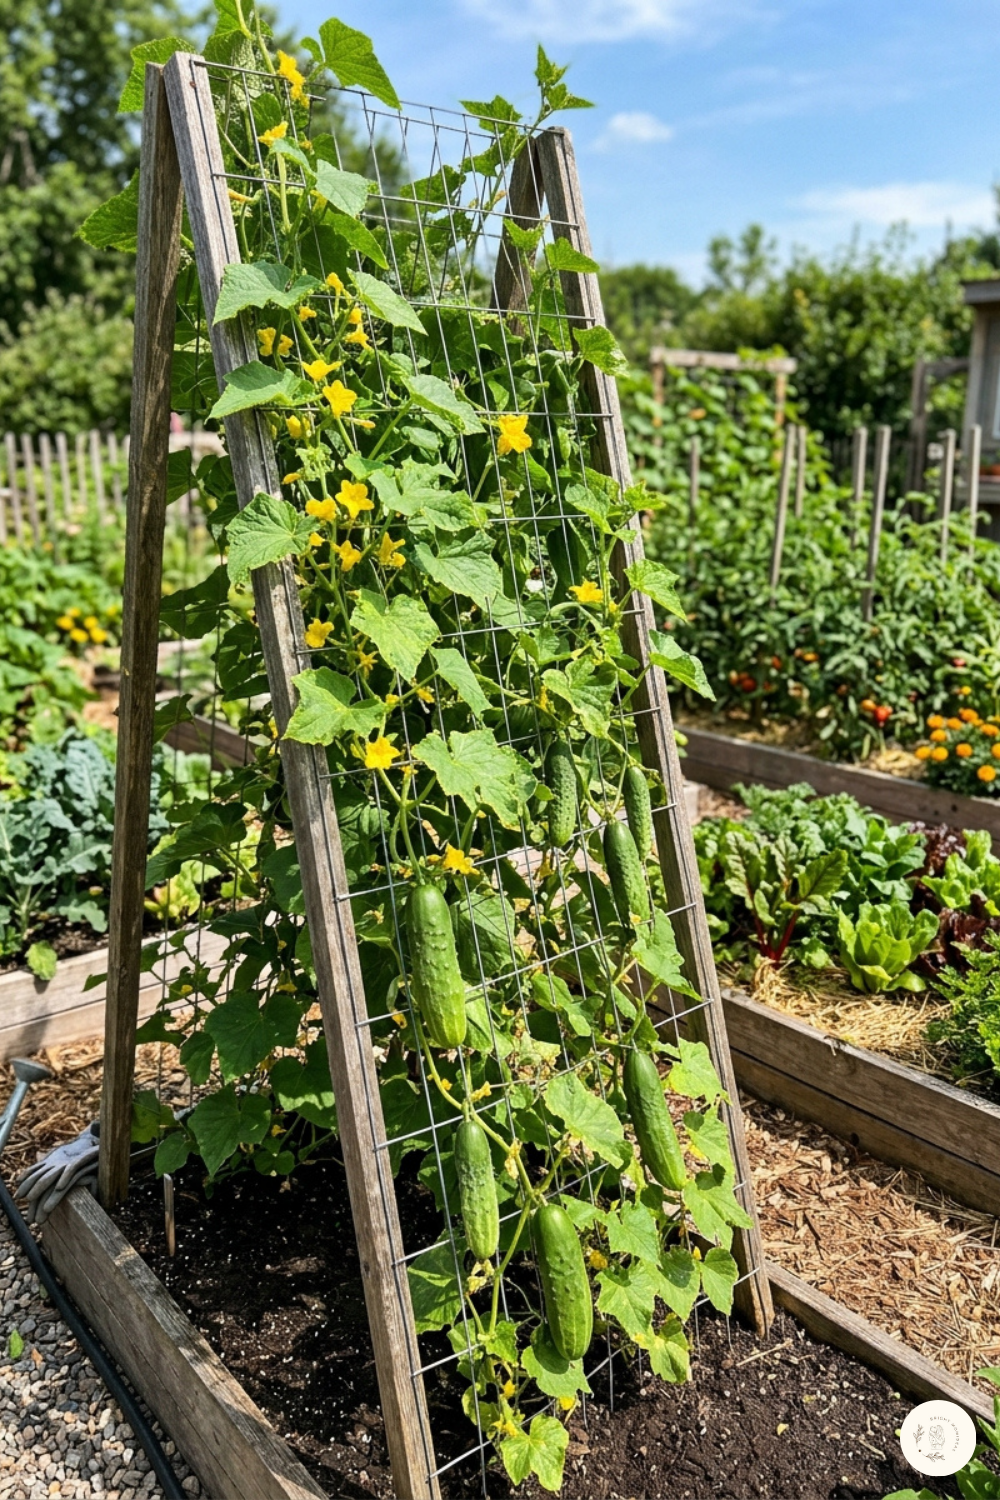
Fast-growing climbing plants suitable for containers include jasmine (fragrant and beautiful), morning glory (stunning daily blooms), black-eyed Susan vine, and climbing nasturtium. For a food-productive option, runner beans and cucumbers climb readily and produce edible harvests throughout the season.

The ZENY Bamboo Privacy Screen on Amazon installs without tools using zip ties and creates an immediate visual barrier while your plants establish. The Gardener’s Blue Ribbon Ultomato Plant Cage works as an excellent freestanding trellis for container climbing plants on balconies where wall mounting is not possible.

Budget estimate: $20 to $50 for the screen, seeds under $5

Best plants: Jasmine, morning glory, nasturtium, runner beans, sweet peas


8: Succulent and Cactus Mini Garden

For anyone who loves the look of a garden but struggles with consistency in watering and care, a succulent and cactus mini garden is the perfect solution. These plants are practically indestructible, require watering only once every one to two weeks, and come in such extraordinary variety of shapes and colors that an arrangement of eight to ten different varieties looks like living sculpture.

Succulent and Cactus Mini Garden

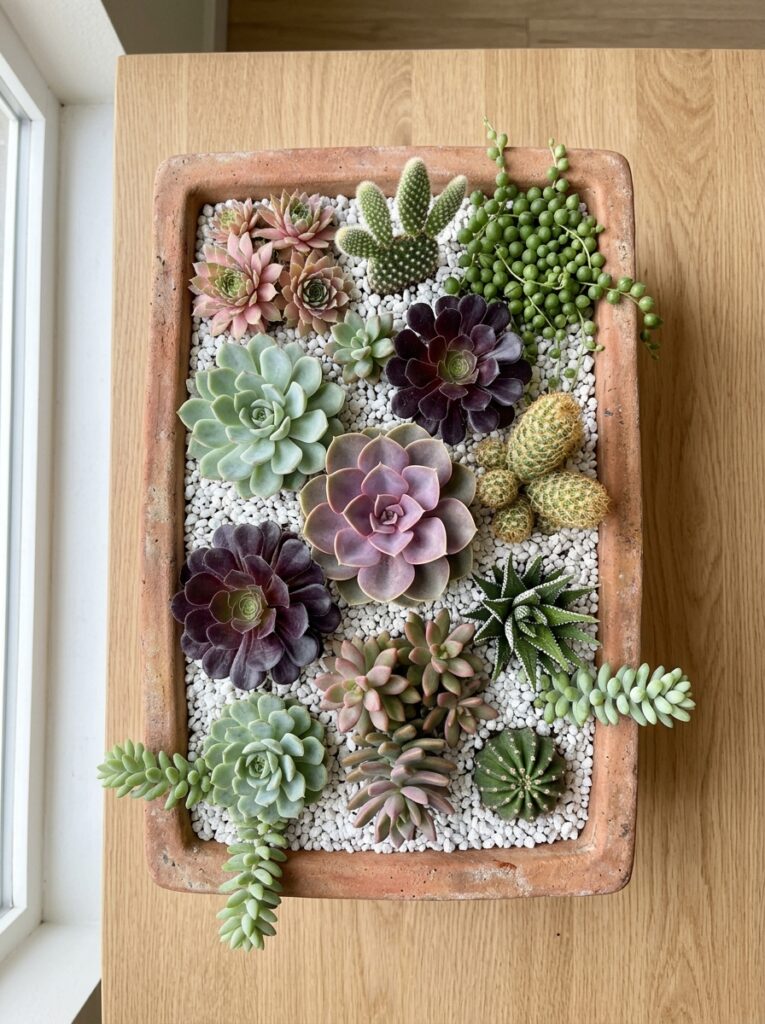
Group succulents and cacti together in a wide, shallow terracotta trough planter filled with a cactus-specific potting mix (regular potting soil holds too much moisture and causes root rot). Top dress the soil with decorative gravel or colored pebbles for a finished, polished look.

The Altman Plants Assorted Succulents 20-Pack on Amazon gives you twenty different varieties at a fraction of the cost of buying individually. The Hoffman 10410 Organic Cactus and Succulent Soil Mix ensures proper drainage from the very start.

This is genuinely the lowest-maintenance way to have a beautiful aesthetic balcony garden 2026 — and it photographs incredibly well in natural light.

Budget estimate: $20 to $45

Best varieties: Echeveria, haworthia, aloe, sedum, mammillaria cact

9: Upcycled Container Garden

This is the truly zero-cost idea — and often the most creative and characterful of all. Almost any container can become a plant pot with a few drainage holes drilled in the bottom. Old tin cans painted in coordinating colors and mounted on a wooden board create a modern, graphic herb wall. A worn wooden ladder leaned against the wall holds plants on each rung. Vintage colanders, old teapots, cracked ceramic bowls, worn rubber boots, and wooden wine boxes all become charming plant containers with a little imagination.

 Upcycled Container Garden  Upcycled Container Garden

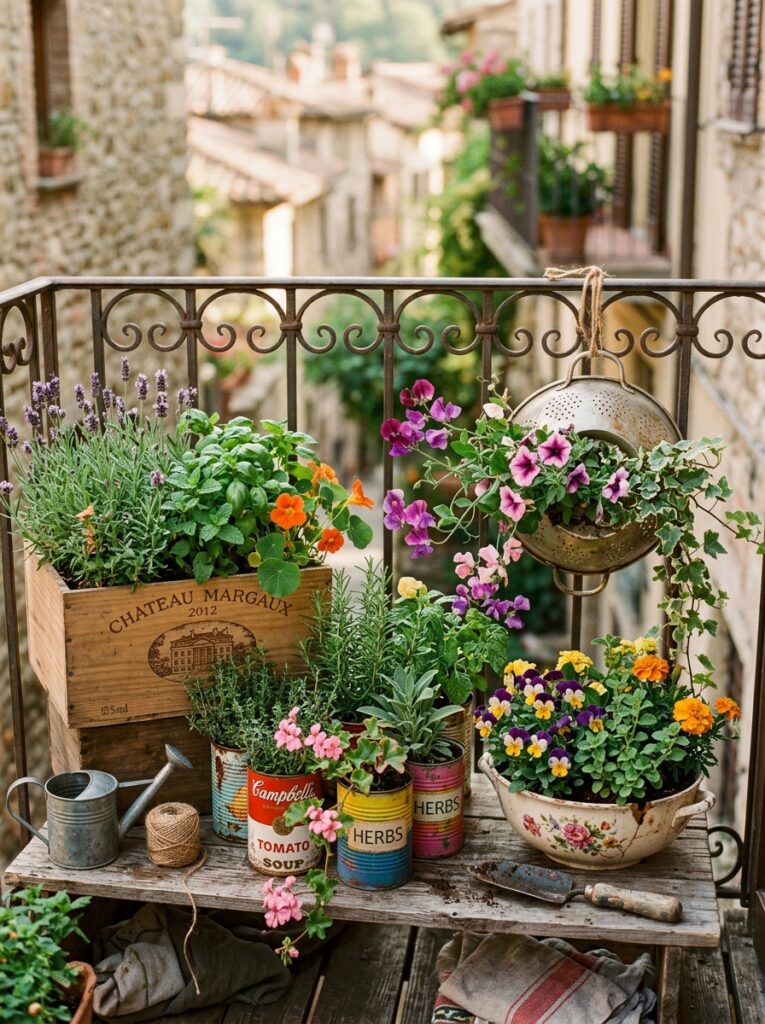
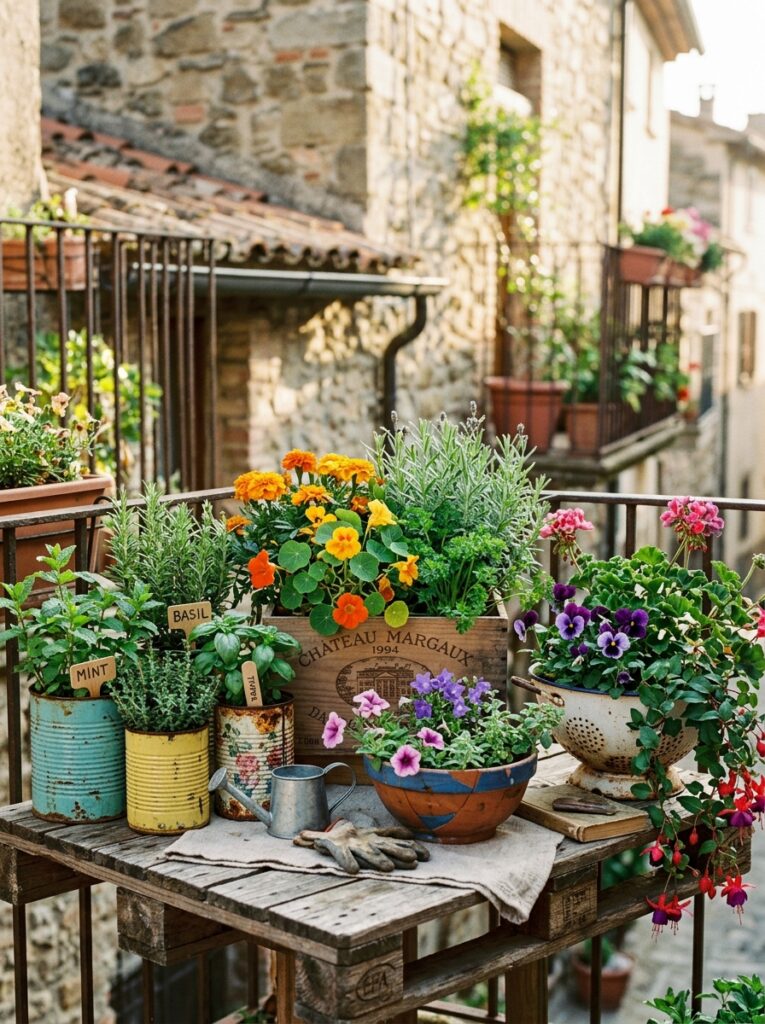
Search “upcycled planter ideas” on Pinterest for endless inspiration — this aesthetic consistently generates high engagement because it is both sustainable and visually distinctive. Document your process as you create and photograph your finished containers beautifully — this content performs extremely well on Pinterest and helps drive traffic to your blog.

The only product you genuinely need for this idea is good quality potting mix — the Miracle-Gro Potting Mix on Amazon is the most reliable general-purpose option available and significantly outperforms cheaper alternatives in plant growth and drainage.

Budget estimate: $0 to $15 (just potting mix)

Best plants: Herbs, succulents, trailing ivy, pansies, violas


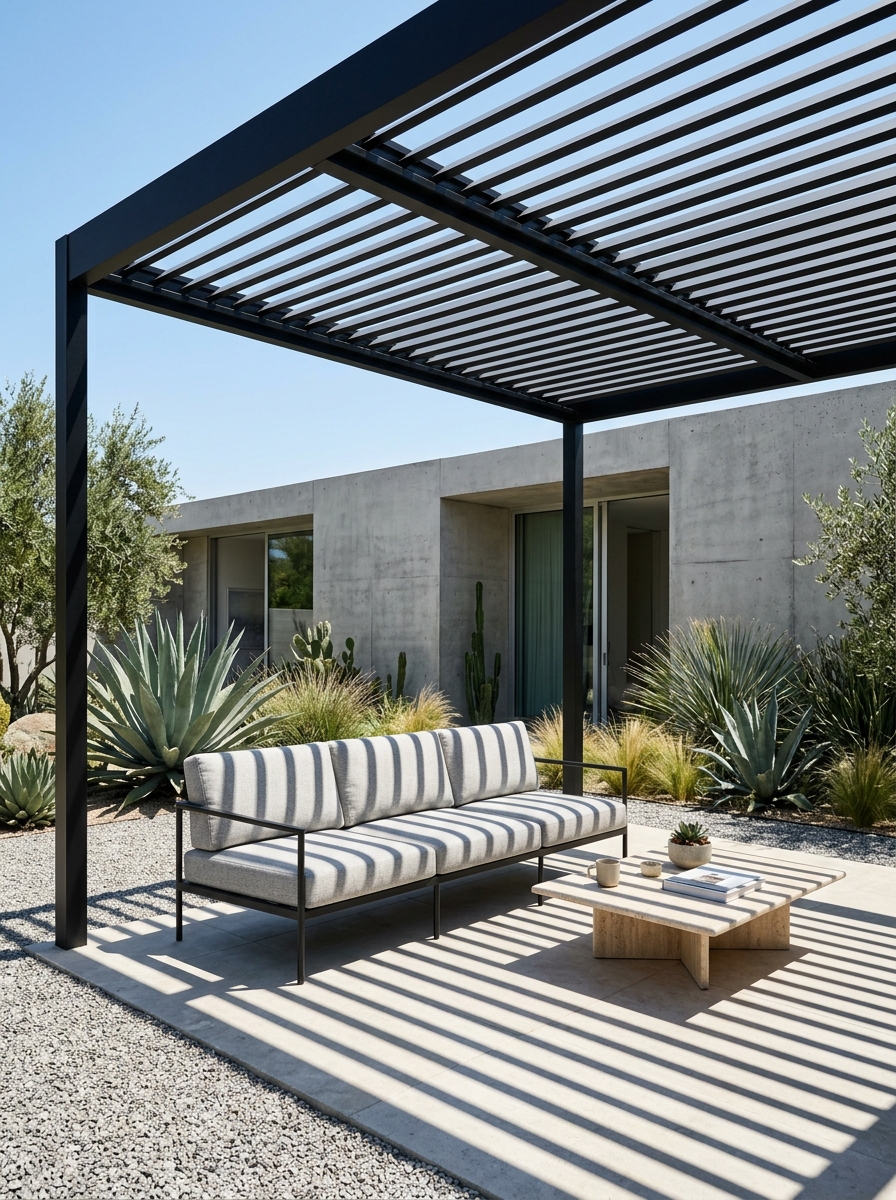
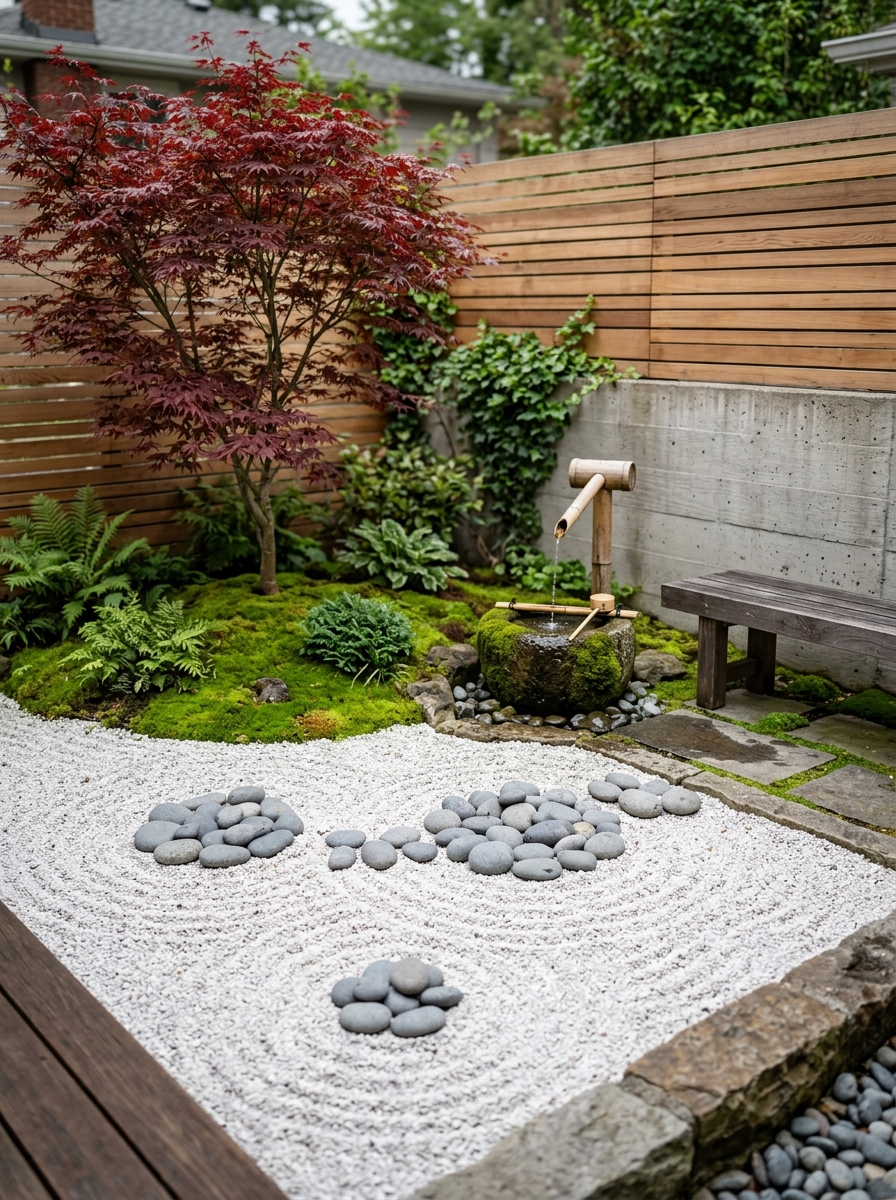
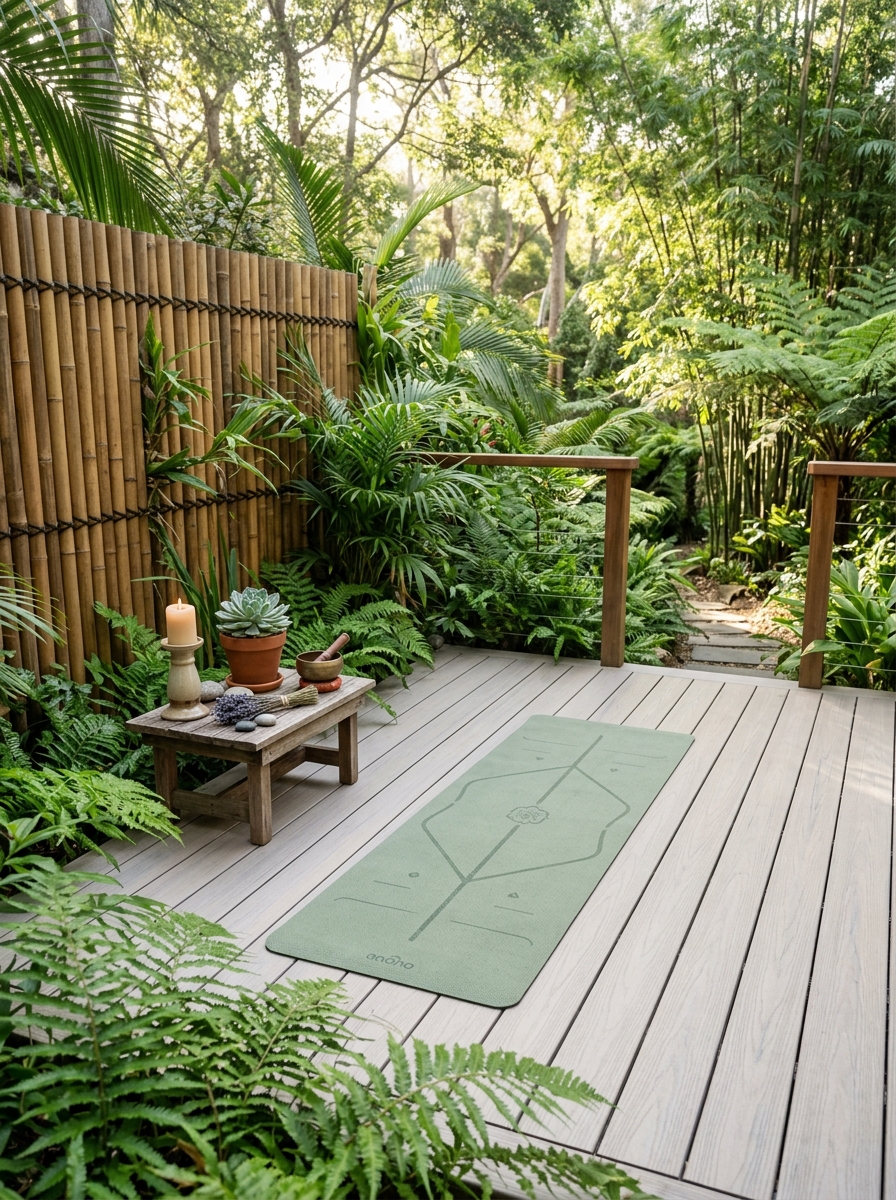
10: Zen Balcony Garden with Pebbles and Greenery

The Zen-inspired balcony garden is the most calming, most sophisticated, and most visually distinctive approach on this list. Drawing from Japanese garden design principles, it combines minimalist plant selection with natural materials — pebbles, bamboo, stone — to create a space that feels peaceful the moment you step onto it.

Zen Balcony Garden with Pebbles and Greenery

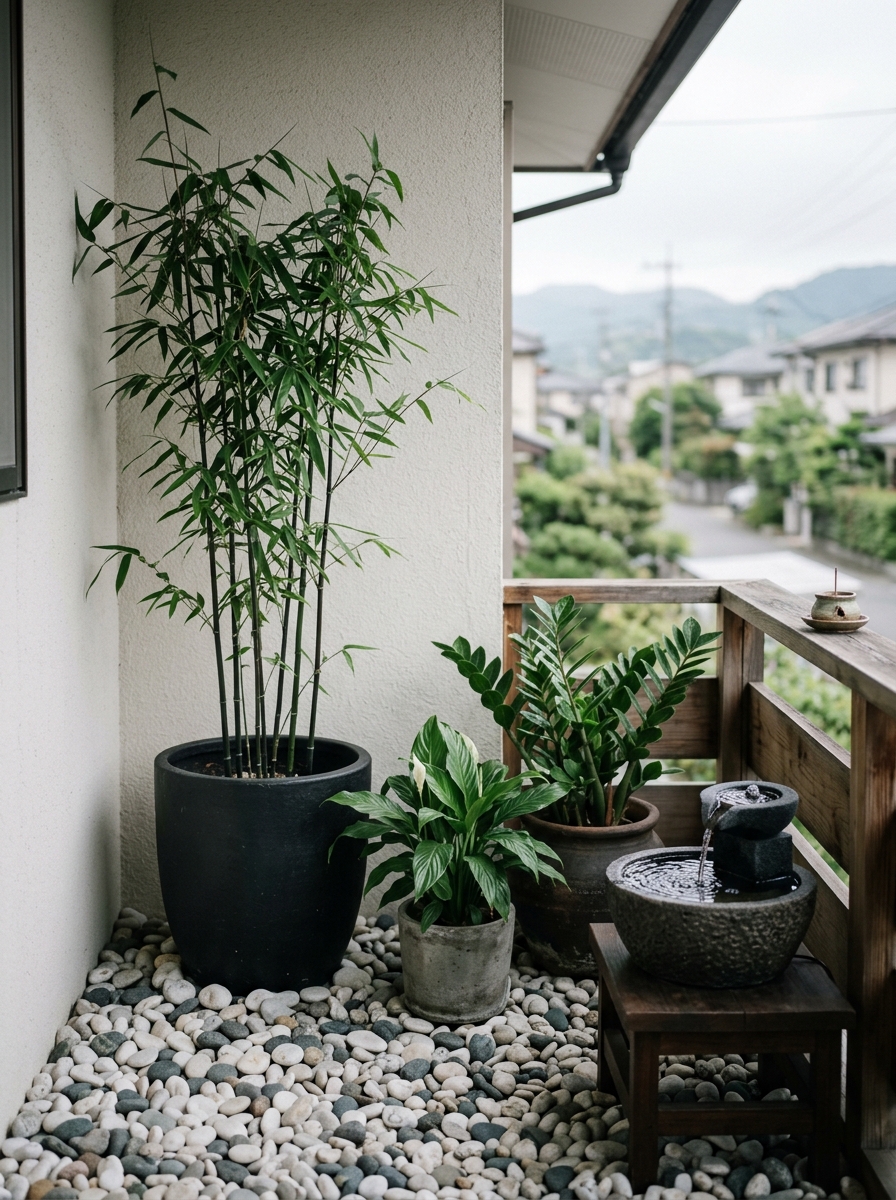
The foundation is a layer of decorative white or grey pebbles covering the balcony floor (placed on top of a weed membrane to protect the surface). Against one wall, place a tall bamboo plant in a dark ceramic pot. Add a peace lily, a ZZ plant, and a low moss ball (kokedama) on a small wooden platform. Include a small water feature — even a tabletop solar fountain creates the sound of moving water that defines the Zen aesthetic.

The ARCADIA GARDEN PRODUCTS Decorative Pebbles on Amazon are perfect for this application. The SZMP Solar Fountain Pump requires no wiring and creates a gentle water sound that transforms the entire balcony atmosphere.

Resist the urge to add more — restraint is the defining principle of Zen design. Three to five plants, natural materials, and open space are all you need.

Budget estimate: $40 to $80

Best plants: Bamboo, peace lily, ZZ plant, moss, bonsai


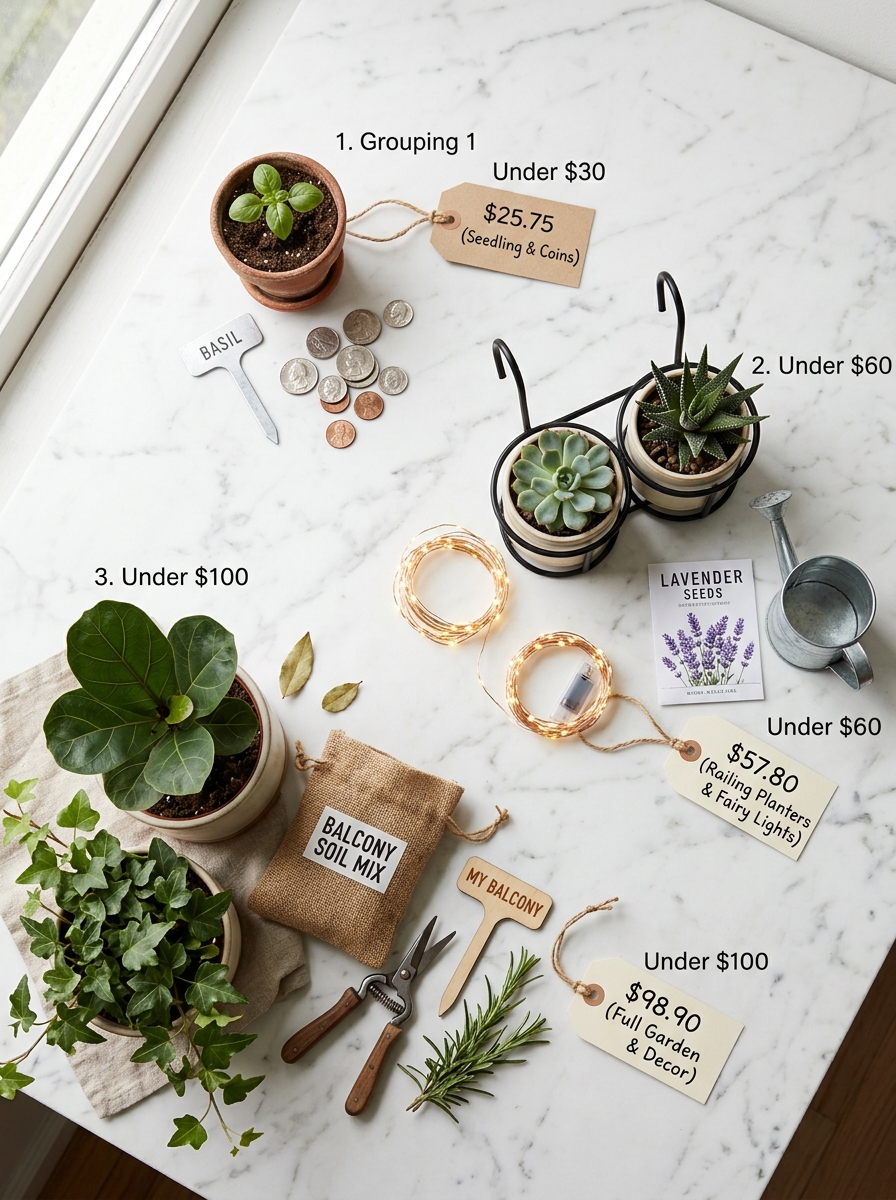
Budget Breakdown: What You Can Achieve at Every Level

Under $30: Upcycled container garden plus one vertical pallet wall with seeds. Fully functional, highly aesthetic.

Under $60: Railing planters, a tiered plant stand, fairy lights, and a DIY herb corner. A genuinely complete balcony garden.

Under $100: All of the above plus a privacy screen with climbing plants and a small Zen corner. A fully transformed outdoor space that looks professionally designed.


Quick Tips for Balcony Gardening Success

Sunlight assessment: Before buying any plant, spend one day observing how many hours of direct sun your balcony receives. Full sun (six-plus hours) supports vegetables, herbs, and most flowering plants. Partial shade (three to six hours) suits ferns, impatiens, and peace lilies. Deep shade (under three hours) limits you to pothos, snake plants, and ZZ plants — but those are beautiful options.

Watering efficiently: Balcony plants dry out faster than ground plants because containers have limited soil volume and wind increases evaporation. Self-watering pots and drip tray reservoirs significantly reduce how often you need to water. The Santino Self Watering Planter on Amazon is one of the best-reviewed options for balcony use.

Weight awareness: If you are planning a large balcony garden with many pots, be mindful of total weight — saturated soil is heavy. Use lightweight fabric grow bags and perlite-heavy potting mixes to keep the overall weight manageable. Plastic pots weigh significantly less than ceramic or terracotta when scaling up.

Wind protection: High balconies experience strong winds that damage delicate plants and dry soil rapidly. Position sensitive plants against walls for shelter, and choose sturdy varieties known for wind tolerance — lavender, ornamental grasses, and rosemary all handle wind well.


Final Thoughts

Your balcony — however small, however bare it looks right now — has the potential to become the most-used and most-loved space in your home. These 10 small balcony garden ideas on a budget prove that square footage is not the limiting factor. Creativity and a little investment of time and money are all that stand between your current balcony and the green, glowing, aesthetic retreat you have been picturing.

Start with one idea this weekend. Just one. Add the next idea next month. By the end of the season you will have a small balcony makeover that surprises even you — and gives you something genuinely worth pinning. 🌿


Frequently Asked Questions (FAQ)

Q1: What can I do to create a beautiful balcony garden?

Creating a beautiful balcony garden starts with a simple three-step approach: assess, plan, and execute.

First, assess your space honestly. Measure your balcony dimensions, observe how many hours of sunlight it receives daily, and note which direction it faces. A south-facing balcony gets the most sun while a north-facing one stays mostly shaded — this determines everything about which plants will work for you.

Second, plan your layout before spending a single rupee or dollar. Decide which areas will have floor plants, which wall or railing space will hold mounted planters, and whether you have ceiling hooks or beams for hanging baskets. Sketch a rough layout on paper — it takes ten minutes and saves hours of rearranging later.

Third, execute in layers. Start with your largest plant or structural element (a tall floor pot, a vertical pallet wall, or a tiered plant stand) and build outward from there. Add medium plants next, then trailing and hanging plants, and finish with decorative touches like fairy lights, pebbles, and plant markers.

The most important thing to remember is that beauty in a balcony garden comes from variety — mixing different leaf shapes, plant heights, pot textures, and colors creates visual richness that a single type of plant never achieves. Combine a spiky cactus with a soft trailing pothos, a broad-leafed peace lily with delicate feathery ferns, and your balcony instantly looks professionally designed.

Finally, do not neglect the non-plant elements. A small bistro chair, a weatherproof outdoor rug, soft string lights, and a few decorative pots transform a collection of plants into a complete outdoor living space that you genuinely want to spend time in.


Q2: How to make your own small garden in an apartment?

Making your own garden in an apartment is entirely possible even without outdoor space — and with a balcony, your options expand dramatically.

Start with containers. Every apartment garden lives in pots, planters, grow bags, or hanging baskets. Choose containers with drainage holes — this is non-negotiable. Without drainage, roots sit in waterlogged soil and rot within weeks. Place saucers underneath to catch excess water and protect your flooring.

Choose the right soil. Never use garden soil from outside in containers — it compacts, drains poorly, and often carries pests. Use a quality potting mix specifically formulated for container gardening. Adding perlite (roughly 20% of your total mix volume) improves drainage and aeration significantly.

Select apartment-friendly plants. The best plants for apartment gardens are those that thrive in containers and tolerate the slightly different conditions of balcony life — more wind, faster drying soil, and reflected heat from walls. Top choices include herbs like basil, mint, and rosemary; vegetables like cherry tomatoes, lettuce, and chili peppers; flowering plants like petunias, marigolds, and geraniums; and foliage plants like pothos, snake plants, and philodendrons.

Water correctly. Apartment balcony plants dry out faster than ground plants because containers have limited soil volume and wind increases evaporation. Check soil moisture by pushing your finger one inch into the soil — water only when it feels dry at that depth. Overwatering kills more apartment garden plants than underwatering does.

Fertilize regularly. Container plants exhaust their soil nutrients within six to eight weeks. After that point, feed with a balanced liquid fertilizer every two weeks during the growing season to maintain healthy, productive growth.

Use vertical space. Apartment gardeners who only think horizontally miss their most valuable real estate. Wall-mounted planters, hanging baskets, railing boxes, and tiered plant stands multiply your growing space several times over without using any additional floor area.


Q3: How to set up a small garden on a balcony?

Setting up a balcony garden is a straightforward process when broken into clear stages. Here is the complete setup sequence from bare balcony to thriving garden:

Stage 1 — Clean and prepare your balcony. Sweep thoroughly, check that drainage gaps in the floor are clear (blocked drainage causes water pooling under pots), and wipe down railings. A clean starting surface makes everything that follows easier.

Stage 2 — Install your structural elements first. Mount any wall planters, install railing planter brackets, add ceiling hooks for hanging baskets, and position your largest floor pots or plant stands. These are the hardest elements to move once plants are added, so getting them right at the start saves significant effort.

Stage 3 — Choose and prepare your soil. Fill all containers with a quality potting mix before adding plants. Water the soil thoroughly and allow it to drain completely before planting — this settles the mix and reveals any containers with poor drainage that need adjusting.

Stage 4 — Plant strategically. Place sun-loving plants in your sunniest positions and shade-tolerant plants in sheltered corners. Put tall plants at the back or against walls so they do not block light from shorter plants in front. Group plants with similar watering needs together to simplify your care routine.

Stage 5 — Set up a watering system. For a small balcony, a quality watering can with a long spout handles everything. For a larger setup, consider a simple drip irrigation kit that connects to an outdoor tap and waters automatically on a timer — this is particularly valuable during summer heat or when you travel.

Stage 6 — Add finishing details. An outdoor rug defines the space and protects your balcony floor from water stains and soil spills. String lights or solar lanterns create evening atmosphere. Plant labels, decorative pebbles as top dressing, and a small seating area complete the transformation from plant collection to genuine garden retreat.

Stage 7 — Establish a care routine. Water in the early morning when possible — this gives leaves time to dry before nightfall, reducing fungal disease risk. Check plants weekly for pests, remove dead leaves promptly, and fertilize every two weeks during the growing season. A consistent routine of fifteen minutes twice a week keeps a balcony garden looking its best year-round.


Q4: How to create a small garden at home?

Creating a small garden at home — whether on a balcony, in a front yard corner, on a windowsill, or inside — follows the same core principles regardless of where you start.

Define your garden zone. Even in the smallest home, designating a specific area as “the garden” creates focus and prevents the scattered, unfinished look of random pots placed without intention. On a balcony, this might be an L-shaped corner. In a front yard, it might be a 4×4 foot raised bed. Inside, it might be a sunny windowsill shelf. Draw a boundary — physical or visual — and work within it.

Layer your planting. Professional garden designers always think in layers: tall background plants that provide structure and height, medium plants that fill the middle ground with color and texture, and low or trailing plants at the front or edges that soften hard lines and create a sense of abundance. Apply this three-layer principle even to a single pot by planting a tall spike plant in the center, bushy flowering plants around it, and trailing plants around the edge.

Create year-round interest. A garden that looks beautiful only in summer feels disappointing the rest of the year. Plan for at least two seasons of visual interest by combining spring bulbs, summer annuals, autumn-berrying shrubs, and evergreen foliage plants. In a container garden, this is as simple as swapping seasonal annuals in and out of permanent pots while keeping structural plants in place.

Incorporate scent. The most memorable gardens engage multiple senses. Jasmine, lavender, rosemary, sweet basil, gardenias, and sweet peas all bring fragrance that transforms a visual garden into a full sensory experience. Place fragrant plants near seating areas or doorways where their scent is most appreciated.

Think about scale. In a small home garden, oversized pots and plants actually make the space feel larger — a common counterintuitive design principle. One large dramatic pot plant creates more visual impact and takes up less psychological space than five small pots clustered together. Do not be afraid of a single large statement element.


Q5: How can I make a beautiful garden cheap?

Making a beautiful garden on a tight budget is genuinely achievable — and in many ways, budget constraints push you toward more creative and characterful solutions than unlimited spending ever would.

Grow from seed, not from plants. Buying established plants from a nursery costs five to ten times more than growing the same plants from seed. Most herbs, vegetables, and many flowering annuals germinate reliably with no special equipment — just good potting mix, a sunny windowsill, and regular watering. Seed packets typically cost under $3 and contain enough seeds for multiple growing seasons.

Propagate from what you already have. Many popular garden plants — pothos, succulents, rosemary, mint, lavender, geraniums — root easily from cuttings. A single pothos plant can produce twenty new plants within a season through water propagation. Ask gardening friends, neighbors, or local Facebook gardening groups for cuttings and divisions — the gardening community is extraordinarily generous with plant sharing.

Use upcycled containers. As discussed throughout this guide, almost any container can become a plant pot. Old tin cans, wooden wine boxes, cracked ceramic bowls, vintage colanders, worn rubber boots, and plastic storage containers all serve perfectly with drainage holes added. Paint or decorate them to match your aesthetic — a set of matching painted tin cans looks deliberately designed rather than improvised.

Buy soil and fertilizer in bulk. The per-liter cost of potting mix drops dramatically when you buy a large bag rather than small individual bags. A 50-liter bag of quality potting mix from a garden center or Amazon costs roughly the same as four small bags — but gives you three times the volume. The same principle applies to slow-release fertilizer granules.

Shop end-of-season sales. Garden centers discount plants, pots, tools, and accessories by 50 to 70 percent at the end of the growing season — typically August through October in the northern hemisphere. Perennial plants bought cheap in autumn establish their root systems over winter and perform fully the following spring. This is the single best timing strategy for budget gardeners.

Start small and expand gradually. The most common budget mistake in gardening is trying to do everything at once and spreading resources too thin. Start with one well-executed corner — a tiered plant stand with six great plants, beautifully arranged and well maintained — rather than twenty mediocre plants scattered randomly. One excellent area motivates you to expand thoughtfully, and you learn what works in your specific conditions before investing more.

Make your own compost. A simple compost bin made from four wooden pallets standing upright in a square costs nothing and turns kitchen scraps — vegetable peelings, coffee grounds, eggshells, fruit cores — into rich free fertilizer within two to three months. Even a small countertop compost collector feeds a balcony garden effectively through the season.

Join local gardening communities. Facebook groups, Nextdoor communities, and local gardening clubs regularly offer free plants, seeds, soil, and advice. People dividing established perennials, clearing out overgrown gardens, or moving house frequently give away plants that would cost significant money at a nursery. The gardening community is one of the most generous and helpful communities online — use it.


Save this FAQ section and refer back to it whenever you have questions about your balcony garden journey. Every beautiful garden starts with exactly these questions — and the fact that you are asking them means you are already on the right path. 🌿

Budget Grill Area DIY Guide and Reviews 2026

budget DIY grill station ideas for backyard 2026

Budget Grill Area DIY Guide and Reviews (Complete 2026 Beginner-Friendly Guide)

Discover the complete 2026 DIY grill station guide including patio grill ideas, must-have accessories and beginner friendly grill reviews.

Creating your own budget-friendly grill station doesn’t have to be expensive or complicated. Whether you have a small patio or a full backyard, you can design a stylish and functional outdoor grill station using simple DIY methods.

Why a grill station transforms your outdoor space

Most people start with just a grill sitting on bare concrete or grass, and while that works, it creates a frustrating experience — tools get misplaced, there’s nowhere to prep food, and everything feels chaotic when you’re cooking for guests. A dedicated grill station solves all of this at once. It gives you a command center where every tool has a home, your food has a prep surface, and the whole setup looks intentional rather than thrown together. Beyond function, a well-built grill station genuinely increases the enjoyment of being outside. It signals to guests that this is a real outdoor kitchen, not just a backyard afterthought. Property value aside, it simply makes summer evenings more pleasurable.


The five best budget grill station ideas — expanded

1. Simple patio grill station

This is the perfect starting point if you rent, have a small balcony, or just want to test the concept before committing. The core idea is a sturdy outdoor side table positioned next to your grill, fitted with a few S-hooks along the edge for hanging tongs, brushes, and a thermometer. Add a small basket underneath for charcoal bags or lighter fluid. The beauty here is portability — nothing is permanent, and you can rearrange or move it indoors in winter. Total cost can be as low as $20–$40 if you use a table you already own or find one secondhand.

2. Cinder block grill station

This is the most searched and most rewarding DIY option for good reason. Cinder blocks cost roughly $1–$2 each at any hardware store, they’re naturally heat-resistant, and they require zero tools or adhesive to stack into a functional structure. A basic L-shaped or U-shaped arrangement of two to three layers creates a stable platform for your grill and an adjoining prep counter.

For a more permanent installation, you can fill the hollow cores with sand or use outdoor construction adhesive between layers. The top surface can be left as exposed block, covered with a concrete paver slab, or tiled with outdoor ceramic tile for a more finished look. The entire structure can be built in an afternoon for under $50, and it will outlast almost any store-bought grill cart.

3. DIY Blackstone flat-top grill station

Flat-top griddles have surged in popularity because they can cook breakfast, stir-fry, smash burgers, and seafood all on one surface. But the Blackstone and similar griddles have one weakness: no built-in storage or side workspace.

A DIY station solves this perfectly. Build a simple wooden frame from 2×4 lumber around three sides of the griddle, leaving the front open for access. Add a plywood shelf underneath for propane tank storage, and attach a fold-down wooden side table on each flank for plating food. Seal the wood with exterior-grade polyurethane to protect against grease and weather. This upgrade costs $60–$100 in materials and completely changes how the griddle functions.

4. Outdoor grill station with full storage

For those who grill frequently and want a more permanent setup, adding real storage elevates the station from a DIY project to a genuine outdoor kitchen. Repurposed kitchen base cabinets from a home renovation (often listed free on Facebook Marketplace or Craigslist) can be stripped, sanded, repainted with exterior paint, and fitted with stainless steel handles for a weatherproof outdoor cabinet.

Add a corrugated metal or butcher block countertop across the top and you have a setup that rivals commercial outdoor kitchens at a fraction of the cost. Store charcoal, lighter fluid, marinades, grilling accessories, and even paper towels in organized, weather-protected compartments.

5. Pallet wood grill surround

Wooden shipping pallets are one of the most versatile free building materials available. A single heat-treated pallet (look for the “HT” stamp — avoid chemically treated ones marked “MB”) can be broken down into planks and reconstructed into a three-sided grill surround with a shelf.

Sand the wood smooth, apply a weatherproof stain in a color that matches your outdoor furniture, and mount a few pipe-fitting hooks along the side for tools. This setup costs almost nothing if you source pallets for free from garden centers, furniture stores, or warehouses.


Step-by-step build guide — fully detailed

Step 1: Location planning Safety comes first. Your grill needs to sit at least 10 feet from any wall, fence, overhanging tree branch, or structure. Even with good weather, wind direction matters — position the grill so smoke blows away from your seating area and away from any open doors or windows. Check that the ground is level; even a slight tilt can cause uneven cooking on flat-top grills and is a stability hazard for tall charcoal grills. If you’re building a permanent structure like a cinder block station, lay a concrete paver base first rather than building directly on grass or soil, which can shift and settle over time.

Step 2: Choosing your base material Wood is warm, easy to work with, and inexpensive, but requires sealing and ongoing maintenance to resist moisture and grease. Metal is durable and low-maintenance but conducts heat and can rust without a protective coating. Cinder blocks are the most heat-resistant and durable option and require virtually no maintenance, but they’re heavy and difficult to move once built. For most beginners, a cinder block base with a wooden side extension strikes the best balance.

Step 3: Structural assembly For a cinder block U-shape, you’ll need approximately 16–20 standard 8×8×16 inch blocks. Lay the first course in your chosen shape — a U-shape is most functional, giving you a back wall and two side walls with the front open for grill access. Stagger the second course so joints don’t align (the same principle as brick laying), which adds stability. Two courses high is usually sufficient for a standard kettle or gas grill. For a countertop surface, lay 12×24 inch concrete pavers across the top course — they’re flat, heat-tolerant, and inexpensive.

Step 4: Workspace and prep area A prep surface adjacent to the grill is arguably more important than the grill platform itself. Ideally you want at least 18–24 inches of flat workspace on one side. A butcher block cutting board clamped or screwed to a wooden bracket attached to the side of your station serves this purpose perfectly. Alternatively, a fold-down shelf on a piano hinge can be folded up when cooking and folded down when not in use to save space.

Step 5: Tool organization A grill station without organization quickly becomes a cluttered grill table. The most functional approach uses three zones: a hanging zone for frequently used Essential Grill Tools (tongs, spatula, brush) on S-hooks or a magnetic bar mounted at arm height; a surface zone for active items (thermometer, salt, oil bottle) on a small tray so they don’t roll off; and an under-station zone for bulky items (charcoal bag, propane tank, spare grates) in bins or on a lower shelf. Label your bins if you share the grill with family members — it sounds minor but makes a noticeable difference in how quickly everyone can find things.

Step 6: Finishing and decoration This step is what separates a functional grill station from one that becomes a genuine gathering point. String lights strung overhead on a pergola or between two shepherd’s hooks create instant ambiance after dark. A weatherproof outdoor rug defines the cooking zone and protects your patio surface from grease drips. Potted herbs — rosemary, thyme, basil — placed near the station are both decorative and genuinely useful while cooking. A small chalkboard sign listing the day’s menu or BBQ rules adds personality. These finishing touches cost $30–$60 total and make a dramatic visual difference.


Grill types — which is right for your station

Charcoal grills reward patience. The heating process takes 20–30 minutes, but the flavor payoff is real — the Maillard reaction combined with wood smoke creates a depth of flavor that gas simply cannot replicate. They’re also the cheapest entry point, with quality kettles available for $40–$80. Maintenance is straightforward: empty the ash catcher after every session and brush the grates while warm. For a cinder block station, charcoal grills sit beautifully on the flat top course without any modification.

Gas grills are the practical choice for weeknight cooking. Turn a knob, wait five minutes, and you’re cooking — no ash, no lighter fluid, easy temperature zones. The tradeoff is cost (entry-level quality starts around $150–$200) and a flavor profile that, while good, lacks the smokiness of charcoal. A gas grill pairs best with a station that has space for the propane tank stored underneath in a ventilated cabinet area.

Flat-top griddles are the most versatile option and the fastest growing category in backyard cooking. The large, flat cooking surface means you can cook an entire breakfast (eggs, bacon, pancakes, hash browns) simultaneously, or smash burgers, fried rice, and grilled vegetables all at once. They require a bit more cleaning discipline — scraping and seasoning the surface after each use — but once that becomes habit, they’re no more work than any other grill.

Pellet grills represent the premium tier of backyard cooking. They burn wood pellets fed automatically by an auger, maintaining precise temperatures over long cooks — perfect for brisket, ribs, or pulled pork. They’re more expensive ($300–$600 and up) but combine the flavor of wood smoke with the convenience of gas. Worth considering as an upgrade once you’ve established your station and know how seriously you take grilling.


Essential accessories — what actually matters

Rather than buying every gadget available, focus on the items that genuinely improve results. An instant-read meat thermometer is the single most impactful tool you can own — it eliminates guesswork and prevents both undercooked and overcooked meat entirely. A good pair of long-handled locking tongs (16 inches minimum) keeps your hands safely away from heat while giving you precise control. A stiff grill brush used while the grates are still warm after cooking extends grate life dramatically. Heat-resistant silicone gloves rated to at least 500°F give you the confidence to handle grates, move coals, and adjust vents without hesitation. A quality grill cover tailored to your specific grill model is the single best investment for longevity — UV exposure, rain, and frost degrade unprotected grills quickly.


Money-saving strategies that actually work

The biggest savings come from timing. Grills go on deep clearance (30–50% off) in August and September as retailers clear summer inventory. Buying a grill in late summer for use the following spring is one of the best value moves in outdoor cooking. For building materials, check Facebook Marketplace, Nextdoor, and Craigslist regularly — people renovating kitchens often list free or cheap cabinets, wood, and hardware that translate directly into grill station components. For cinder blocks specifically, buying in-store rather than having them delivered saves significantly on per-unit cost since delivery fees for heavy materials are substantial. Start with the minimum viable station — grill plus one prep surface plus tool storage — and add elements over two or three seasons as your budget allows. This approach also lets you discover what you actually use versus what looks good in planning.


Safety — the non-negotiable checklist

Never operate any grill, charcoal or gas, in an enclosed space — carbon monoxide accumulates rapidly and is odorless. Keep a fire extinguisher (Class K for grease fires) within arm’s reach of your station, not inside a cabinet where it’s hard to access quickly. Check propane connections annually by brushing soapy water over all fittings — bubbles indicate a leak that must be fixed before lighting. Position your station so there is always a clear path away from the grill in every direction — never box yourself into a corner. Keep children and pets at least six feet from an active grill, and establish this as a visible boundary using your outdoor rug or a chalk line on the patio.

In this complete guide, you’ll learn:

  • How to build a DIY grill station cheap
  • Best patio grill station ideas
  • Step-by-step methods (including cinder block grill station)
  • Must-have tools & accessories (perfect for adding Amazon links)
  • Honest reviews of popular grill setups

Let’s get started 🔥


🌿 Why You Need a Grill Station

A proper grill station is more than just a place to cook—it becomes the heart of your outdoor space.

Benefits:

  • Keeps everything organized
  • Makes cooking easier and faster
  • Adds aesthetic value to your patio
  • Great for hosting BBQ parties

If you’re using a basic grill setup right now, upgrading to a DIY outdoor grill station will completely change your experience.


💡 Best Budget Grill Station Ideas

Here are some trending and practical grill station ideas you can build without spending too much:

1. Simple Patio Grill Station

Perfect for beginners.

  • Small table + grill
  • Add hooks for tools
  • Use storage baskets

👉 Budget: Very low
👉 Best for: Apartments & small patios


2. Cinder Block Grill Station (Most Popular DIY)

A cinder block grill station is one of the cheapest and most durable options.

Why it’s great:

  • Very affordable
  • Easy to build
  • Heat-resistant
  • Customizable

👉 You just stack blocks and place your grill on top—no advanced skills required.


3. DIY Blackstone Grill Station

If you own a flat-top grill, a DIY Blackstone grill station is a great upgrade.

Features:

  • Side shelves
  • Storage space
  • Prep area

👉 Best for serious BBQ lovers


4. Outdoor Grill Station with Storage

  • Add cabinets or shelves
  • Use plastic bins or wooden crates
  • Store charcoal, tools, and accessories

👉 Makes your grilling setup clean and professional


🛠️ How to Build a DIY Grill Station (Step-by-Step)

Let’s create a simple DIY grill station cheap:

Step 1: Choose Your Location

  • Flat surface
  • Away from walls (safety)
  • Near seating area

Step 2: Pick Your Base

Options:

  • Wooden table
  • Metal stand
  • Cinder blocks (recommended)

Step 3: Build the Structure

For Cinder Block Setup:

  • Arrange blocks in rectangle shape
  • Leave space for grill
  • Add a slab or metal top

Step 4: Add Workspace

  • Install a side table
  • Use wood plank for prep area

Step 5: Organize Tools

  • Hooks for spatula/tongs
  • Small shelves
  • Storage bins

Step 6: Decorate (Optional but Recommended)

  • Add plants 🌿
  • String lights ✨
  • Outdoor rug

⭐ Budget Grill Reviews (Beginner-Friendly Picks)

Here are some general recommendations you can link to:

1. Charcoal Grills

Best for:

  • Smoky flavor
  • Traditional BBQ lovers

Pros:

  • Affordable
  • Easy to use

Cons:

  • Takes time to heat

2. Gas Grills

Best for:

  • Quick cooking
  • Convenience

Pros:

  • Fast heating
  • Easy temperature control

Cons:

  • Slightly expensive

3. Flat Top Grills (Blackstone Style)

Best for:

  • Cooking multiple foods
  • Large gatherings

Pros:

  • Versatile
  • Big surface

Cons:

  • Needs more space

💸 Budget Tips (Save More Money)

  • Use recycled wood
  • Buy second-hand grills
  • Start simple, upgrade later
  • DIY instead of buying ready-made stations

🌟 Common Mistakes to Avoid

❌ Placing grill too close to wall
❌ Ignoring airflow
❌ Using weak materials
❌ No storage planning

👉 Always focus on safety + durability


🎯 Final Thoughts

Building your own outdoor grill station is one of the best budget DIY projects. Whether you go for a cinder block grill station or a simple patio grill station, you can create something functional and beautiful without spending a lot.

Start small, upgrade over time, and most importantly—enjoy the process 🔥


Playroom Ideas For kids

21 Creative Ways to Design a Fun and Organized Playroom

Discover 21 creative kids playroom ideas to design a fun, organized, and inspiring space with smart storage, reading corners, play tents, and educational play areas.

kids playroom ideas

Designing the perfect playroom can transform your home into a magical space where children can learn, imagine, and grow. If you’re searching for kids playroom ideas, you’re probably looking for ways to create a space that is fun, safe, organized, and inspiring.

A well-designed playroom helps children develop creativity while also keeping toys and activities organized. Whether you have a small corner, a spare room, or a basement, there are many creative ways to build the perfect play space.

In this guide, you’ll discover 21 amazing kids playroom ideas that are stylish, practical, and Pinterest-worthy.

This post may contain affiliate links. If you purchase through these links, I may earn a small commission at no extra cost to you.

Why Every Home Needs a Kids Playroom

Before exploring the ideas, it’s important to understand why a dedicated playroom is helpful.

kids playroom ideas

A kids playroom:

• Encourages creativity
• Keeps toys organized
• Reduces clutter in the living room
• Creates a safe play area
• Supports learning through play

The best kids playroom design combines fun décor with smart storage solutions.

1. Create a Colorful Playroom Theme

Kids love colors. Bright and cheerful color schemes make playrooms exciting and stimulating.

kids-playroom-decor.

Rainbow Multi Coloured Rug

Check Price on Amazon

You can use:

• Rainbow walls
• Colorful shelves
• Bright rugs
• Multicolored storage bins

Choose colors that make the space lively but not overwhelming.

2. Add Smart Toy Storage

One of the most important kids playroom ideas is proper toy storage.

tiny playroom ideas

✨ Tap here to check the latest price & availability
https://amzn.to/4ldcS48

Use:

• Open shelves
• Toy baskets
• Storage cubes
• Labelled bins

This helps children learn to organize their toys after playing.

3. Create a Reading Corner

Encourage children to love books by adding a cozy reading corner.

tiny playroom ideas

✨ Tap here to check the latest price & availability
https://amzn.to/4k3fZLg

Include:

• Small bookshelf
• Floor cushions
• Soft lighting
• Kids tent or canopy

This space can become their favorite quiet zone.

4. Install a Chalkboard or Whiteboard Wall

Kids love drawing on walls. Instead of stopping them, give them a dedicated drawing wall.

✨ Tap here to check the latest price & availability
https://amzn.to/4crHOv6

Options include:

• Chalkboard paint wall
• Magnetic board
• Whiteboard wall

This boosts creativity and artistic expression.

5. Add a Play Tent or Teepee

A play tent creates a magical space for imagination and storytelling.

small playroom design

✨ Tap here to check the latest price & availability
https://amzn.to/3OOtR0A

Kids can use it for:

• Pretend play
• Reading
• Quiet time

Choose a soft fabric teepee with pillows and blankets.

6. Create an Art and Craft Station

Children love crafting, painting, and building things.

kids playroom decor

✨ Tap here to check the latest price & availability
https://amzn.to/46D76Tq

Set up a small art station with:

• Kids table
• Chairs
• Art supplies
• Storage drawers

This keeps messy activities in one place.

7. Add a Climbing Wall or Indoor Gym

For energetic kids, an indoor play gym is perfect.

Ideas include:

• Mini climbing wall
• Monkey bars
• Gym rings
• Balance boards

Climbing Wall or Indoor Gym

There are many great playroom products available online. You can check availability, reviews, and prices on Amazon before choosing the best option for your kids.

Here are some highly rated Amazon picks:
https://amzn.to/4uhUeMu
https://amzn.to/4120kmM

This supports physical activity indoors.

8. Use Soft Play Mats

Safety is essential in a kids playroom décor. Soft foam mats protect children while playing and also make the room comfortable.

kids playroom with foam puzzle mats, bright colors, safe and soft play area, toys scattered, family friendly interior

Choose:

• Puzzle mats
• Foam flooring
• Soft rugs

9. Add a Mini Stage for Performances

Children love performing and pretending.

Create a mini stage with:

• Curtains
• Dress-up costumes
• Toy microphone

kids playroom mini theater stage with red curtains, dress up costumes, toy microphone, playful family home interior"

Kids can enjoy singing, dancing, and acting.

10. Build a LEGO Wall

LEGO walls are trending in modern playrooms. Attach base plates to the wall so kids can build vertically.

Benefits:

• Saves floor space
• Encourages creativity
• Keeps LEGO organized

11. Add Educational Toys and Learning Areas

Playrooms can also support learning.

Include:

• Alphabet charts
• Number boards
• Puzzle tables
• STEM toys

This helps children learn through play.

12. Create a Dress-Up Corner

Dress-up areas encourage imagination and role play.

Add:

• Costume rack
• Mirrors
• Dress-up clothes
• Storage baskets

Kids can pretend to be superheroes, doctors, or princesses.

13. Design a Montessori Playroom

Montessori playrooms focus on independence and minimalism.

Features include:

• Low shelves
• Natural materials
• Simple toys
• Neutral colors

This type of playroom is calm and organized.

14. Add Wall Murals

Wall murals make playrooms visually exciting.

Popular themes include:

• Jungle animals
• Space adventure
• Fairy tales
• Dinosaurs

Murals can turn a playroom into a magical world.

15. Create a Puzzle and Game Table

A puzzle and game table is a wonderful addition to any kids playroom because it encourages children to develop problem-solving skills, patience, and critical thinking while having fun. Instead of spreading puzzles and board games all over the floor, a dedicated table gives kids a comfortable place where they can sit, focus, and enjoy games without interruptions.

Choose a child-sized table and chairs so kids can easily sit and play for longer periods. A round or square table works well because it allows multiple children to sit together and play. This setup also encourages social interaction, teamwork, and family bonding, especially when siblings or parents join in for game time.

To keep the area organized, place small baskets, drawers, or shelves nearby to store puzzles, board games, and card games. Labeling these storage bins can make it easier for kids to find their favorite games and learn to clean up after playing.

You can also make the table more fun and functional by adding:

  • Puzzle boards or trays

  • Rotating puzzle storage racks

  • A tabletop organizer for game pieces

  • Bright table mats or play mats

16. Use Floating Shelves for Display

Display favorite toys and books using floating shelves.

This makes the room look organized and stylish.

An indoor slide can instantly turn a normal playroom into an exciting mini playground. Kids naturally love climbing and sliding, so adding a small indoor slide helps them burn energy while staying active indoors—especially during bad weather or cold seasons.

You don’t need a huge space to include a slide. Many modern playroom slides are designed to fit in small rooms and can easily be placed next to a climbing structure, bunk bed, or play platform. Some parents also add a wooden Montessori climbing frame with a slide, which supports both physical activity and motor skill development.

18. Create a Music Corner

A music corner is a wonderful way to introduce children to sounds, rhythm, and creativity. Music helps support emotional development and improves listening skills, coordination, and creativity.

To create a small music space in the playroom, dedicate a corner where kids can freely explore musical instruments. You can include simple instruments such as:

• Toy piano
• Mini drum set
• Xylophone
• Tambourines
• Maracas

For younger children, choose instruments that are colorful, lightweight, and easy to play. These instruments allow kids to experiment with sound and rhythm while having fun.

You can also add a small shelf or basket to store the instruments neatly. Hanging a few instruments on wall hooks can make the area look organized while keeping everything easily accessible.

A music corner encourages children to express themselves, explore sounds, and develop a love for music from an early age.

19. Add Personalized Name Decor

Personalized decor is a simple way to make a kids playroom feel unique and special. Adding your child’s name to the wall creates a sense of ownership and makes the space feel truly theirs.

There are many creative ways to include personalized decorations in a playroom. Some popular ideas include:

• Wooden name signs
• LED letter lights
• Wall decals with the child’s name
• Custom canvas prints
• Colorful alphabet wall art

20. Use Hidden Storage Furniture

Keeping a playroom organized can be challenging because toys tend to spread everywhere. That’s why hidden storage furniture is one of the smartest solutions for maintaining a clean and tidy playroom.

Furniture pieces with built-in storage help you hide toys, books, and art supplies while still keeping them easily accessible. Some great options include:

• Storage benches
• Ottoman boxes
• Toy chests
• Coffee tables with storage
• Storage cubes with baskets

21. Create a Cozy Relaxation Zone

After running, playing, and exploring, kids also need a calm place where they can relax. A cozy relaxation zone gives children a quiet corner where they can rest, read, or enjoy quiet playtime.

This area should feel soft, comfortable, and calming. You can create this space by adding:

• Bean bags
• Soft rugs
• Floor pillows
• Cozy blankets
• Warm lighting or fairy lights

A small bookshelf nearby can make this area perfect for reading, while a canopy or small tent can make the space feel even more magical and cozy.

Neutral colors, soft textures, and warm lighting help create a peaceful atmosphere where children can unwind after active play. This type of space also encourages quiet activities like reading, drawing, or imaginative storytelling.

Tips for Designing the Perfect Kids Playroom

Here are a few important tips when planning your playroom.

Keep Safety First

Avoid sharp furniture edges and choose non-toxic materials.

Use Washable Materials

Kids playrooms get messy, so washable rugs and furniture are helpful.

Make It Flexible

Children grow quickly, so choose furniture that adapts over time.

Encourage Creativity

Leave space for imagination and creative activities.


Final Thoughts

Creating a beautiful playroom doesn’t require a huge budget or large space. With the right kids playroom ideas, you can design a space that is fun, organized, and inspiring.

From cozy reading corners to colorful art stations, every playroom should encourage creativity and learning. Whether you prefer a minimalist Montessori design or a vibrant themed room, the most important goal is to create a space where kids feel happy and free to explore their imagination.

A thoughtfully designed playroom will become your child’s favorite place in the house. Use our free Kids Room Budget Planner to plan your makeover!

Spring Home Décor Ideas That Make Every Room Feel Fresh and New

boucle throw pillow cover

Spring Home Décor Ideas That Make Every Room Feel Fresh and New

As the seasons change, your home deserves a fresh update too. Spring is the perfect time to brighten up your space with light colors, natural textures, and simple decorative touches. Whether you want a full seasonal makeover or just a few simple spring decorations, these ideas will help you transform your space beautifully.

From cozy spring living room décor to early summer living room décor ideas, this guide will inspire you to create a light, airy, and welcoming home.

Why Update Your Home for Spring?

Spring home décor is all about:

✔ Fresh colors
✔ Natural light
✔ Floral accents
✔ Decluttered spaces
✔ Soft textures
✔ Indoor-outdoor connection

After winter, lighter décor instantly makes your home feel bigger, brighter, and happier.

1. Add Fresh Flowers & Greenery

Nothing says spring home décor like fresh blooms. Tulips, daisies, cherry blossoms, or simple eucalyptus stems instantly refresh any room.

Place flowers in:

  • Glass vases

  • Ceramic pitchers

  • Woven baskets

  • Coffee table centerpieces

If fresh flowers aren’t practical, high-quality faux stems work beautifully too.

✨ Tap here to check the latest price & availability

https://amzn.to/3OKtwMm

2. Switch to Light Throw Pillows

Heavy winter fabrics can make a room feel dark. Swap them for:

  • Linen pillow covers

  • Floral patterns

  • Soft pastel tones

  • Light cotton textures

This is one of the simplest spring decorations you can do in minutes.

✨ Tap here to check the latest price & availability (High Reviews)

https://amzn.to/4sjMkjO

3.  Refresh Your Coffee Table Styling

A coffee table is often the centerpiece of a living room, which means even small styling changes can make a big impact on the overall look of the space. Refreshing your coffee table styling is a simple and affordable way to give your living room a clean, updated feel without redecorating the entire room. The key is to declutter first and then add a few carefully chosen pieces that bring balance, beauty, and personality.

Start by removing everything from your coffee table. Over time, coffee tables tend to collect random items like remotes, magazines, and everyday clutter. Clearing the surface instantly makes the room feel more organized and spacious. Once the table is empty, think of it as a blank canvas where you can create a small decorative arrangement.

Declutter your coffee table and restyle with:

  • A small floral arrangement

  • Spring-themed books

  • A ceramic tray

  • A scented candle

Keep it minimal and fresh.

spring-home-decor-ideas-living-room.jpg

4. Use Light Curtains

If you prefer a slightly warmer tone, soft beige curtains are another excellent choice. Beige blends effortlessly with most color palettes and creates a calm, cozy atmosphere. This shade is perfect for living rooms that already feature warm tones like light wood, woven baskets, or earthy décor elements.

Switching to lighter curtains does more than just improve lighting. It can visually enlarge the room and make the entire space feel more cheerful and refreshed. Natural sunlight highlights other décor elements like plants, cushions, and wall art, making your living room feel more vibrant.

Overall, replacing heavy curtains with sheer white, cream linen, or soft beige fabrics is a simple yet powerful update. It allows more natural light to flow into the room and instantly upgrades your spring living room décor with a bright, airy, and inviting atmosphere.

Switch dark curtains to:

  • Sheer white

  • Cream linen

  • Soft beige

This allows more sunlight and instantly upgrades your spring living room décor.

spring-home-decor-ideas-living-room.jpg

✨ Tap here to check the latest price & availability

https://amzn.to/4ucy5PS

5. Add Floral Wall Art

Refreshing your home for spring doesn’t always require major changes. Sometimes, small decorative updates can make a big difference. One of the easiest ways to bring the feeling of spring into your living room is by adding simple seasonal wall decorations. Light, nature-inspired wall art can instantly brighten the space and create a cheerful, refreshing atmosphere.

A great option for spring décor is botanical prints. These prints usually feature plants, leaves, or delicate flowers and bring a natural, calming element into your home. Botanical artwork works especially well in living rooms with neutral color palettes because the green tones add a subtle pop of color without looking too bold. You can place two or three framed botanical prints above a sofa, console table, or reading corner to create a fresh and elegant focal point.

Simple spring decorations can include:

  • Botanical prints

  • Floral canvas art

  • Nature-inspired wall frames

These small details create seasonal charm without overwhelming the space.

spring-home-decor-ideas-living-room.jpg

6. Incorporate Soft Pastel Colors

One of the most beautiful ways to refresh your home for the spring season is by incorporating soft pastel colors into your living room décor. Pastel shades naturally reflect the lightness and freshness of spring, helping your space feel brighter, calmer, and more inviting. The best part is that you don’t need to repaint your walls or completely redesign your room. Small décor accents in pastel tones can easily transform the overall atmosphere.

Some of the most popular spring color palette ideas include shades like blush pink, soft sage green, light blue, cream, and pale yellow. These colors are gentle on the eyes and create a peaceful, uplifting environment. When used thoughtfully, pastel tones can make your living room feel airy and stylish without appearing too bold or overwhelming.

A simple way to introduce these colors is through decorative cushions and throw blankets. For example, you can place blush pink or pale yellow cushions on a neutral sofa to instantly brighten the space. A soft sage green throw draped across the couch can also add warmth while keeping the room aligned with the fresh spring theme.

Spring color palette ideas:

  • Blush pink

  • Soft sage green

  • Light blue

  • Cream

  • Pale yellow

You don’t need to repaint — use décor accents instead.

spring-home-decor-ideas-living-room.jpg

7. Declutter & Simplify

Spring is often associated with renewal, freshness, and new beginnings, which makes it the perfect time to declutter and simplify your living room. Over time, spaces can become filled with unnecessary décor, extra items, and seasonal pieces that make the room feel crowded. By removing clutter and organizing your space, you can instantly create a lighter, more refreshing environment that reflects the calm and airy feeling of spring.

Start by removing heavy décor pieces that were perfect for winter but may now feel too dark or bulky. Items like thick throws, dark decorative pillows, and heavy centerpieces can make the room feel visually heavy. Replacing them with lighter accessories or simply removing a few items can immediately open up the space.

Next, focus on clearing surfaces such as coffee tables, side tables, and console tables. These areas tend to collect random objects like magazines, remotes, and decorative pieces over time. Try keeping only one or two carefully chosen décor items on each surface, such as a small plant, a candle, or a decorative tray. This minimal approach helps the room feel calm and organized rather than crowded.

Another important step is to organize shelves and storage areas. Bookshelves, wall shelves, and entertainment units often become cluttered with too many items. Take a few minutes to rearrange them neatly. You can group books together, add small baskets for hidden storage, or place a few decorative objects like vases or framed photos to keep the display balanced.

Spring is also about freshness and simplicity.

  • Remove heavy décor

  • Clear surfaces

  • Organize shelves

  • Store winter blankets

A clutter-free room feels lighter instantly.

8.  Update Your Entryway

Your entryway is the first thing people see when they enter your home, so refreshing it for spring can instantly create a welcoming atmosphere. Small updates can make a big difference and set the tone for the rest of your space.

Here are a few simple ways to refresh your entryway:

Add a Fresh Wreath
A floral or greenery wreath on your door brings a cheerful spring vibe and makes your home feel inviting.

Switch to a Light Rug
Replace heavy winter rugs with lighter, brighter ones to give the space an airy seasonal look.

Place a Small Plant
A small plant or fresh flowers add life and color to your entryway, making the space feel fresh and natural.

Use a Decorative Tray for Keys
Keep your essentials organized with a stylish tray for keys, sunglasses, or mail. It keeps clutter away while adding a decorative touch.

Remember: Entryway updates are small, but they create a big impact and make your home feel refreshed for the new season.

Welcome spring at the door with:

  • Fresh wreath

  • Light rug

  • Small plant

  • Decorative tray for keys

Entryway updates are small but impactful.

spring-home-decor-ideas-living-room.jpg

✨ Tap here to check the latest price & availability

https://amzn.to/4bbjH1E

Remember: Entryway updates are small, but they create a big impact and make your home feel refreshed for the new season.

9.  Add Natural Textures

Texture adds warmth without heaviness.

Use:

  • Woven baskets

  • Rattan trays

  • Light wood décor

  • Cotton throws

Natural materials complement spring home décor perfectly.

10.  Transition Into Summer Living Room Décor

As spring moves into summer, brighten even more.

Summer living room décor ideas include:

  • White and blue accents

  • Coastal-inspired décor

  • Lightweight fabrics

  • Ocean-themed art

Keep the base neutral and adjust accessories seasonally.

spring-home-decor-ideas-living-room.jpg

✨ Tap here to check the latest price & availability

https://amzn.to/4u90Sob

11.  Add Scent & Seasonal Touches

Don’t forget sensory decor.

  • Citrus candles

  • Fresh linen scent

  • Floral diffusers

Spring decorating isn’t just visual — it’s atmospheric.

✨ Tap here to check the latest price & availability

https://amzn.to/46YoRgb

https://amzn.to/4rTswUM

Simple Spring Decorations for Any Budget

You don’t need expensive furniture.

Affordable ideas:

  • Swap pillow covers

  • Add fresh flowers

  • Rearrange furniture

  • Change wall art

  • Add small plants

Small changes create big seasonal impact.


Final Thoughts

Spring home décor is about lightness, freshness, and simplicity. From easy spring living room décor updates to simple spring decorations, even small changes can transform your home into a bright and welcoming space.

As the season shifts toward summer, you can gradually introduce summer living room décor ideas like coastal accents and airy fabrics to keep your space feeling seasonal and stylish.

A fresh home starts with fresh energy.

Warm Kids Room Color Palette Ideas to Create a Cozy & Happy Space

Choosing the right colors for your child’s bedroom is one of the most meaningful decisions you’ll make in your home. Colors don’t just decorate — they shape how your child feels, sleeps, plays, and grows. And if you’re looking for a palette that feels both beautiful and nurturing, warm kids room color palette ideas are exactly where to start.

I know how overwhelming it can be to stand in front of a paint swatch wall and feel completely lost. There are so many options! But warm tones — think peachy sunrises, cozy mustard yellows, soft terracottas, and creamy neutrals — have a magical way of making a space feel like a warm hug. They’re cheerful without being chaotic, and comforting without being boring.

In this post, I’m walking you through 8 of my favorite warm color palettes for kids rooms, along with styling tips, age-appropriate suggestions, and advice on how to balance everything beautifully. Let’s dive in!

Why Warm Colors Work So Well in Kids Rooms

Before we get into the palettes, let’s talk about why warm colors are such a great choice for children’s spaces.

Warm colors — yellows, oranges, reds, pinks, peaches, and earthy neutrals — are naturally inviting. They create a sense of safety and coziness, which is exactly what a child needs in their personal space. Unlike cool colors that can feel a little sterile or distant, warm tones feel alive and welcoming.

Here’s what warm colors can do for your child’s room:

  • Create a cozy, nurturing atmosphere that supports sleep and rest
  • Stimulate creativity and playfulness during the day
  • Make small rooms feel warm and welcoming rather than cramped
  • Add cheerfulness and energy without harsh brightness
  • Work beautifully for both boys, girls, and gender-neutral spaces

The secret to making warm colors work is balance — and I’ll show you exactly how to do that for each palette below.

1. Soft Peach and Cream — Gentle and Timeless

If I had to pick one warm palette that works for every single age group, it would be this one. Soft peach and cream is gentle, soothing, and endlessly versatile. It feels like a warm sunset in your child’s room — peaceful and beautiful.

Peach has this wonderful quality of being warm without being too intense. It doesn’t demand attention, but it adds a lovely softness to the space that feels intentional and cozy.

How to style it:

  • Paint walls in a soft peach or warm cream shade
  • Choose light natural wood furniture — pine or oak work beautifully
  • Layer cream and white bedding with a peachy throw blanket
  • Add woven baskets for storage — they enhance the warmth naturally
  • Hang warm fairy lights for a dreamy glow at bedtime

Best for: Nurseries, toddler rooms, and young children’s bedrooms.

2. Mustard Yellow and Warm White — Cheerful and Bright

Mustard yellow might sound bold, but when you pair it with warm white, it becomes something truly special. It’s sunny and cheerful without being overwhelming — like a happy little burst of energy in the room.

This is one of my absolute favorite palettes for creative kids. Yellow is known to stimulate the mind and encourage positivity, and mustard specifically has that earthy richness that keeps it from feeling too juvenile. It’s a color your child can genuinely grow with.

How to style it:

  • Use warm white on three walls and add a mustard yellow accent wall behind the bed
  • Choose natural wooden shelves and furniture
  • Add a beige or cream rug to ground the space
  • Incorporate animal-themed or nature-inspired decor
  • Keep bedding simple — white or cream with mustard cushion accents

Best for: Toddlers aged 3–7 and creative, playful kids.

3. Terracotta and Beige — Earthy and Grounding

Terracotta is having a major moment in interior design right now — and honestly, I think it’s here to stay. This rich, earthy tone has a warmth that feels grounded and calm. In a kids room, it creates a space that feels both stylish and incredibly cozy.

The key with terracotta is not to overdo it. Use it as an accent — one feature wall, or through decor pieces like cushions, rugs, and artwork — and let beige do the heavy lifting as your base.

How to style it:

  • Paint one feature wall in terracotta and keep remaining walls beige or cream
  • Add rattan or wicker decor pieces for a natural, boho feel
  • Choose light oak furniture to keep the space airy
  • Layer warm-toned curtains in linen or cotton
  • Add a terracotta throw or cushion on the bed for continuity

Best for: Shared sibling rooms, older kids aged 6–12, and gender-neutral spaces.

warm-kids-room-color-palette-ideas.jpg

4. Coral and Soft Gray — Lively and Modern

If you want a warm palette with a modern edge, coral and soft gray is a stunning combination. Coral is vibrant and energizing — it brings life and personality to a space. And when you balance it with a soft warm gray, the result is fresh, contemporary, and beautifully balanced.

This palette works especially well if you want the room to feel lively during the day but still calm enough for bedtime. Coral wakes the space up; gray brings it back down.

How to style it:

  • Use soft warm gray on walls as your base
  • Introduce coral through bedding, cushions, and wall art
  • Choose white furniture to keep things light and fresh
  • Add gold or brass accents for a touch of warmth and sophistication
  • Layer colorful cushions in complementary warm tones

Best for: Girls’ rooms, gender-neutral spaces, and kids aged 5 and up.

warm-kids-room-color-palette-ideas.jpg

5. Blush Pink and Warm Taupe — Soft, Elegant, and Timeless

Blush pink is one of those colors that just never gets old. It’s soft without being saccharine, feminine without being overwhelming, and calming in a way that genuinely supports sleep and relaxation. Pair it with warm taupe and you have one of the most elegant combinations possible for a child’s bedroom.

What I love most about this palette is how long it lasts. You won’t feel the need to redecorate every few years because blush and taupe are truly timeless. As your child grows, you simply update the decor accessories while keeping the walls exactly as they are.

How to style it:

  • Paint walls in a soft blush or warm taupe — either works as the dominant shade
  • Choose white or natural wood furniture
  • Layer soft bedding in blush, cream, and dusty rose shades
  • Add a taupe or natural fiber rug
  • Use warm white bulbs — they make blush look softer and taupe look richer
  • Add fairy lights for a magical bedtime glow

Lighting tip: Always use warm white light bulbs in this palette. Cool blue lighting will completely change how blush pink looks on the walls — and not in a good way.

Best for: Nurseries, toddler rooms, and girls’ bedrooms of all ages.

6. Burnt Orange and Cream — Bold, Creative, and Warm

Burnt orange is for the child who has a big personality. It’s deeper and moodier than bright orange, with an earthy richness that adds real character to a space. When you balance it with cream, the result is surprisingly cozy and sophisticated — not loud at all.

The key is restraint. Don’t paint all four walls burnt orange. Instead, use it on a single feature wall and let cream do the rest. This approach gives you that gorgeous warmth and personality without making the room feel heavy or overwhelming.

How to style it:

  • One burnt orange feature wall behind the bed or reading nook
  • Cream walls on the remaining three sides
  • Light wooden furniture — the natural grain pairs beautifully with orange
  • Cream bedding with burnt orange cushion accents
  • Woven baskets and rattan decor for texture
  • Warm white fairy lights to enhance the orange’s richness at night

Best for: Creative and adventurous kids, gender-neutral rooms, and children aged 5 and up.

7. Warm Rainbow — Playful Without Being Loud

A rainbow theme doesn’t have to mean bright, saturated primary colors. A warm rainbow palette uses muted, earthy versions of each hue — dusty orange, soft mustard, warm blush, sage green, and cream. The result is playful and joyful without being chaotic.

This is a wonderful palette for children who love color and creativity. It stimulates imagination while still feeling harmonious and easy to live with.

How to style it:

  • Use warm white or cream as your base wall color
  • Paint a soft muted rainbow mural above the bed or on one wall
  • Choose rainbow-toned bedding in dusty, muted shades rather than bright primaries
  • Add colorful bookends, toy storage, and wall art in warm tones
  • Keep furniture neutral — white or natural wood

Best for: Toddlers and kids aged 3–8 who love color and storytelling.

8. Warm Neutral Minimalist — Pinterest-Perfect and Peaceful

If you love those perfectly curated, aesthetic kids rooms you see all over Pinterest, this is the palette for you. Warm neutrals — beige, cream, soft sand, light wood tones, and a hint of mustard or peach — create a space that feels effortlessly beautiful and incredibly calm.

The magic of minimalist warm neutrals is in the textures. The palette itself is quiet, so texture is what gives the room personality and depth.

How to style it:

  • Warm beige or soft cream walls
  • Light wood furniture — keep it simple and clean-lined
  • Layer textures: knit blankets, linen cushions, woven rugs, macramé wall hangings
  • Add just one warm accent — a mustard yellow cushion or a peach throw
  • Keep decor minimal and intentional — less is truly more here

Best for: All ages, especially if you want a room that grows with your child and never feels outdated.

A minimalist warm neutral kids bedroom featuring soft beige walls with a smooth matte finish

How to Balance Warm Colors Without Overwhelming the Room

One question I hear all the time is: “How do I use warm colors without making the room feel too intense or closed in?” Here’s my simple approach:

Choose One Hero Color

Pick one warm shade as your main color. This is usually best on a single feature wall or through major decor items like bedding and rugs. Everything else supports it.

kids room color palletes

Use Neutral as Your Base

Cream, beige, or warm white on the majority of walls keeps the room feeling light and airy. Neutrals give warm accents room to breathe.

Bring in Natural Materials

Wood, rattan, linen, cotton, and jute naturally enhance warm tones. They add texture and depth without adding more color.

Layer Your Textures

A layered room always feels more intentional and cozy. Mix a soft rug with textured cushions, a knit blanket, and fabric curtains. The layers make the warm palette feel rich rather than flat.

Get Your Lighting Right

Always use warm white light bulbs in a warm-toned room. Cool or daylight bulbs will fight against your palette and make the colors look completely different from what you intended.

Best Warm Colors by Age Group

Nursery (0–2 Years)

Stick to the softest, most gentle warm tones: blush pink, soft peach, warm cream, and pale beige. Babies are sensitive to stimulation, and these shades create a calming, nurturing space perfect for sleep and early development.

Toddlers (3–6 Years)

Toddlers love color and stimulation! Mustard yellow, coral, terracotta, and warm rainbow palettes work beautifully at this age. These shades support play, curiosity, and creativity while still feeling warm and safe.

Older Kids (7–12 Years)

As kids grow, they often develop stronger opinions about their space. Burnt orange, earthy beige, warm neutral minimalist, and coral with gray are all sophisticated enough to feel “grown up” while still maintaining that cozy warmth.


Warm Colors for Small Kids Rooms

If your child’s room is on the smaller side, don’t be afraid of warm colors — just be strategic about which ones you choose.

  • Choose light warm tones: soft peach, blush, and warm cream open up a space rather than closing it in
  • Use warm white on the walls and introduce color through bedding, cushions, and decor
  • Keep furniture light — natural wood or white pieces prevent the room from feeling heavy
  • Add a large mirror to reflect light and make the space feel more open
  • Avoid painting all four walls in a deep warm shade like terracotta or burnt orange in a small room

Light warm tones are genuinely magical in small spaces. They make a room feel like a cozy cocoon rather than a cramped box.


Frequently Asked Questions

What are the best warm colors for a kids room?

The best warm colors for a kids room include soft peach, mustard yellow, terracotta, blush pink, coral, burnt orange, and warm cream. These shades create a cozy, cheerful, and nurturing environment perfect for children of all ages.

Are warm colors good for a child’s bedroom?

Yes! Warm colors like peach, blush, and mustard promote happiness, creativity, and a sense of safety. Softer warm tones are especially good for nurseries and toddler rooms as they create a calming and comforting atmosphere without overstimulating young minds.

What warm color palette is best for a small kids room?

For small kids rooms, light warm shades work best — think soft peach, warm white, or blush pink. These shades open up the space visually. Avoid dark warm tones like deep terracotta on all four walls as they can make a small room feel smaller and more enclosed.

Can I use terracotta in a kids bedroom?

Absolutely! Terracotta is a trendy and beautiful choice for kids rooms. Use it on a single accent wall and pair it with beige, cream, and light wood furniture to keep the space feeling warm and balanced rather than heavy or overwhelming.

What colors work with mustard yellow in a kids room?

Mustard yellow pairs beautifully with warm white, beige, cream, soft gray, and natural wood tones. You can also add touches of blush or terracotta as accent colors for a layered, Pinterest-worthy look that feels curated and intentional.

How do I balance warm colors without making the room feel overwhelming?

The key is to choose one main warm color and use neutral shades — like cream, beige, or warm white — as your base. Add warm accents through bedding, cushions, rugs, and decor rather than painting all walls in bold tones. Natural materials like wood and rattan also help balance the palette beautifully.

What is the best warm color palette for a nursery?

For nurseries, the gentlest warm tones work best: blush pink, soft peach, warm cream, and pale beige. These shades are soothing and promote restful sleep while keeping the space feeling warm and welcoming for both baby and parents.


Warm colors have this incredible ability to transform a kids room from just a bedroom into a real haven — a space where your child feels safe, happy, and at home. Whether you fall in love with the softness of peach and cream, the cheerfulness of mustard yellow, or the earthy richness of terracotta, there’s a warm palette here for every child and every style.

kids room color paletes

Ready to bring your warm color vision to life? Start with a solid plan! Our Free Kids Room Budget Planner helps you organize every purchase — so you can create the cozy, beautiful room your child deserves without any budget surprises. 💛 👉 [Try It Free]

The most important thing is to trust your instincts. You know your child better than any design guide ever could. Choose colors that make both of you happy, balance them with natural neutrals and textures, and don’t be afraid to start small with accessories before committing to a full paint job.

If you’re looking for more inspiration, check out these cute and colorful kids bedroom ideas and small kids room ideas for even more creative ways to design a space your child will absolutely love.

Happy decorating, mama! 🧡


Affiliate Disclosure: This post contains affiliate links. As an Amazon Associate, I earn from qualifying purchases at no extra cost to you. I only recommend products I genuinely love and believe will add value to your home. Thank you for supporting Bright Mom Ideas — it helps me keep creating free content for you! 🧡